How to create a product gallery slider in WooCommerce
A product gallery slider lets your customers browse multiple product images quickly, with a smoother experience than the default WooCommerce gallery. In this article, I'll show you how to add a variation-aware product gallery to your WooCommerce store using a free plugin.
The default WooCommerce gallery stacks thumbnails below the main product image. It works, but it doesn't give your customers a great way to see different views or variations of the same product.
A product gallery slider improves that experience. Customers can swipe through multiple images, see a different gallery for each variation, and get a much clearer picture of what they're buying.
In this guide, I'll walk you through adding a product gallery to your WooCommerce store. I'll use the free Additional Variation Images Gallery for WooCommerce plugin by Emran Ahmed.
Why add a product gallery slider to WooCommerce?
There are several reasons to upgrade the default product gallery.
Show every angle of your product
A single product image rarely tells the full story. A gallery lets you show multiple angles, zoom-ins on details, lifestyle shots, and packaging.
This is especially useful for products where look and feel matter - clothing, jewelry, homewares, and craft items.
Show different images per variation
If you sell variable products, each variation often needs its own images. A red shirt and a blue shirt should show different gallery photos when customers pick the color.
A gallery slider that supports variation images solves this problem. The plugin we'll use today does this out of the box.
Improve the mobile experience
On mobile, swipe gestures feel more natural than tapping through thumbnails. A gallery slider gives customers a familiar, smooth way to browse images on a phone.
So now we know the main benefits. Let's look at how to add a product gallery slider to your store.
What is Additional Variation Images Gallery for WooCommerce?
Additional Variation Images Gallery for WooCommerce is a free plugin on the WordPress.org repository. It has over 20,000 active installations.
The plugin extends the default WooCommerce gallery in two important ways:
- It turns the gallery into a slider, so customers can swipe through multiple images.
- It lets you assign a separate gallery to each variation of a variable product.
Key features:
- Multiple images per variation. Each variation can have its own gallery of additional images.
- Slider-style gallery navigation with thumbnails, dots, or arrows.
- Lightbox support so customers can view images full-size.
- Mobile-friendly swipe gestures.
- Works with any WooCommerce theme.
- Free on WordPress.org, with a Pro version available for advanced features like video and zoom.

How to add a product gallery slider to WooCommerce
The setup takes two steps:
- Install the plugin.
- Add gallery images to your variations.
Let's walk through them.
Step 1: Install Additional Variation Images Gallery
Install the plugin from your WordPress dashboard:
- Go to Plugins → Add New.
- Search for 'Additional Variation Images Gallery for WooCommerce'.
- Click 'Install Now', then 'Activate'.
The plugin is now active. There's no separate license key to enter because it's free.
Step 2: Add gallery images to your variations
With the plugin active, you can add multiple images to each variation of a variable product.
- Go to Products and open the variable product you want to update.
- Scroll down to the 'Product data' section and click the 'Variations' tab.
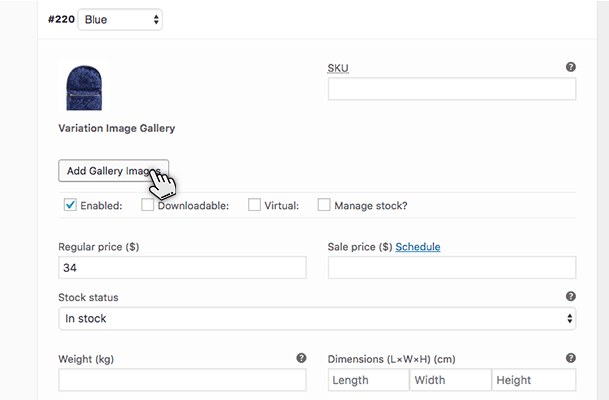
- Expand the variation you want to add images to.
- Find the new 'Additional Variation Images' field added by the plugin. Click to upload or select images for that variation.
- Save the variation, then publish or update the product.
That's it. When customers select that variation on the front end, the gallery updates to show the images you uploaded.
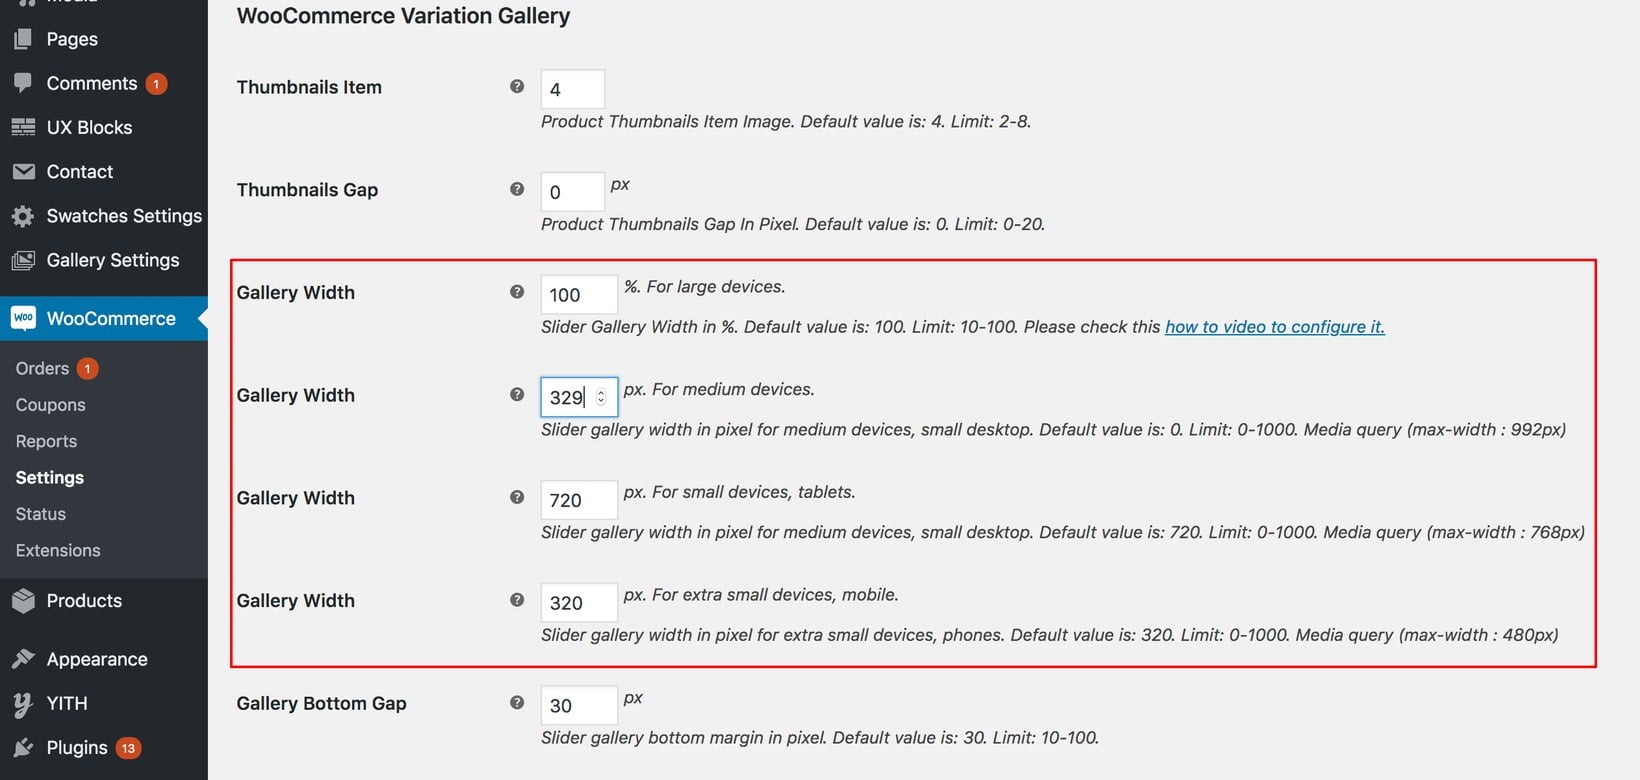
Step 3: Adjust the gallery settings (optional)
The plugin includes a settings page so you can fine-tune the gallery behavior.
- Go to WooCommerce → Settings → Products → Variation Images Gallery.
- Choose whether to show thumbnails, arrows, or dots.
- Toggle the lightbox on or off.
- Save your changes.
Visit a product page on the front end to see the gallery in action.
Add a product gallery slider to WooCommerce today
A product gallery slider gives customers a better view of what they're buying. With Additional Variation Images Gallery for WooCommerce, you can add one to your store in minutes without any cost.
For variable products, the per-variation gallery is the killer feature. Customers see exactly the right images for the color, size, or style they pick.
Install the plugin from the WordPress.org repository and upgrade your product pages today.