How to create custom WordPress registration & login forms

Are you looking for a way to let users select a user role during registration? Create custom WordPress registration and login forms.
Creating custom forms is a great way to add a unique touch to your site and improve the user experience. It also makes it easier to let people select a user role when registering for your WordPress or WooCommerce site.
In this post, we’ll show you how to create custom WordPress registration and login forms using the ProfilePress plugin.
Creating custom registration and login forms in WooCommerce
Default registration and login forms in WordPress or WooCommerce don’t really give businesses the option to edit the layout or customize the registration fields based on their preferences. This means you have no control over the look and feel of your registration and login forms.
It also means that you can’t let subscribers, customers, or clients select different user roles at the time of registration. For instance, let’s say you sell to wholesale customers as well as regular customers. You will want to let people select their user role when registering on your site.
While you can edit the code of your site to do this, it’s much better to use a plugin like ProfilePress to create custom login and registration forms in WordPress.
ProfilePress offers an all-in-one solution for creating custom forms and user profiles that are designed to help you enhance the user experience.
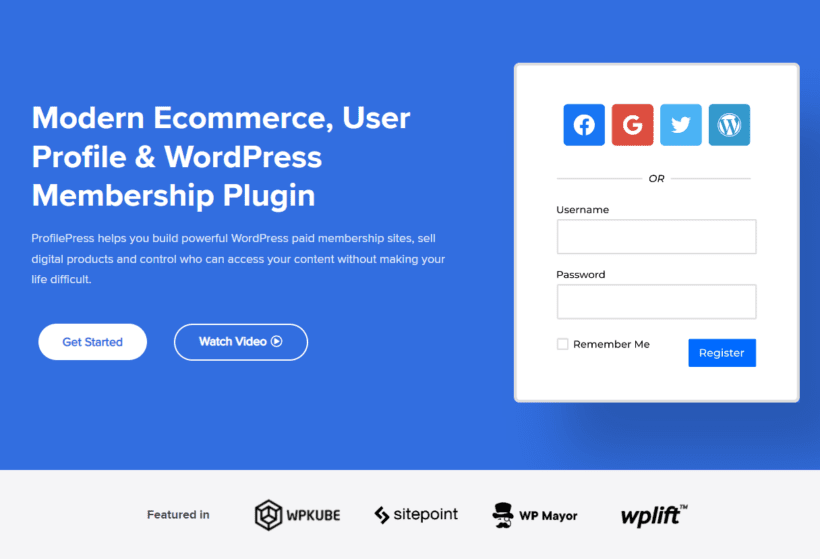
The robust plugin comes pre-built with all the functionality you need to create and design custom forms, without having to touch a single line of code. You can start with a pre-designed template and then customize it according to your unique requirements. The best part is that the plugin is very easy to use and set up on your WordPress or WooCommerce site, even if you’re not very tech-savvy.
For those seeking additional customization options beyond ProfilePress, JetFormBuilder serves as a valuable complement. With its extensive range of form-building features, JetFormBuilder empowers users to create dynamic and interactive registration and login forms with ease.
By integrating JetFormBuilder into your WordPress or WooCommerce site alongside ProfilePress, you gain access to advanced form elements, conditional logic, and multi-step form functionality. This enables you to tailor the registration and login experience to your specific needs while maintaining a user-friendly interface.
Moreover, JetFormBuilder's compatibility with various email marketing services and CRM platforms allows for seamless data collection and integration, streamlining communication workflows and enhancing user engagement.
How to create custom WooCommerce registration and login forms
Here, we’ll show you how to create custom WooCommerce registration and login forms using the ProfilePress plugin.
For this, you’ll need a WordPress site and the ProfilePress plugin to create and replace the default WordPress registration and login forms.
Step #1: Install and activate the ProfilePress plugin
Get the ProfilePress plugin and install it on your WordPress site. To do this, navigate to Plugins → Add New and upload the plugin’s ZIP file to your WordPress site.
Once you click the Install Now button, the plugin will automatically be installed on your site. Make sure to activate the plugin on your WordPress site once it’s installed.
Next, validate the license key given to you at the time of purchase. For this, navigate to ProfilePress → Settings and click on the License tab from the top.
Enter your license key in the text field and click on the Activate License button to continue.
Step #2: Design a custom form
Now, with the ProfilePress plugin installed and activated on your WooCommerce site, you can start designing custom forms. To get started, navigate to ProfilePress → Forms & Profiles and click on the Add New button.
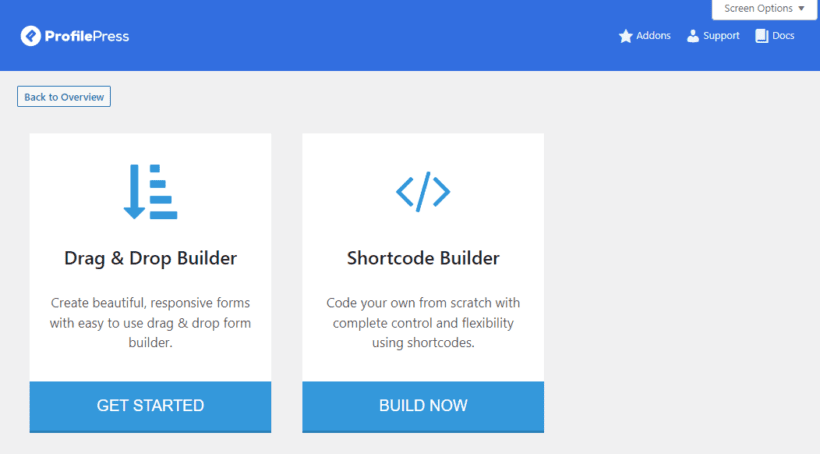
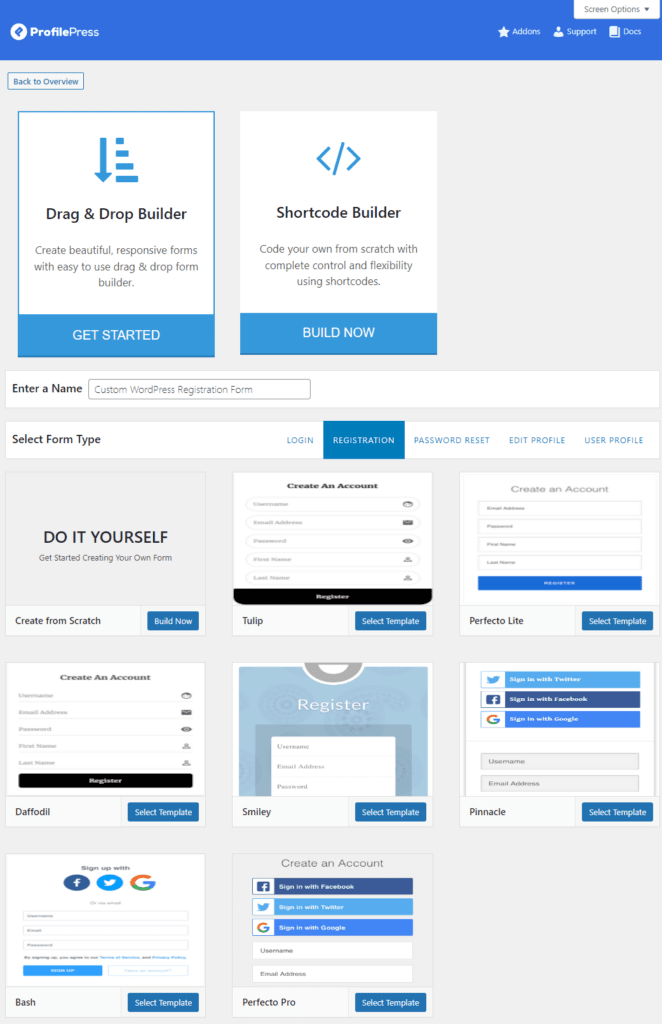
We recommend using the Drag & Drop Builder option to create a custom WooCommerce login form if you don’t have prior experience with coding. However, the plugin also features a Shortcode Builder that lets you create custom forms.
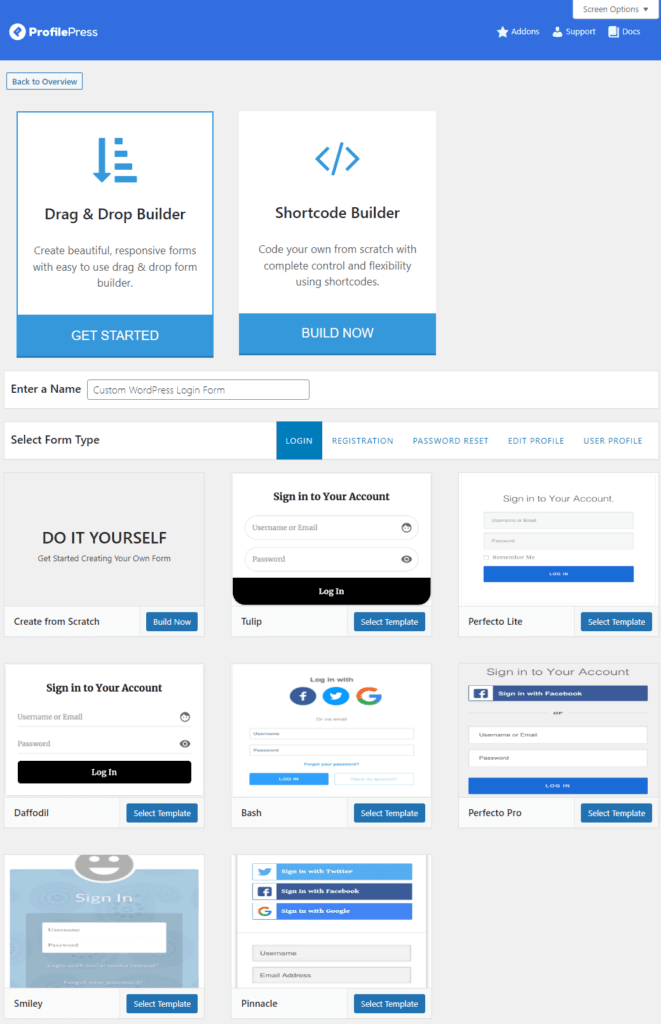
Once you click on the Drag & Drop Builder button, it will automatically load more options. You can give your custom form a title, select Login using the Select Form Type section, and select a pre-designed template to begin customizing it according to your brand’s requirements. For demonstration purposes, we’ve decided to go with the Daffodil template. Click on the Select Template button to continue.
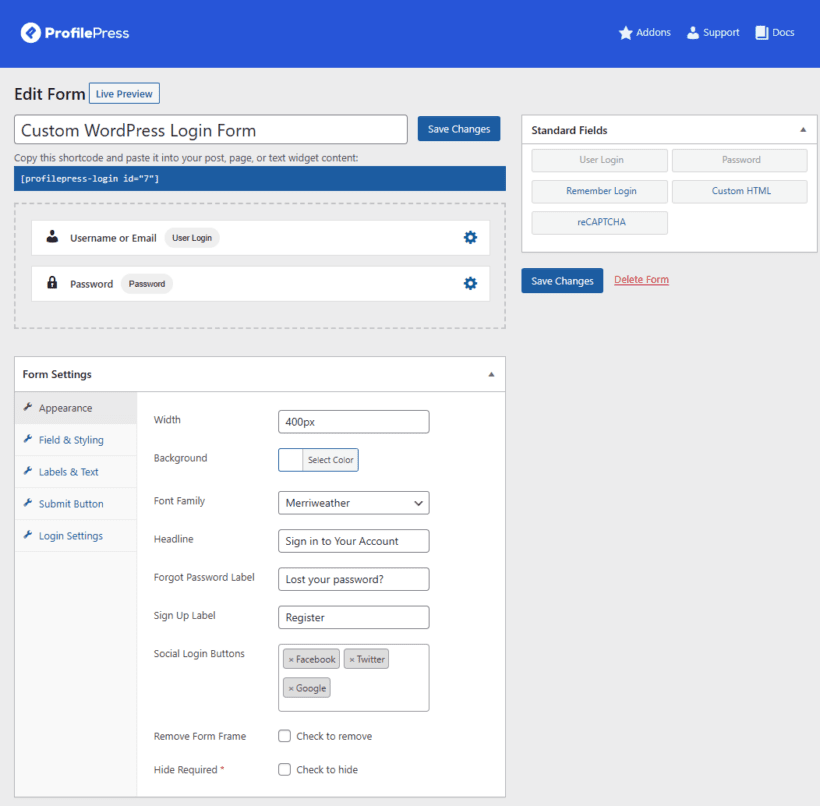
This will redirect you to the form edit screen. Here, you can add new fields to your custom login form by dragging and dropping them into place. You can also click on the little settings icon next to any field to edit the field from the same screen.
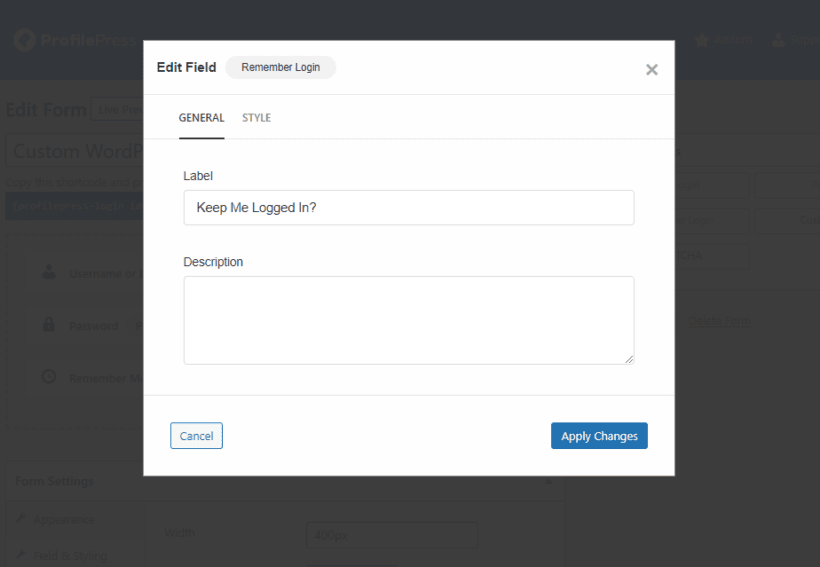
For instance, you can set a custom label for the “Remember Login” field to something that’s more on-brand. Make sure to click on the Apply Changes button once you’re done making changes.
That’s not all, ProfilePress also gives you full control over how your custom forms will look on the front-end. This makes it easier to improve the overall UX of your WordPress site while making sure forms look exactly according to your brand’s unique aesthetics.
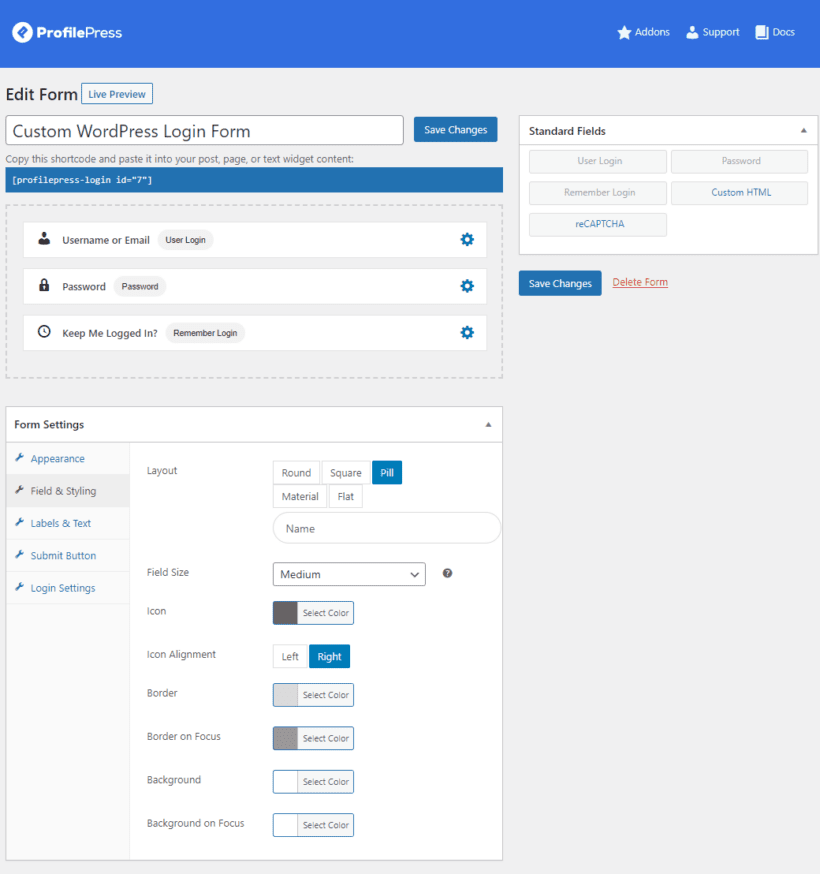
Using the Form Settings meta box, you can customize just about anything that’s displayed on your WordPress custom form.
- The Appearance section lets you change the overall look and feel of your custom form.
- The Field & Styling section lets you customize the layout of your custom form and change fields' alignment or positioning.
- The Labels & Text option lets you set custom labels, font style, and color.
- The Submit Button section lets you modify how your form submission buttons look on the front-end of your WordPress site.
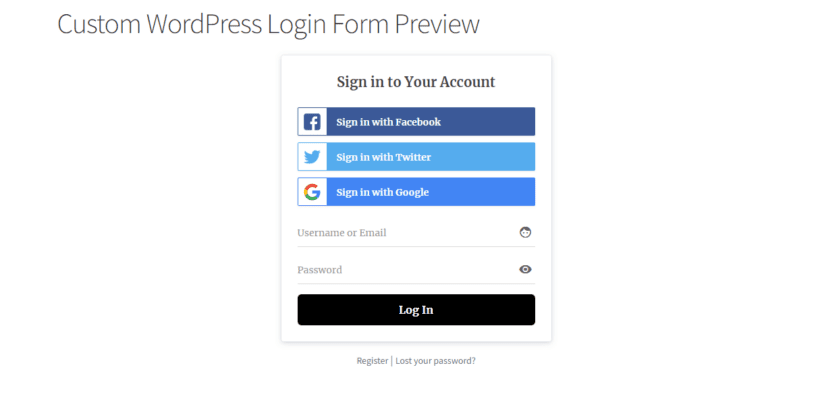
You can also see what your customizations look like on the front-end using the Live Preview button. Once you’re ready, make sure to click on the Save Changes button to continue.
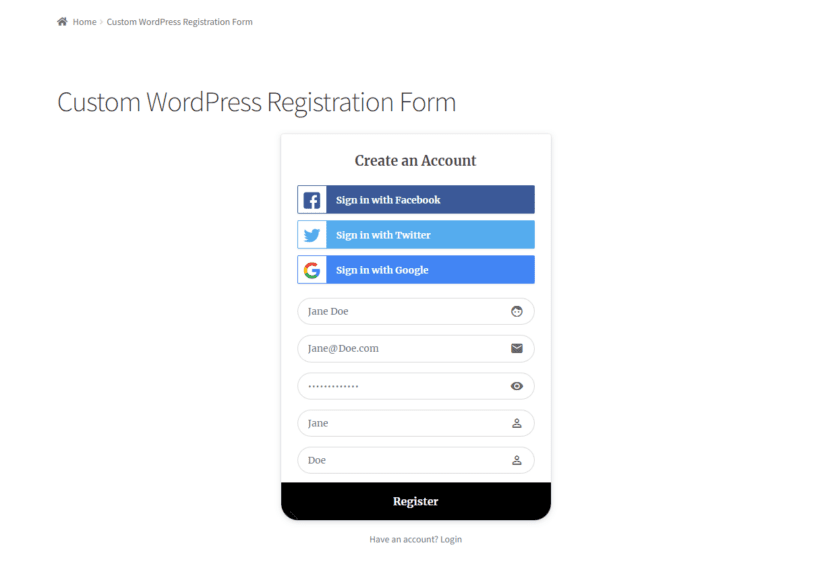
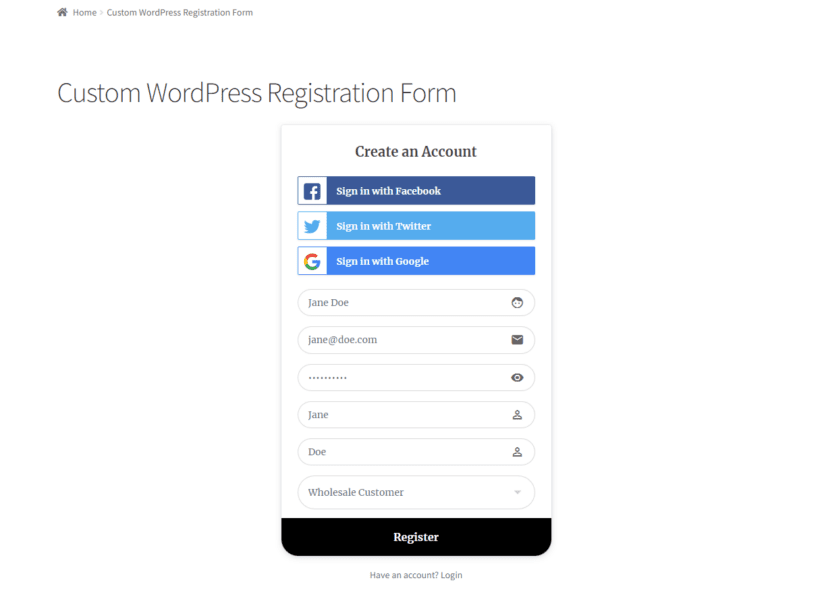
Similarly, you can also create a custom WordPress registration form using the same steps mentioned above. However, you will need to select Registration from the Select Form Type section when creating a custom registration form using ProfilePress.
Step #3: Replace the default WordPress forms with a custom one
Now that we’ve created ProfilePress custom WordPress login and registration forms, it’s time to replace the default WordPress ones with the ones we created. But before this, you will need to publish the ProfilePress form shortcodes on WordPress pages. To do this, create a new page by navigating to Pages → Add New.
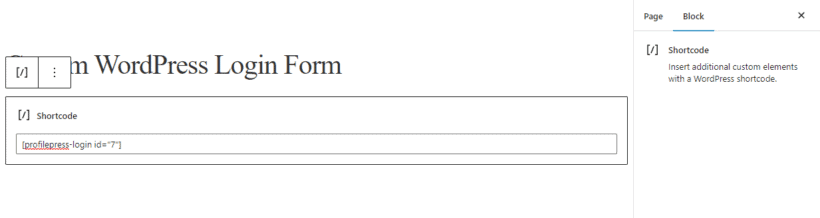
Paste your ProfilePress login form shortcode in a Shortcode Gutenberg block and click on the Publish button to continue.
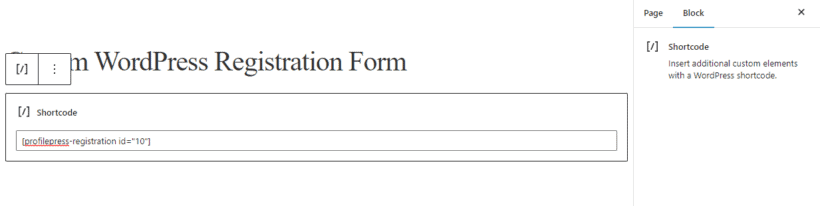
Similarly, paste the ProfilePress registration form shortcode in a Shortcode Gutenberg block on a separate page and publish it.
Now that both pages are published, navigate to ProfilePress → Settings and click on the Pages tab.
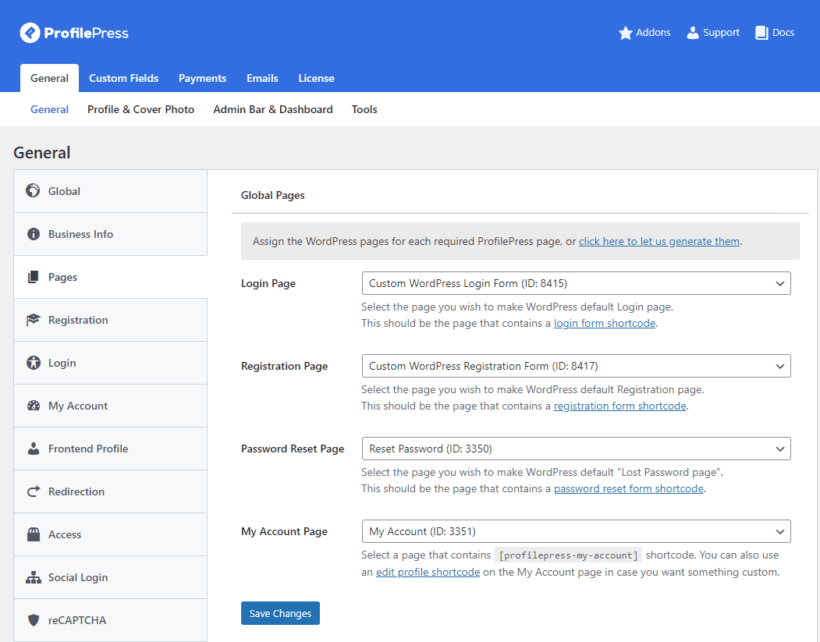
Select the login and registration pages using the dropdown and click on the Save Changes button to continue.
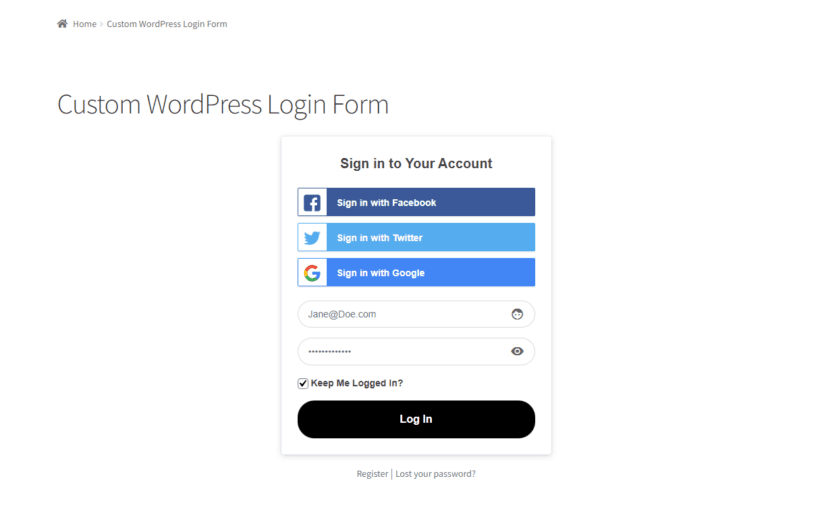
This replaces the default WordPress registration and login forms with custom ones created using ProfilePress.
Users who have already registered can log in to their accounts using the custom WordPress login form.
Step #4: Protect your categories
The great thing about ProfilePress custom forms is that they work great with any plugin that shows different content to different logged-in users and roles. Let’s say you use Barn2’s Password Protected Categories plugin to showcase restricted categories to specific user roles on your site.

For this, you can add a User Role field to your custom registration form created with ProfilePress so it gives your customers extra options when registering on your site.
This also works with the WooCommerce Protected Categories, and WooCommerce Private Store plugins.
Step #5: Let registrants choose their user role
ProfilePress is also perfect if you want to create an advanced wholesale registration and login form. This is useful as a lot of wholesale plugins provide basic registration forms but may not have all the field types you need such as dropdowns, checkboxes, or file uploads for gathering relevant information from users when they register on your site.
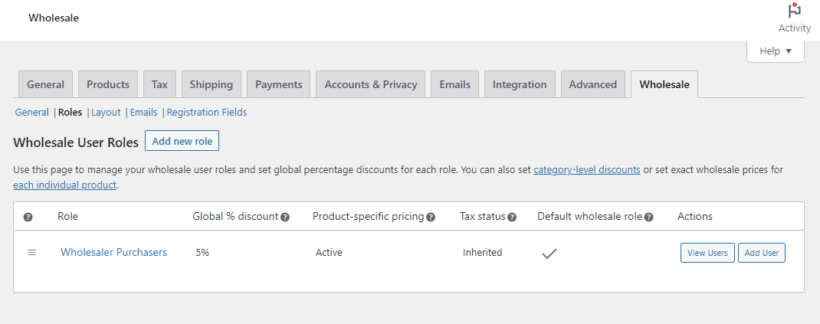
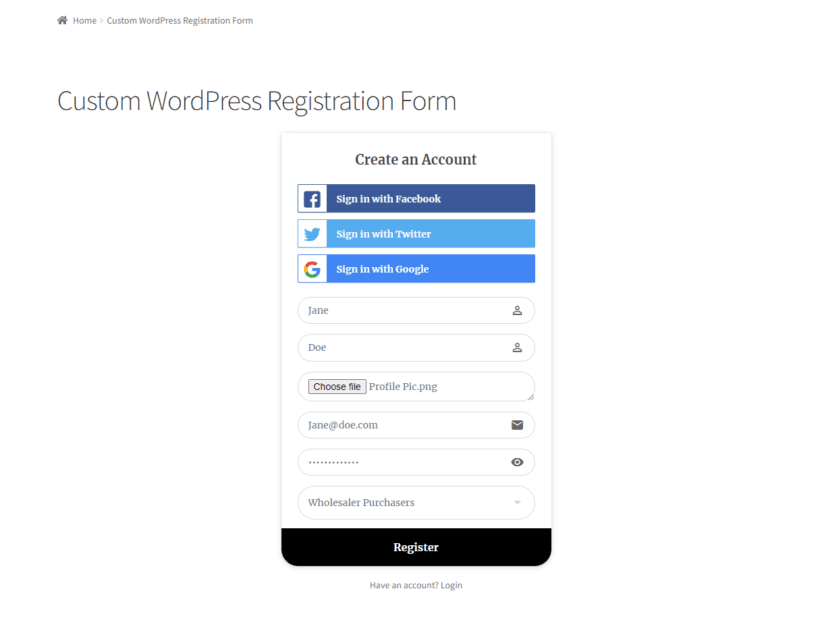
Let’s say you use Barn2’s WooCommerce Wholesale Pro plugin to create multiple user roles to offer discounts on your store. You can use custom ProfilePress forms to allow your customers to choose their preferred user roles using a dropdown field and let them upload their own profile picture.
Conclusion
Depending on your brand’s unique requirements, creating custom WordPress registration and login forms can help enhance the user experience on your site. For example, if you’re a wholesaler, you can allow clients to select their preferred user role using a custom registration form. However, this isn’t possible in default WordPress or WooCommerce and requires you to edit the code in the back-end.
This is why it’s better to use a plugin like ProfilePress. It makes it incredibly easy to create and design custom registration and login forms for your WordPress or WooCommerce site. This way, you can enhance the user experience and encourage more users to register with your brand.
Ready to start creating custom WordPress registration and login forms? Get ProfilePress today!