Looking for a way to create online courses? Do you want to share your knowledge and also make some passive income?
Building and launching your own online course is surprisingly easy with WordPress. And with WooCommerce, you can sell them as digital products. The best part? You don't even need any coding skills. Yes, it's that easy.
Of course. You need to know a thing or two about web technologies. But it's not more than what you already know and use to navigate the internet every day.
So if you're someone who wants to start a paid online course, then this article is for you. In this guide, we'll explain how you can easily launch online courses using WordPress and WooCommerce.
But, before we get into it, let's look at what all we'll need.
Requisites to create online courses using WordPress and WooCommerce
To build courses online you need to have an up and running WordPress website to start with.
For that, you'll need the following:
Domain name - A domain name acts as the address of your website on the internet. It's the URL that people will use to find your website. Example - www.mycoursewebsite.com. You can register for a domain name here.
Web hosting - You'll need a WordPress hosting account to store all your files. You can choose from tons of hosting providers like Kinsta or Siteground. To choose web hosting, you can check out this dedicated list of hosting providers.
An LMS plugin - A Learning Management system (LMS) addon to create online courses and manage users. The upside of using WordPress to launch an eLearning business is that it has a lot of options to choose from.
It's simple. The more the features, the greater the price will be. But luckily, there are a lot of affordable options available.
Steps to create online courses using WordPress and WooCommerce
1. Install and set up WordPress
The reason we recommend WordPress is because it's highly customizable and beginner-friendly. Because of that, it's quite popular as well. It powers over 455 million websites over the internet.
Additionally, installing WordPress is a breeze. Most hosting providers offer a one-click WordPress installation service too.
For example, if you sign up with Kinsta, they will automatically install WordPress for you.
However, if you wish to install WordPress yourself, then you can use this comprehensive guide on how to install WordPress for step-by-step instructions.
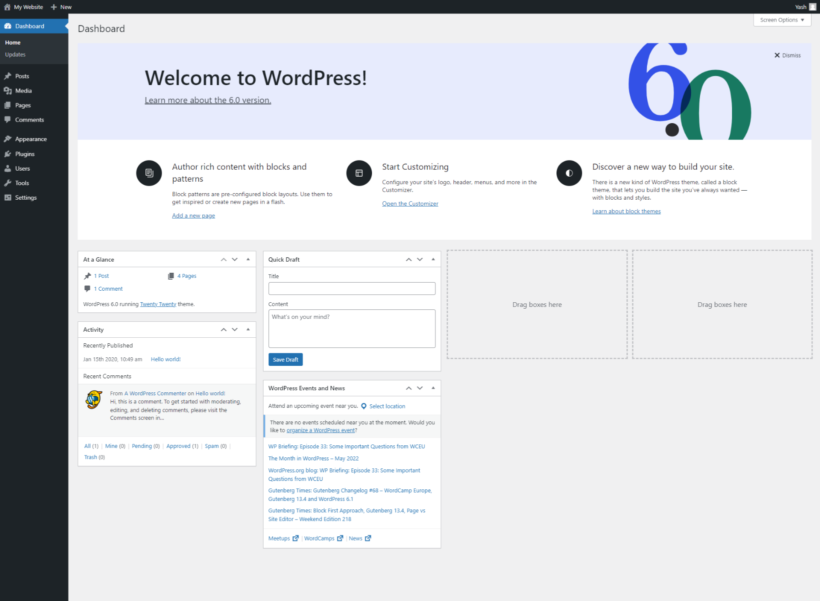
Once WordPress is set up, you can access the dashboard to navigate through the settings. It will look something like this:
After setting up WordPress, we can move on to the next step. And that includes installing the right theme.
2. Pick an LMS-friendly theme
The look and feel of your online courses are also extremely important. They are controlled by the theme of your WordPress site.
Moreover, these themes come with ready-made templates. You will just need to put in your demo content.
For example, if they come with a ready-to-use login/registration page or a course overview page, you can change the demo content with yours, and you're good to go.
Thousands of free and paid WordPress themes are available to choose from. So to select the best one, look for the following parameters:
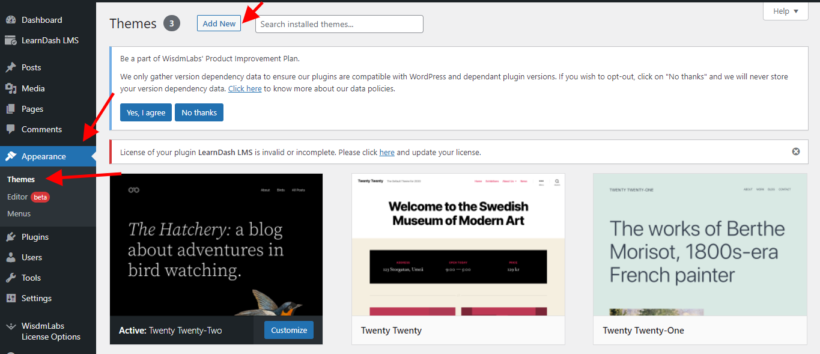
Your WordPress site will have a basic theme by default. But, you can install a new one by navigating to your WordPress dashboard → Appearance → Themes page and then clicking on the 'Add New' button.
After selecting, click on install and then activate your theme. Once that is done, we can move on to the next bit.
3. Activate your LMS plugin
The next step is to install and set up a Learning Management System plugin. This will allow you to create and manage your online courses.
It will help you in creating and handling courses, consistent course structure and delivery, accepting payments, and user management.
Now, LearnDash is a premium plugin. For starters, it'll cost you about $159.
You can choose from its Plus and Pro packages if you want more features. But, we recommend you start with the basic plan.
After purchasing LearnDash, you'll receive a license key on your registered email. Keep it handy as we'll need it later.
First, you need to install and activate the LearnDash plugin. You can use this step-by-step guide for details.
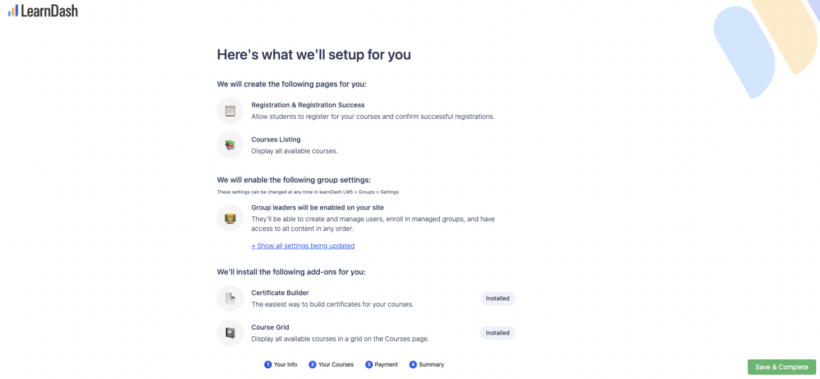
Upon successful activation, LearnDash's onboarding wizard will help you set up your courses, lessons, and even payments. The wizard takes care of all the essential steps and even installs all the necessary addons.
Make sure you're using the latest version of LearnDash to use the onboarding Wizard.
Pro Tip: On the Payments page, the wizard presents an option between WooCommerce and Stripe. We recommend you choose WooCommerce.
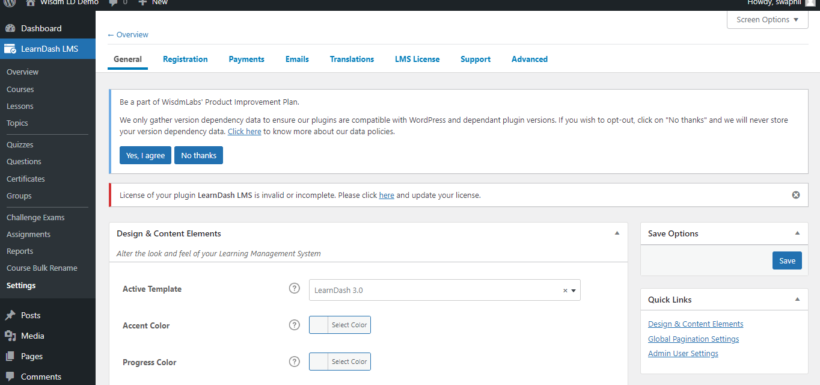
Once the setup is complete, you can configure LearnDash if you want to change the default settings.
Just simply navigate to your LearnDash LMS Dashboard → Settings and configure different LearnDash settings.
After installing and configuring LearnDash, you can start by creating your online course.
4. Create a course using the LMS plugin
LearnDash comes with a drag-and-drop course builder. In fact, it's one of the most prominent features of LearnDash.
It makes building courses absolutely simple.
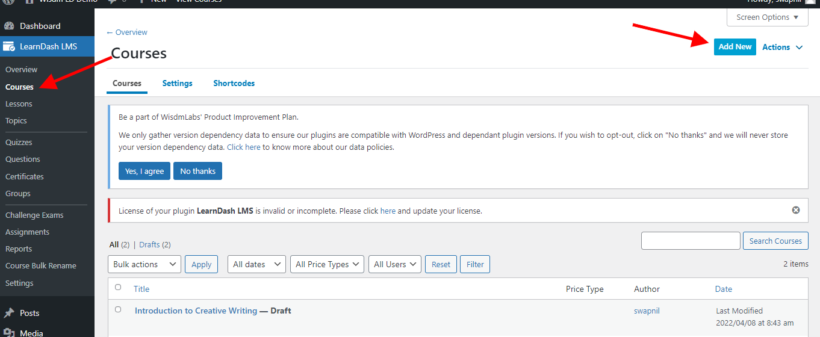
To add a new course, simply navigate to your LearnDash LMS dashboard → Courses → Add New.
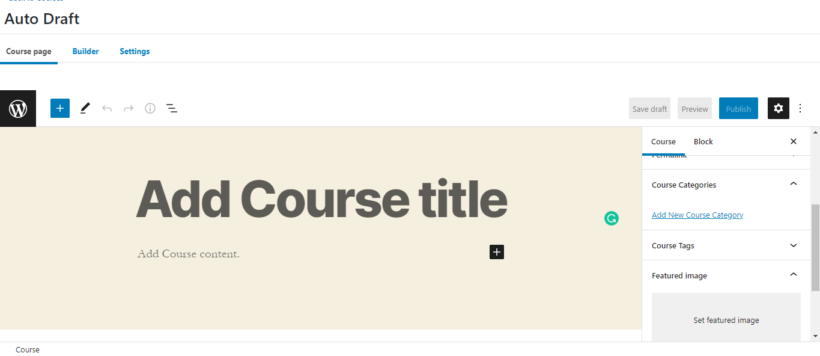
Next, you have to provide your course details like the title, description, feature image, course categories, etc.
After you've provided the details, you can start building your course.
It's easy!
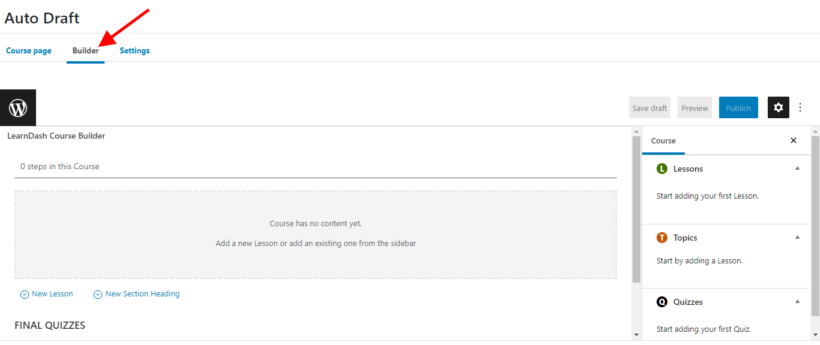
You start by outlining your course material. Use the course builder to define the sections, topics, lessons, quizzes, etc.
To navigate to the course builder, simply use the builder tab on the top of your editor.
After you've defined a structure, you can add your course content, edit, and rearrange it before publishing the final draft. The course builder also allows you to preview your courses.
Wasn't that easy?
Now that your online course is ready, we'll learn how to create a WooCommerce product for it.
Note: If you have enabled WooCommerce while setting up LearnDash then you can skip this step. But if you left it for later, let us quickly show you how.
5. Install and set up WooCommerce
WooCommerce is a free WordPress ecommerce plugin that turns your WordPress website into an online store. The installation process is similar to any other plugin.
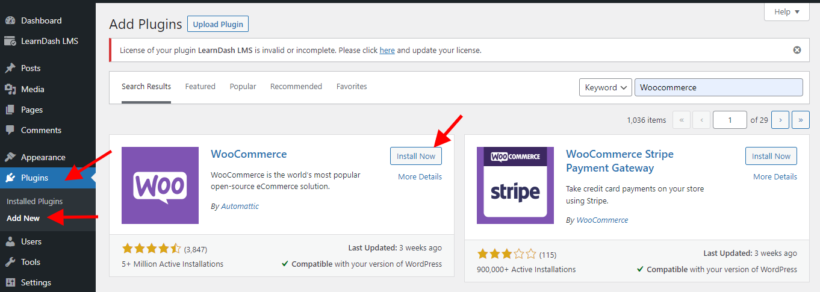
Simply navigate to your WordPress Dashboard → Plugins → Add New and search for WooCommerce. Click on Install Now.
After successful installation, you need to click on the 'Activate' button to start using it.
After activating the plugin, you'll need to configure the settings so that it works smoothly with your LMS. In this case, LearnDash.
When someone purchases a course created with WooCommerce, LearnDash will need to provide access to that user. It can only enroll a specific user within WordPress into the course. So users will need to create an account while checking out.
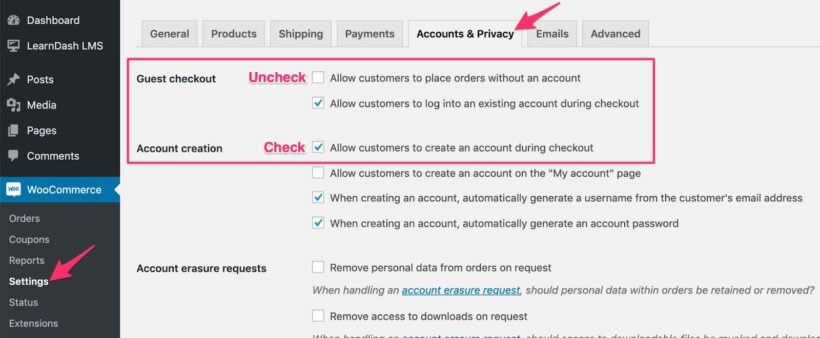
To enable this setting, navigate to WooCommerce → Settings. Click on the Accounts & Privacy tab. Uncheck the box next to "Allow customers to place orders without an account".
On the same page, check the box next to "Allow customers to create an account during checkout" and save the changes.
You can also allow customers to log in to an existing account on the same page.
6. Create a WooCommerce product for your course
Once WooCommerce is set up, creating a product for your course becomes a cakewalk.
You just need to navigate to Products from your dashboard and click on Add New. You can add a product name, description, product category, etc.
The most important section is the Product Data section. Here you'll set up your course price.
From the simple product dropdown menu, check the box for Virtual products.
Click on the Simple Product dropdown menu and choose Course. Now, next to Related Courses, click on the course you'd like to associate with this product.
Now that you've created a course in WooCommerce, it's time to set it up for purchase.
Simply navigate to LearnDash LMS → Courses. Select the course associated with a WooCommerce product.
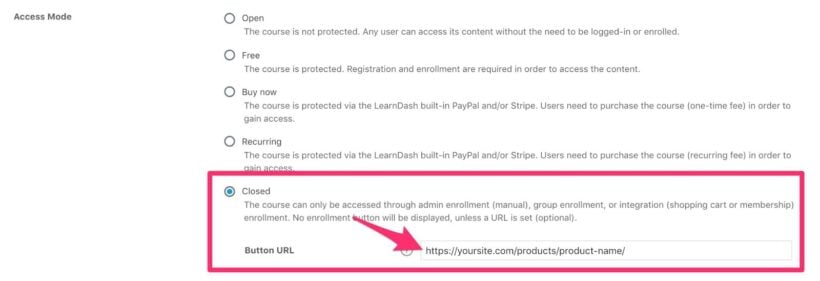
From the top, click on the Settings tab. Under course access settings, search for access modes.
Enable the Closed mode.
Lastly, in the button URL field, paste the URL for your WooCommerce Product Page.
Make sure to repeat the process for all the courses that you want to sell.
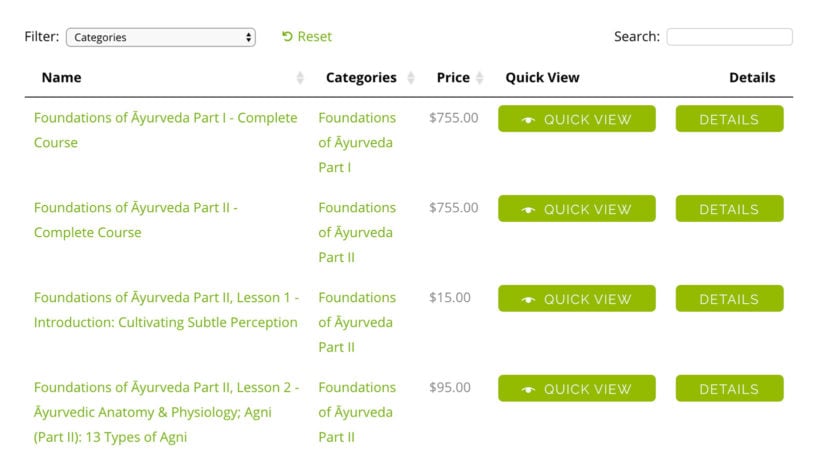
Have multiple courses to list?
Use WooCommerce Product Tables to list all your courses in a fully searchable and sortable table view. Allow users to add multiple courses to their cart with one click! It's a great way to sell multiple courses.
You can integrate WooCommerce with any of the payment gateways. It works perfectly with most popular ones like Stripe, PayPal, Afterpay, etc.
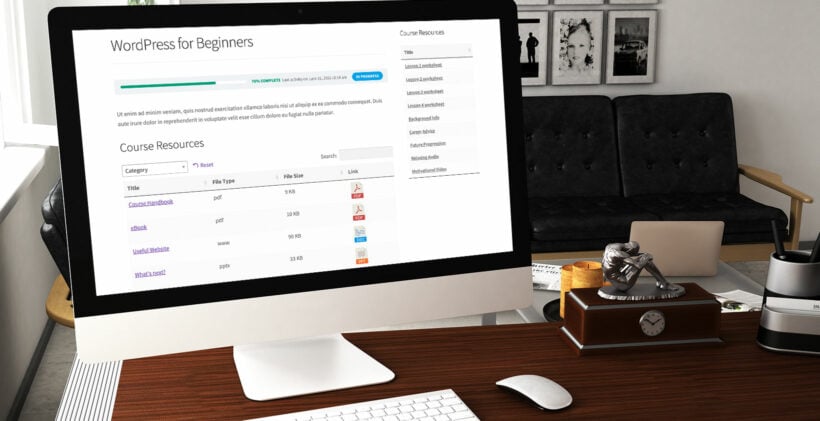
Before we finish, let's think about the resources that you provide to your students. Most WordPress LMS courses need to share handouts, downloads or other resources. These complement the learning from the course.
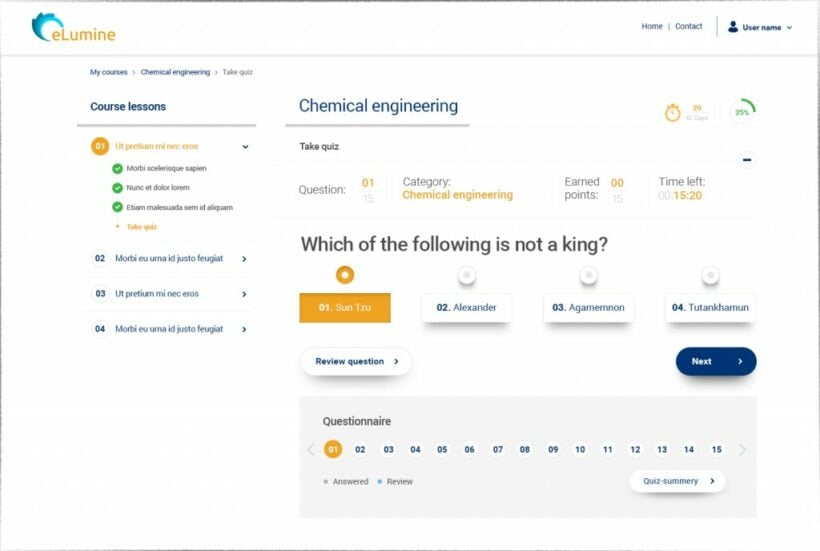
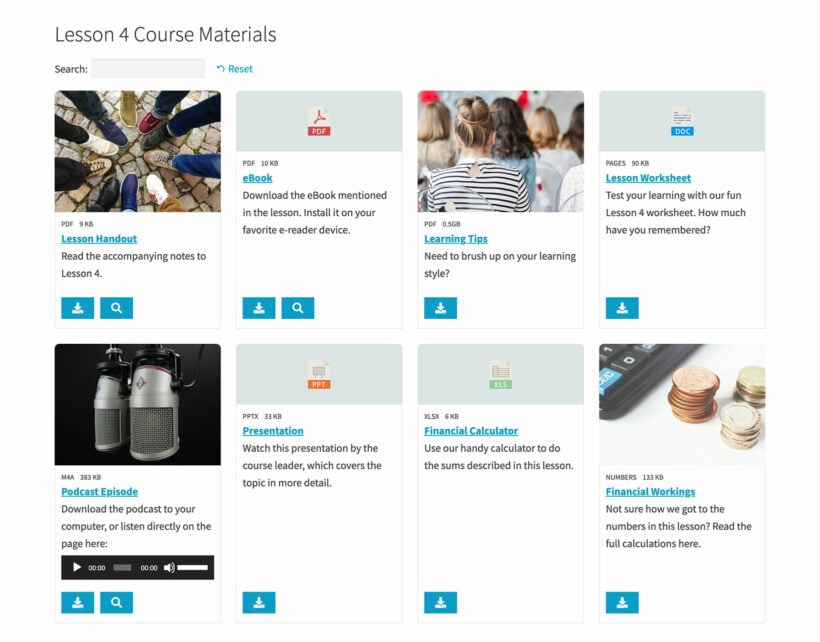
You can easily add a searchable resource library to any LMS course using the Document Library Pro plugin. Either list the resources in a searchable table, or in a stylish grid layout like this:
An example of a course resource library using LearnDash and Document Library Pro
Need expert help but don't know where to start?
Use WisdmLab's guide with 101 Questions To Help You Hire the Right WooCommerce Developer. Get My Guide!
When customers click on the take this course button, they will be directed to the WooCommerce product page to complete the checkout process.
Conclusion
Did you find this helpful? Do you feel confident to create online courses?
We hope this article provides you with all the knowledge you need to build your online course and kickstart your side hustle. We've focussed on LearnDash but you can use any WordPress LMS plugin.