Formidable Forms Display Entries: Show Data in a Table
Formidable Forms is one of the finest WordPress form plugins. You can use it to collect user data and display Formidable Forms entries on your website’s frontend with the help of one of our plugins - Document Library Pro, Posts Table Pro, or WooCommerce Product Table.
Formidable Forms is known as the most advanced WordPress form plugin. It offers a comprehensive list of features that is hard to find in other form plugins. There are a ton of things you can do with this plugin. From letting users submit articles to applying for membership, from uploading documents to submitting job postings.
In this tutorial, we’ll show you how to collect user data and then display Formidable Forms entries in a searchable, filterable, responsive table with the help of one of our plugins - Document Library Pro, WooCommerce Product Table, or Posts Table Pro.
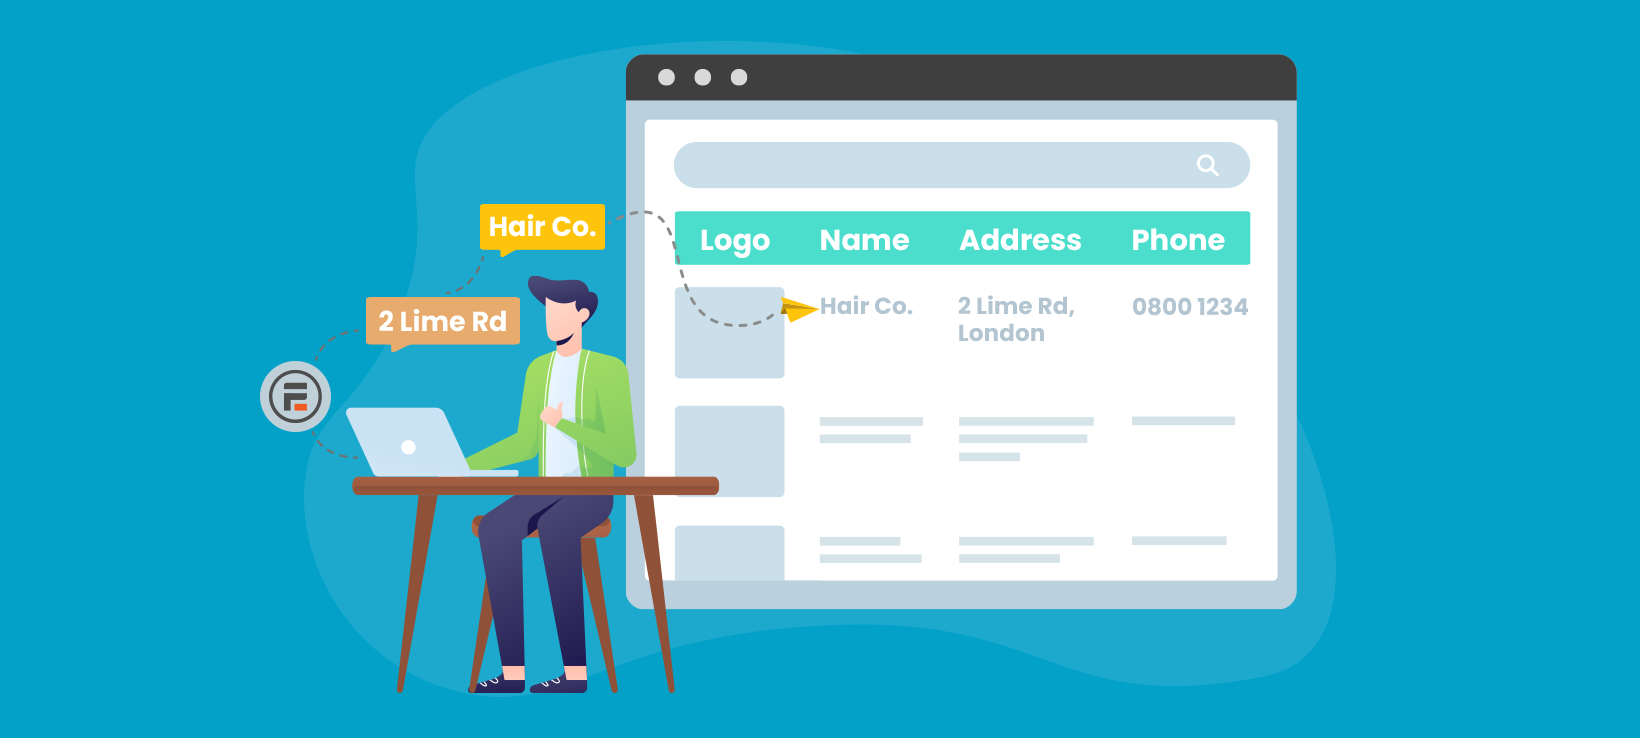
By the end, you will have a table like this:

In this article, we cover how to …
- Collect user data with a form.
- Store the Formidable Forms entries in the WordPress database.
- Display user data in a searchable, filterable, and responsive table.
Let’s begin…
1. Collect user data with a form
In this section, you’ll learn how to build a form with Formidable Forms and display it on your website.
- Install and activate the free Formidable Forms plugin on your website.
- Then take a minute to decide what fields you want the form to have. Think of what kind of information do you need from users. For this tutorial, we are creating a job board on our demo site. Therefore, we need the following fields:
- Job Title
- Job Description
- Company
- Type of work (full-time/part-time)
- Location
- Website
- On your WordPress admin, go to Formidable → Forms (Lite) → Add New → Blank Form.
- Next, pick a name for the form and start building it using the drag and drop method.
Remember to hit Update once the form is ready.
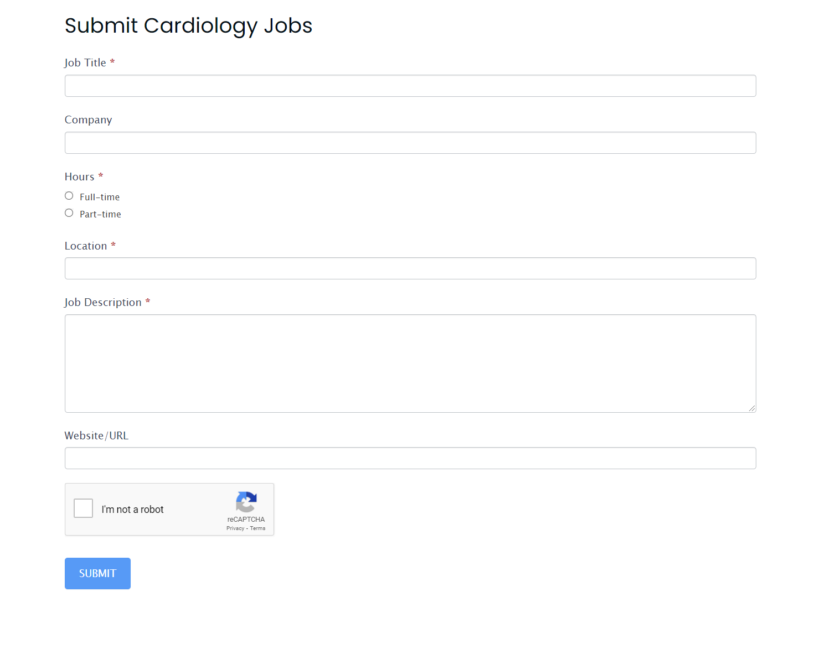
This is the form we’ve built for our job board:
Protect Formidable Forms (Recommendation)
At Barn2, we take security seriously. WordPress websites are a popular target primarily because it dominates the market. Over 40% of websites on the internet are inbuilt with WordPress.
By putting up a form on your WordPress site you are inadvertently inviting spammers and hackers. Therefore you need to protect your form. We recommend enabling Formidable Forms’ reCAPTCHA and honeypot protection.
If you plan to share the form with only a handful of people, consider password-protecting the page.
Given the state of online security these days, we strongly recommend taking steps to secure your website like installing an SSL certificate, putting up a firewall, keeping the plugins updated, etc.
2. Store the Formidable Forms entries in the WordPress database
In this section, you will learn to choose how to store the user data you'll be collecting. You need to store it in the WordPress database in order to display Formidable Form entries on the front end of your website.
2a. Choose where to store user data
Form entries can be viewed by going to Formidable → Entries. This works for a regular contact form. For forms built to receive membership applications, document uploads, articles, job applications, etc, it is necessary to store entires (or user data) separately.
Before we go any further, it’s time to decide which plugin you’ll be using to display the Formidable Forms entries on your website. This affects how you store the user data in the back end. The options are:
Posts & pages
Store user data as a page or post. If you do this then you can display the data using the Posts Table Pro plugin. Since pages and posts are built into WordPress itself, you can skip the rest of this section and jump straight to step 2b (how to store user data).
Documents & other resources
If your users are submitting documents or other types of resources, then you can display them using the Document Library Pro plugin. This is a powerful plugin to store and display documents (or any type of downloadable resources) on your WordPress website. It comes complete with its own documents ‘post type’ for storing the documents in the WordPress database. This means that you don’t need to worry about where to store the data, so skip straight to step 2b.
E-Commerce products
Are your users submitting e-commerce products, perhaps for an online marketplace? If so, then you can display the user-submitted products with WooCommerce Product Table. Install the plugin and it’ll automatically add a ‘Products’ section to your WordPress admin where all users-submitted products are stored. Again, you don’t need to create an area for storing the user data, so you can skip right to step 2b.
Business & job listings
Finally, what if you want to display something that isn’t a page, post, document, or product? For example, maybe you’re using Formidable Forms to let users submit job listings or business directory listings? To do this, you need to do 2 things: create a custom post type in WordPress (which you can easily do using a free plugin), and display the Formidable Forms data with the Posts Table Pro plugin. Keep reading to learn how to create a custom post type to store absolutely any type of user data from Formidable Forms.
We recommend the free Custom Post Type UI plugin for creating a custom post type. It’s ideal for creating a space within WordPress to store your user-submitted job postings, memberships profiles, guest posts, and much more.
- Install and activate Custom Post Type UI.
- Open your WordPress admin and go to CPT UI → Add/edit Post Types. Fill in the Basic settings, Additional labels, and hit the Add Post Type button. That’s it. Easy peasy!

Adding custom fields and taxonomies
To display user data on your website’s front-end, you need custom fields and taxonomies. They help you to store additional data and to group and filter the data.
Custom fields are used to store unique data like a product reference number, dates, price, URLs, etc. Such fields are not designed to be filterable.
Custom taxonomies are used to group data together like location, types of jobs, etc. These are designed to be filterable.
Take a look at the table below. On the top of the table, there are some dropdown lists containing data that visitors can filter by. These are custom taxonomies.
In Custom Post Type UI, simply navigate to CPT UI → Add/edit Taxonomies. To create custom fields, you will need to install a free plugin called Advanced Custom Fields. It’s very very easy to use.
2b. Link the Formidable Forms data to your WordPress post type
In this step, we will connect the form with the actual user-submitted content in Formidable Forms. This might be normal WordPress posts or pages, it might be documents or products, or it might be a custom post type that you created in step 1a.
- Go to Formidable → Forms (Lite) → open your form → Setting → Actions & Notifications → Create Post.
- On the next page, there is an option called Post Type with a dropdown. From the dropdown select your storage space (i.e. Documents, Products, or custom post types). NOTE: If you are storing user data as a post or a page, select Posts or Pages.

- Next, scroll down to the taxonomies and custom fields section. Add the taxonomies and custom fields that you created.
- Then scroll down and take a look at the other options. When you are ready, hit update. That’s it. The form will now store all user data in the storage space you choose.
3. Formidable Forms Display Entries in a searchable, filterable, and responsive table
In this section, you will learn how to create a table with user-submitted data.
If you are using Document Library Pro or WooCommerce Product Table for storing user data, then you can use the same plugins to build a table. But if you are using Custom Post Types UI for storing data, then use Posts Table Pro.
And no matter which plugin you use, the instructions below are universal.
Instructions
- Install and activate Document Library Pro or Posts Table Pro or WooCommerce Product Table (if you haven’t already).
- Go to the plugin settings page and activate the license key.
- (Posts Table Pro only) Scroll down and you should see a dropdown option right beside Post types. From that option, select the custom post type or Posts or Pages (depending on how you chose to store the user data).
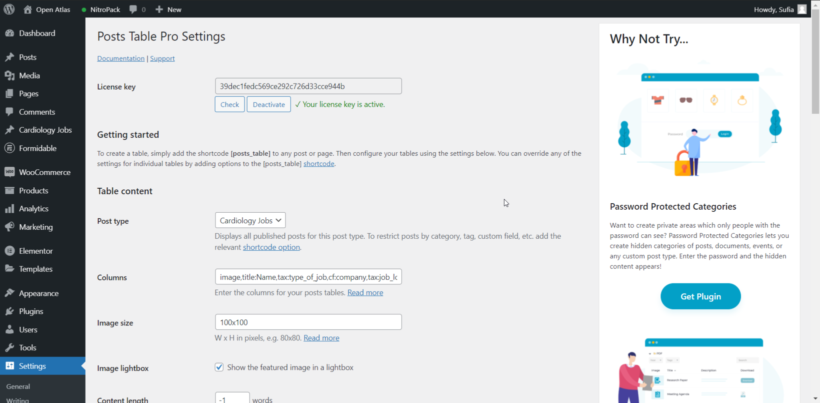
- Next, take a minute to fill in or modify other options on the settings page. If you need help, follow these help docs: Document Library Pro or Posts Table Pro, or WooCommerce Product Table. You can also check out the FAQ section below or leave a comment in the comments section. We also have a YouTube channel with tons of guides on each plugin. For further assistance, reach out to us. Before we move on to the next step, here’s a sneak peek into our Posts Table Pro settings page.
- Go to Pages → Add new. Name the page and depending on which plugin you installed add any one of these shortcodes:
[doc_library]or[posts_table]or[product_table]
If you preview the table, you should have a table like this:
Something wrong? The table is a reflection of the settings you choose back in steps 3 and 4. You can go back to the setting page and tweak a few options to build a searchable, filterable, responsive table like ours.
Speaking of responsiveness, this is how the table looks on mobile:
FAQ
Q. How can I show Formidable Form entries in WordPress?
A. To display Formidable Forms entries in WordPress, you need to buy a pro plan called Forms & Views. Alternatively, you can purchase a plugin that specializes in building front-end tables - Document Library Pro or Posts Table Pro, or WooCommerce Product Table.
Q. How can my users add a picture or file to a Formidable Form?
A. To add a picture or file to a Formidable form, you need to open a form (or create a new form) and go to Advanced Fields, then select File Upload. This feature is available only to pro-plan subscribers.
Q. How can users modify the data they submitted?
A. You can install Sheet Editor or Editus to let users modify the data they submitted. Although both plugins offer the same feature, they work slightly differently. We recommend that you check out these walkthrough tutorials before purchasing either: Sheet Editor tutorials or Aesop Editus for WordPress.
Start displaying Formidable Forms today!
To display Formidable Forms entries you need a combination of the finest plugins. Here’s how to get them:
- Formidable Forms: It’ll help you create a form to receive user submissions.
- Custom Post Type UI (optional): It’ll help you create a custom post type.
- Either Document Library Pro or WooCommerce Product Table or Posts Table Pro: These will help you build searchable, filterable, and responsive tables.
Thinking of displaying user data collected with other form plugins? We have tutorials covering the four most popular WordPress form plugins: Gravity Forms, Contact Form 7, Ninja Forms, and WPForms.
Any questions? Reach out to us in the comment section below.