2 methods for organizing the WordPress media library

The WordPress Media Library is where all images, videos, and other media files are stored on any WordPress site. With your website’s media assets stored in a library, you need to make sure you keep it organized.
A cluttered and disorganized Media Library can cause problems with site performance, broken links, and the most obvious, difficulty finding the right media file when you need them.
Although performing basic management of your Media Library is straightforward, things can easily get messy over time. In this article, I’ll show you how to improve the organization of your WordPress Media Library and make it easier for you to manage. You'll learn how to organize and display media files to create an organized, optimized Media Library for both you and your users.
We even made a video guide to go along with this article:
Where to find the WordPress Media Library?
The default WordPress Media Library can be easily accessed by navigating to the left sidebar from the WordPress admin dashboard. Simply navigate to Media → Library from the WordPress admin panel to open your website’s Media Library.
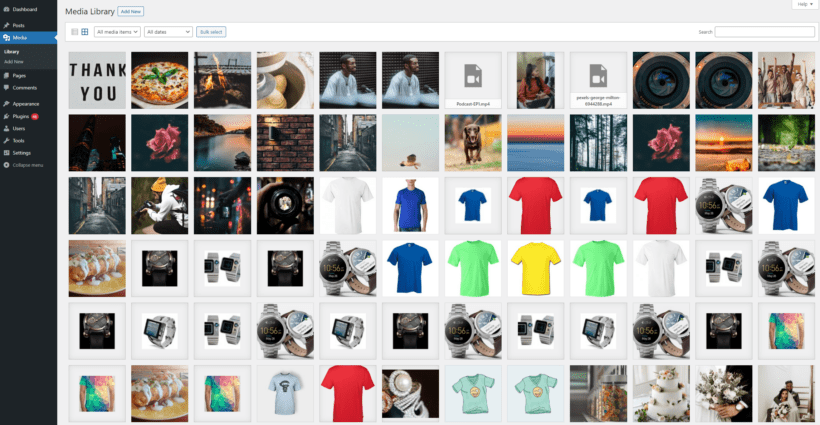
By default, the WordPress Media Library organizes all items in your media library by media type:
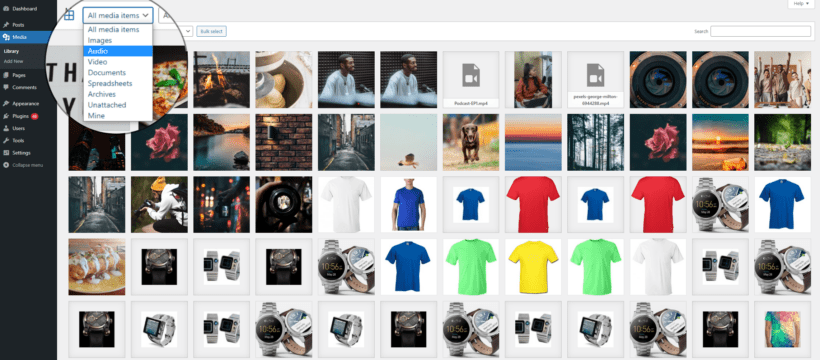
This means you can sort your media library by selecting only images, videos, audio, documents, spreadsheets, unattached, or by your own uploaded files. By using the All dates dropdown menu you can filter out specific media files by their upload date. You can also search for specific files using the search bar on the right side.
The limited sort and filter options make it difficult to find multiple media files at once. For example, if you need to find video and audio files for your podcast then it can be a headache to filter both media types using the default WordPress sorting and filtering options.
On top of this, the default layout of the WordPress Media Library is not very user-friendly. It essentially clutters all of your media files into a library that’s difficult to navigate. There's no built-in functionality to organize or categorize media files.
Method 1: How to organize the Media Library through FTP
All the files in the WordPress Media Library are ultimately stored in the website's file system. You can use any FTP (File Transfer Protocol) tool to organize these files more efficiently.
FTP gives you direct file system access so that you can create custom folder structures, rename files, and perform bulk edits that aren't possible through the WordPress admin. This can be especially useful for sites with large Media Libraries, where the default monthly/yearly structure becomes unwieldy. FTP also provides a way to backup and restore your full media collection independently of the WordPress database.
However, directly modifying WordPress media via FTP does have some disadvantages. The WordPress Media Library consists of both the file system and MySQL database working together. This means that if you simply moved or reorganized media files via FTP without updating the database, then this is likely to cause problems. That's because it would break any existing references to the old file paths within your WordPress content, custom fields, or other integrations. Images will not display correctly in the front end, and you may see 404 errors when trying to access the media.
If you're unsure of how to do this safely, then I recommend using Method 2 (below) instead.
Organizing WordPress Media with FTP
- Access your WordPress file system via FTP. You can use a desktop FTP client like FileZilla or access the files directly through your web host's control panel.
- Navigate to the /wp-content/uploads/ directory. This is the default location where all media files uploaded through WordPress are stored.
- Examine the existing folder structure. By default, WordPress automatically creates subdirectories based on the year and month the media was uploaded. For example, you may see folders like /2024/11/ for content added in November 2024.
- Before making any changes, back up your entire /wp-content/uploads/ directory before. This will ensure you can easily restore your media library if needed.
- To further organize your media, you can create additional subdirectories within the yearly/monthly folders. For instance, you could have /2024/11/blog-posts/, /2024/11/social-media/, and /2024/11/product-images/ to categorize files by their intended use.
- When uploading new media via FTP, be sure to place the files in the appropriate subdirectory. This will maintain the organizational structure and prevent your media library from becoming cluttered.
- In addition to creating new folders, you can use FTP to rename, move, or delete existing media files as needed. However, be careful when making such changes because they could potentially break links or functionality on your WordPress site.
- If you make structural changes to your media structure, you should update any references to the old file paths within your WordPress content. You can use a free plugin like Update URLs to automate this.
By using FTP to organize your WordPress media, you can maintain a well-structured, efficient, and easy-to-manage file system. This will organize the files behind the scenes, but things won't look any different in the WordPress admin. For that, I recommend keeping things organized using the Document Library Pro plugin instead. We'll talk about this next.
Method 2: Organizing the Media Library with Document Library Pro
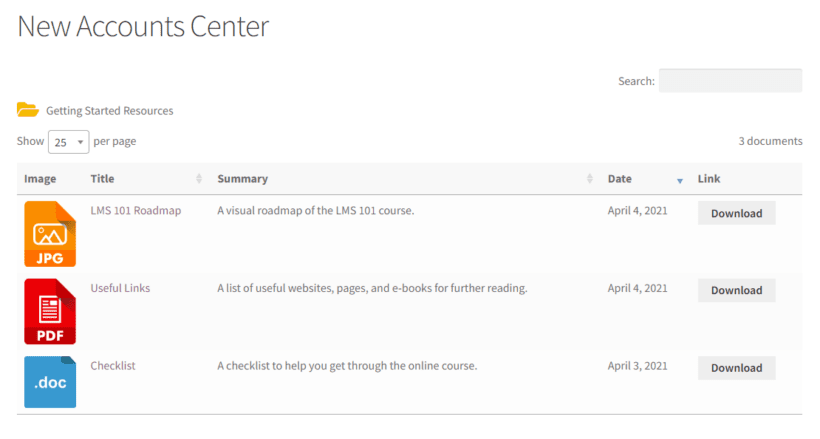
One of the most effective ways to organize the WordPress Media Library is by creating a front-end media library. As the name implies, it’s a media library that can be accessed directly from the front-end of your WordPress site. This means, instead of using the admin panel to access the WordPress Media Library, you and your site visitors can access it on your site’s main pages.
This method doesn't change how your media is structured behind the scenes. Instead, it keeps everything organized and categorized in a front end format that everyone can see.
Introducing Document Library Pro
The Document Library Pro plugin makes it easy to manage media files on your WordPress site and organize them into multiple front-end media libraries. You can upload multiple media files to a single library and display them anywhere on your WordPress site.
Key features
Full control over document uploading
Using the plugin, you have full control over how media files/documents are uploaded to your WordPress site. It lets you properly categorize your media files by adding categories, tags, and other important document data.
Document Library Pro also supports uploads for most types of media types as well as third-party URLs such as embedded audio and video players.
Customizable
The best part about the plugin is that it’s flexible and lets WordPress site owners completely change the look and feel of their front-end media libraries. You can showcase download buttons, links, and icons on your WordPress Media Library, change how the library looks using over 50 different customization options, and even create private document libraries by using it with the Password Protected Categories plugin.
Front-end media library plugin
While it’s called a document library plugin, you can think of it as a front-end media library or resource library add-on. A front-end media library is essentially a place where each document is a different media file and has complete optional information such as an image, excerpt, description, tags, and categories. For more information, check out our guide on how to create a front-end media library in WordPress.
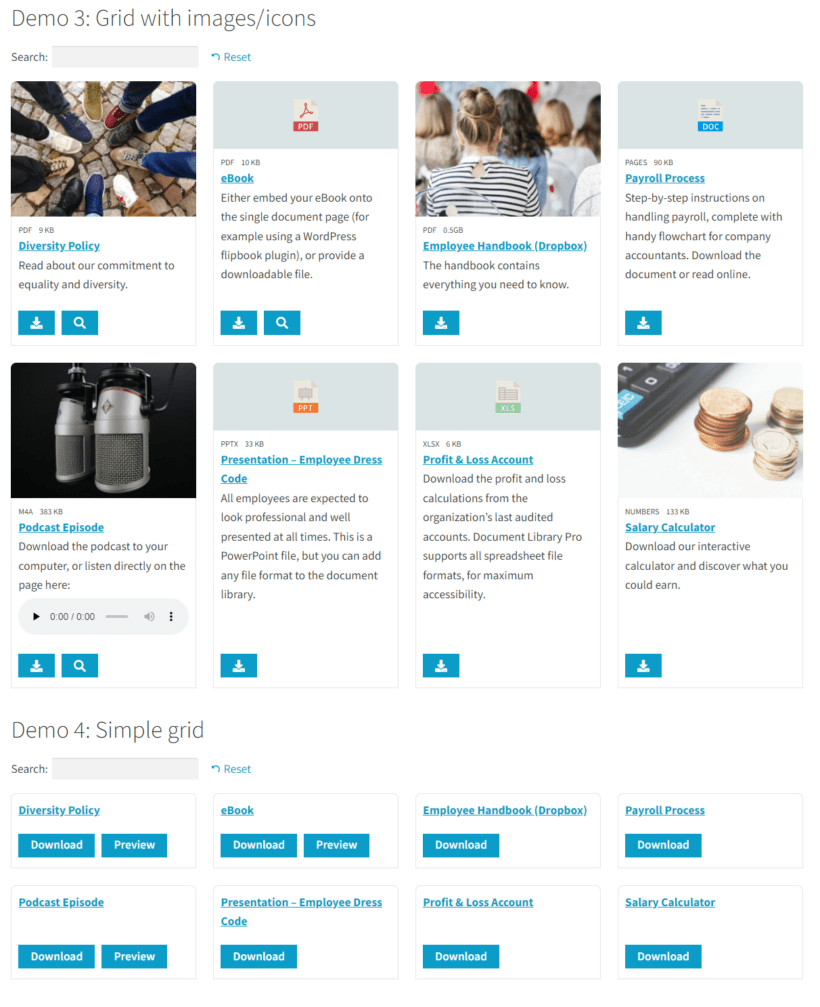
The plugin's grid layout is a great way to showcase multiple types of media files in a single place with large images and descriptions for easy navigation. Users can click on the download button to easily access the media files without having to navigate to another page:
If you prefer, then you can choose a searchable table layoute:
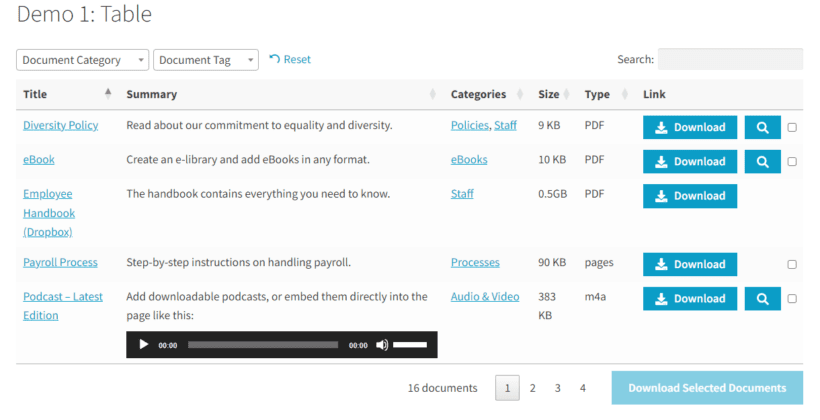
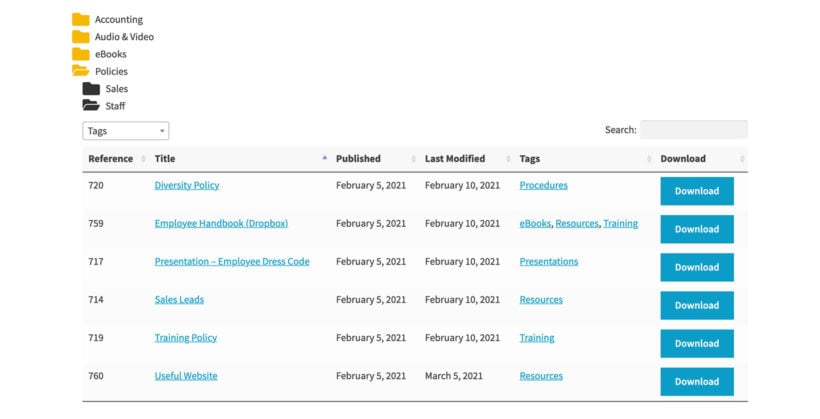
And either way, you can display media files in an organized manner by enabling the category-based folder view:
Control access to the media files
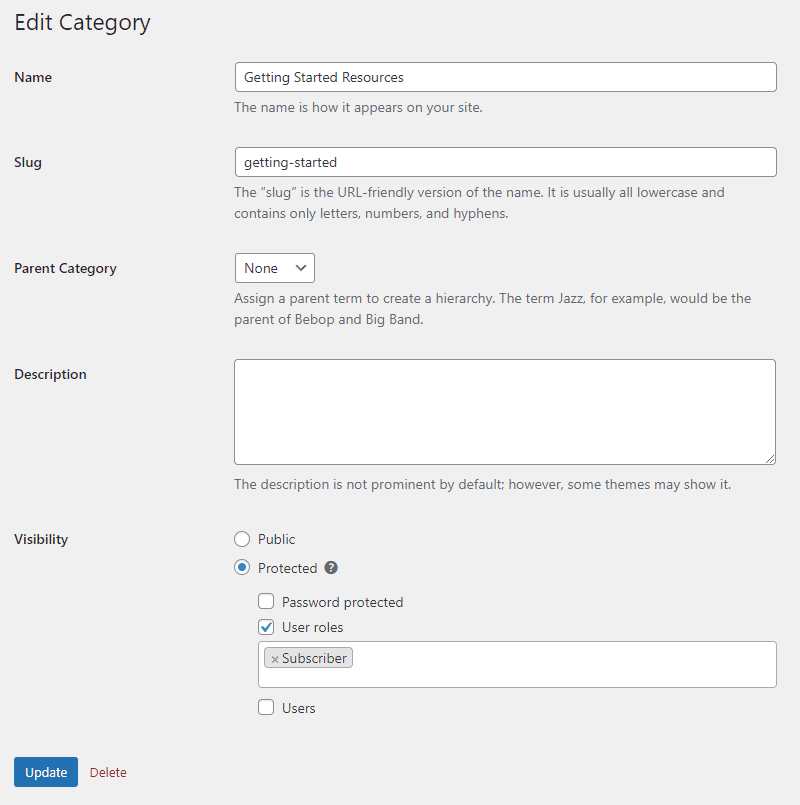
You can either make all the Media Library files publicly available, or restrict them using the Password Protected Categories plugin. This lets you choose who can access each media category:
Structure media files into folders or categories
Document Library Pro makes it easier to structure the media items you upload on your WordPress site into virtual folders or categories. You can simply create or set up a new category just like you would for WordPress posts or WooCommerce products.
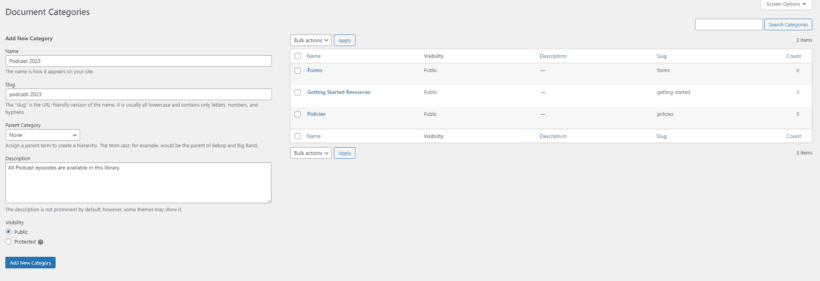
This allows WordPress site owners to keep their media files properly organized and easily accessible.
The plugin also lets you create subfolders. To do this, simply create a child category and add the posts to it. It will appear in a subfolder on the front-end.
The front-end folder display is incredibly user-friendly. You can create unlimited folders and display them without any performance optimization problems. Either have all folders closed by default, or set it to open a specific folder when the page loads. Perfect!
Tagging and categorizing media files
The plugin also lets you tag and categorize your media files which makes it easier to find and group similar media files together.
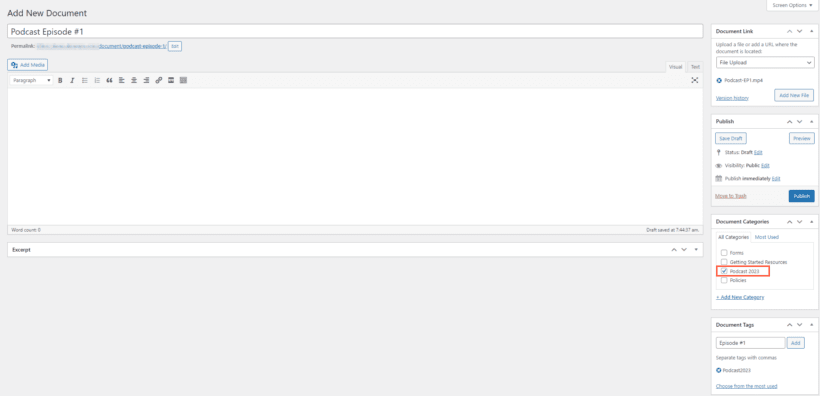
Let's say you want to upload 10 episodes for a podcast. You can group all of them into a separate “Podcast” category or add the “Podcast” tag to each one. This makes it easier to find older uploaded media files along with new ones in a single place. Each category translates to a new folder on the front-end. The category name appears as the folder name.
Store extra information about each media file
Document Library Pro also allows you to add extra information to the media files you upload using the robust plugin.

You can add a description and an excerpt explaining what the file is about when uploading it. This can make it easier for you and your site visitors to easily understand and identify each media file.
Access all your media files in a dedicated section
The great thing about the Document Library Pro plugin is that it gives you access to all the files you add to your Media Libraries in a dedicated section in the WordPress dashboard.
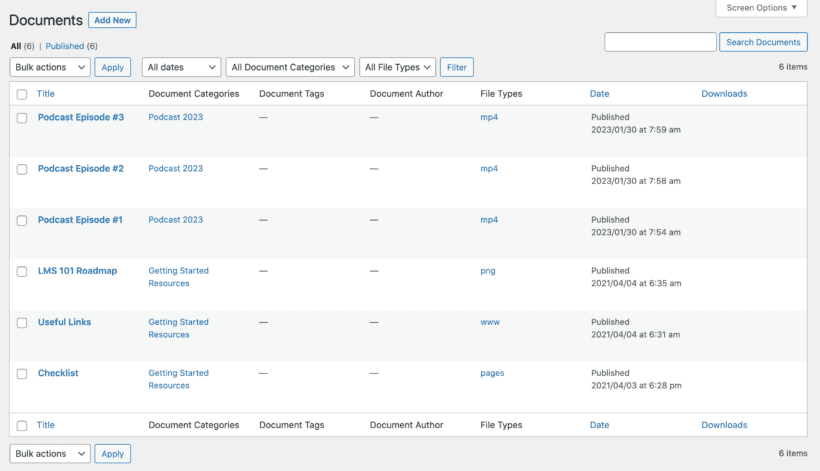
The All Documents section lists all of your uploaded media files through the Document Library Pro plugin. This makes it easier for you to manage and organize your files using a familiar interface. It works like a file manager for WordPress.
Improving navigation and searchability
Once you add a front-end Media Library to your WordPress site, it makes it easier for both you and your website visitors to navigate and search through your media files.
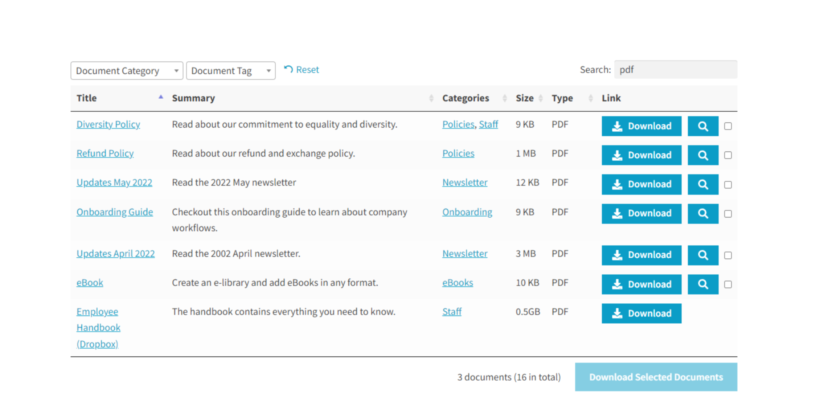
Your site visitors can quickly find the media files they are interested in two ways:
- Using the search bar.
- By navigating through the media folders.
As a result, it helps refine the user experience and speeds up the user flow on your WordPress site.
Search and filtering
The Document Library Pro plugin lets you showcase a search bar. It also lets site visitors and administrators sort media files by the column options.

This makes it a breeze for all users on your WordPress site to access media files quickly. They'll be able to find the files they need within a few seconds. It improves the user interface and makes it easier for users to find the files they're looking for.
Enhancing the presentation of media files
The Document Library Pro plugin gives you full control over the presentation of media files on your WordPress site.
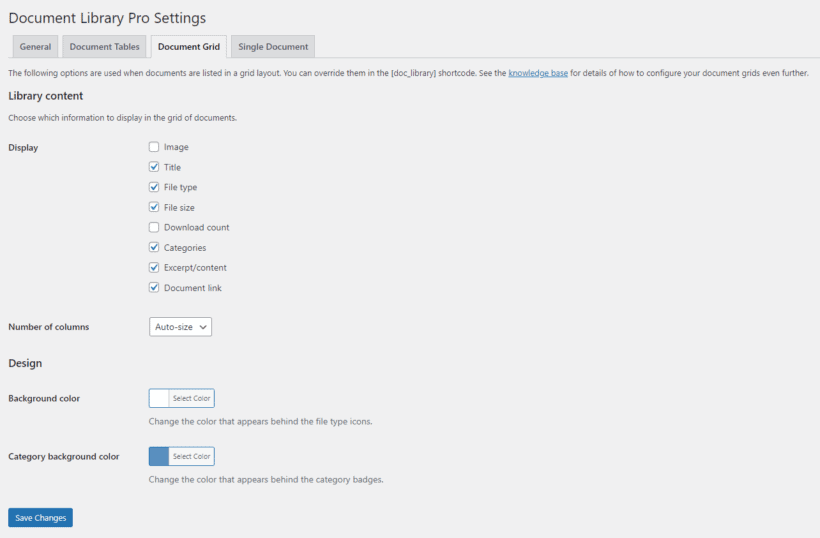
This means you have various options to display media files on the front-end. You can choose between a table layout or a grid layout as well as plenty of customization options. The plugin supports a variety of file types including image files, PDFs, docx, xlsx, mp4, mp3, gif, png, jpeg, and more.
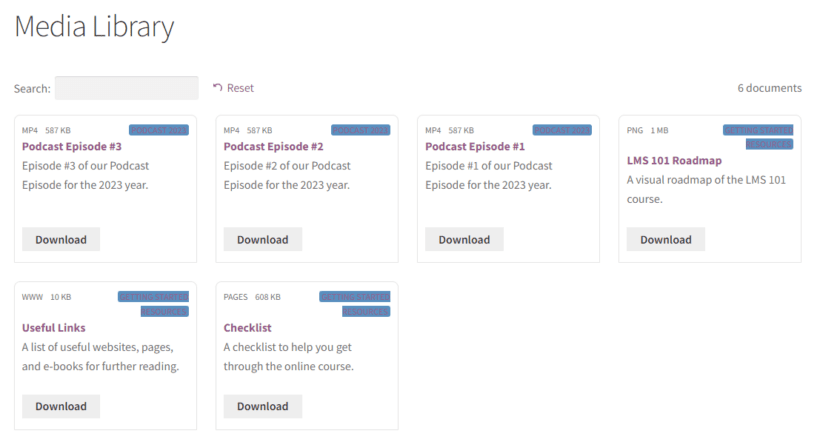
This helps you create a professional-looking front-end WordPress Media Library that’s visually-appealing and functional.
Adding extra details and information
The Document Library Pro plugin also gives you a few options for adding extra details and information about each file.

It also lets you add media file authors, thumbnails, display the file size, and the upload date of the media file. This is great for taking media organization to the next level.
Easily add existing files from the Media Library to the front-end library
The best part about the Document Library Pro plugin is that it lets you convert existing media files in the default WordPress Media Library into “Documents”.
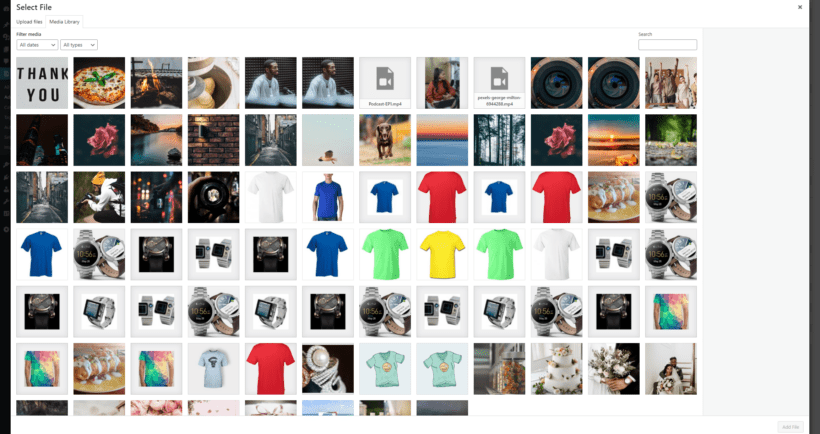
This lets you create a “Document” post in the Documents section of your WordPress admin panel. Like other WordPress custom post types, Documents have their own dedicated section in the Dashboard. Once that’s done, you can:
- Add extra information about the media file. This is good for SEO because you can display this information on the front end Media Library.
- Add links to the file.
- Showcase it on the front-end of your WordPress site.
Other ways to organize your WordPress Media Library
Creating a front-end media library is one of the best ways to organize your WordPress Media Library. However, there are some other options you can try out.
Organize media library files in the back end only
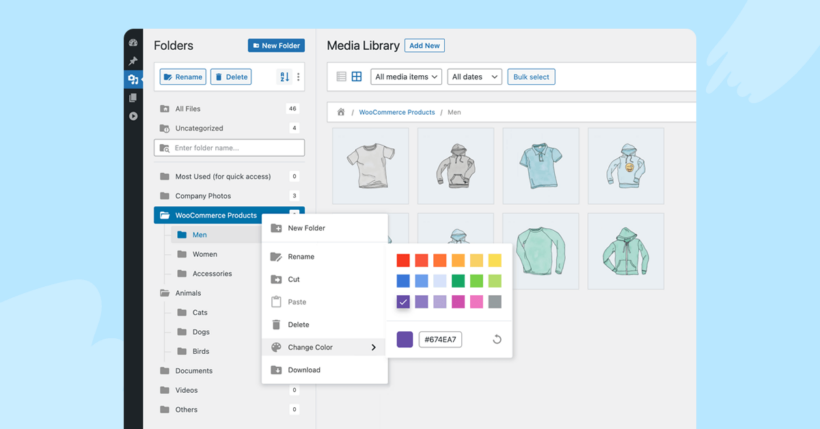
So far, we've looked at how to use the Document Library Pro plugin to organize media files and display them on the front end of your website. Alternatively, the FileBird WordPress media library plugin allows you to create folders and subfolders to organize your media files in the . It also provides a number of other features to help you manage your WordPress media library more effectively, such as:
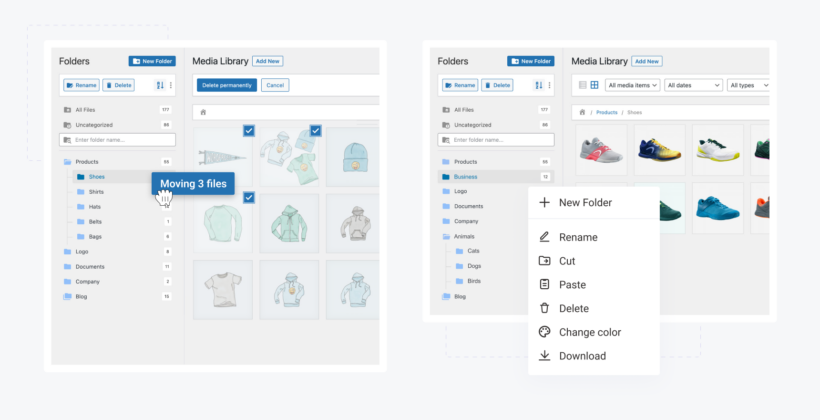
- Drag-and-drop file management: You can easily drag and drop files to move them between folders, or to upload new files.
- Bulk operations: You can perform quick operations on files and folders, such as moving, copying, renaming, or deleting multiple files/folders at once.
- Advanced search and filtering: You can use FileBird's advanced search and filtering features to quickly find specific files or change the file location.
- Smart galleries: You can create dynamic image galleries that automatically display the images from a specific folder or collection.
Moreover, you can even tweak the folder tree skin in the styles of Dropbox or Windows 11, and color-code your folders as needed.
Creating folders to organize media
Creating different folders in your WordPress Media Library makes it easier to group similar media files and organize them. This way, you can find them later quickly. You can use a plugin like the Media Library Folders to create and manage folders in the default WordPress Media Library. Unlike Document Library Pro, these create Media Library folders in the WordPress dashboard - not the front end.
Using the plugin, you can label and organize your media files. All you have to do is drag and drop them into the right order or WordPress Media Library folder. This is essential for keeping all of your media files organized on your WordPress site. It's especially important when uploading new files to your site.
Using the built-in drag-and-drop interface is better than uploading files to WordPress via FTP. That's because the files are instantly added to the WordPress Media Library, whereas FTP only adds them to the file system and not the database.
Using tags and categories to group media
You can also use tags and categories to organize your WordPress Media Library better.
You can use a plugin like the Media Library Assistant for tagging and categorizing media files in your WordPress Media Library. This is a free plugin on wordpress.org. It doesn't have a pro version. It works by adding a taxonomy to the Media Library, which can be used to create categories.
Again, a free WordPress media library folders plugin is different from the tags and categories that you get with Document Library Pro. This is because they only organize things in the WordPress back end. In contrast, Document Library Pro lets you tag and categorize media files in the back-end. In addition, it allows users to use this data to find and filter files in the front-end.
Renaming media files for clarity
Another useful way to organize your default WordPress Media Library is by renaming media files. This makes it easier for you to search for specific media files using the default WordPress Media Library search settings.
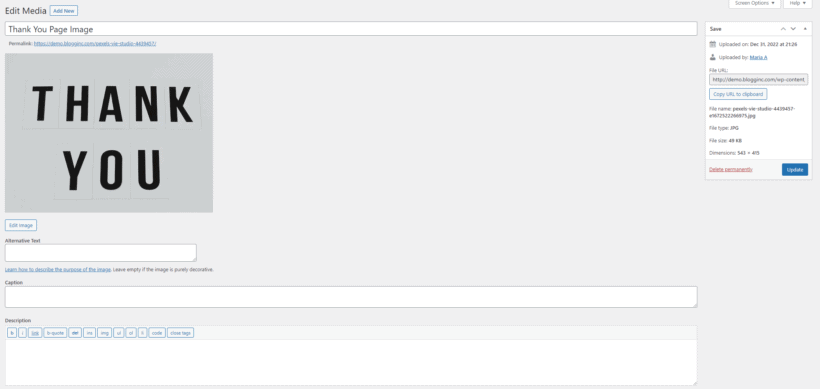
You can also click on the Edit link on the image you want to rename in your WordPress Media Library. Click on the Update button for the changes to take effect on your WordPress site.
Deleting unused media
Delete unused or duplicate files to make sure your WordPress Media Library is always organized. You can do this is by manually selecting and deleting each media file that’s not useful to you anymore.
However, a better way to delete unused media from your WordPress Media Library is using a plugin like the Media Cleaner plugin. This makes media management significantly easier in the back-end.
Tips on how to organize the WordPress Media Library
Always backup!
It’s also important to always keep a backup of your WordPress Media Library. This is essential for protecting valuable media files from getting deleted during maintenance. In addition to this, you don’t want to lose valuable media file data in case your WordPress site breaks down and you have to restore it to an older version.
This is why it’s important to regularly back up your Media Library in WordPress. While WordPress by default doesn’t offer any functionality that lets you do this, you can use a plugin like UpdraftPlus (free version available) for backing up your WordPress Media Library regularly.
Additionally, you can also upload or back up your WordPress Media Library to cloud storage. You can do this by using a WordPress plugin like Media Library Folders Pro or WP Cloud Storage. If you’re creating a front-end media library with Document Library Pro plugin then instead of uploading the files directly to the WordPress Media Library, you can add new files in the cloud and add the URL.
The Document Library Pro plugin will display a download button linking to where the file is hosted. This means that it works equally well for files which are hosted in the Media Library or elsewhere.
Version control the WordPress Media Library
Document Library Pro comes with built-in version control. This is a good way to organize the Media Library and save space on your hosting account.
When you want to replace old files, don't just upload files to replace them. Instead, use the version control to properly replace the old version with the new. In the plugin settings, you can choose whether to store or delete old files when you replace them.
Media library image SEO settings
When working with the WordPress Media Library, it's always important to consider SEO and accessibility. Luckily, you can use the same techniques make the media easy for both search engines and real users to access. For example:
- Always add helpful alt text to every media file.
- Set a readable URL for each file.
- Keep file sizes to a minimum before uploading them to WordPress.
Organize your WordPress Media Library today!
Organizing the WordPress Media Library is important for ensuring you can easily and quickly find the media files you need. Instead of using the default WordPress Media Library, it’s much better to display an enhanced Media Library on the front-end of your WordPress site. This way, admins and site visitors can easily navigate and access the media library on your WordPress website.
Ready to start organizing the WordPress Media Library and creating a better-performing, easily manageable website? Get Document Library Pro today!