How to add radio buttons to product variations in WooCommerce (step by step)

Want to replace WooCommerce's clunky dropdown menus with radio buttons for your product variations? The default WooCommerce setup limits you to dropdowns, but there's a better way to present options to your customers.
Radio buttons let people select one option from a single-choice list - think of how you pick a shipping method at checkout. Unlike checkboxes where multiple selections are possible, radio buttons ensure customers choose exactly one option. This makes them perfect for product variations, where customers select one of each attribute.
This guide shows you how to add radio buttons to product variations using the WooCommerce Product Options plugin. You'll learn to set up:
- Standard radio buttons with text labels
- Clickable image options
- Text-based selections
- Color swatches for visual choices
The steps we'll cover work without requiring coding knowledge. They'll give you full control over how variations appear as radio buttons on product pages. Let's make your product options more user-friendly.🤝
How to display WooCommerce product variations as radio buttons
In WooCommerce, variations always appear as dropdown lists. Simple dropdowns may not be suitable for the type of products you sell. The solution is to use the WooCommerce Product Options plugin to display variations as radio buttons.
The plugin offers a range of eye-catching ways to display WooCommerce variations as radio buttons:
- Simple radio buttons, where the customer clicks on a small circle.
- Advanced radio buttons, which consist of a circle with a thumbnail image alongside.
- Color swatches, ideal for selecting from a list of color variations.
- Image buttons, where the customer chooses from a list of visual choices.
- Text labels, ideal for selecting from a grid of text-based options.
WooCommerce Product Options also comes with conditional logic where you can show or hide options depending on the customer's other selections. It's a much more advanced way of displaying product variations.
Keep reading to learn how to use it to change the variation dropdown to radio buttons in WooCommerce.
Step #1: Install the WooCommerce Product Options plugin
Start by getting WooCommerce Product Options and installing it on your WordPress site.
Once you've downloaded the plugin zip file, navigate to Plugins → Add New and upload it to your site.
Step #2: Change the WooCommerce variation dropdown to radio buttons
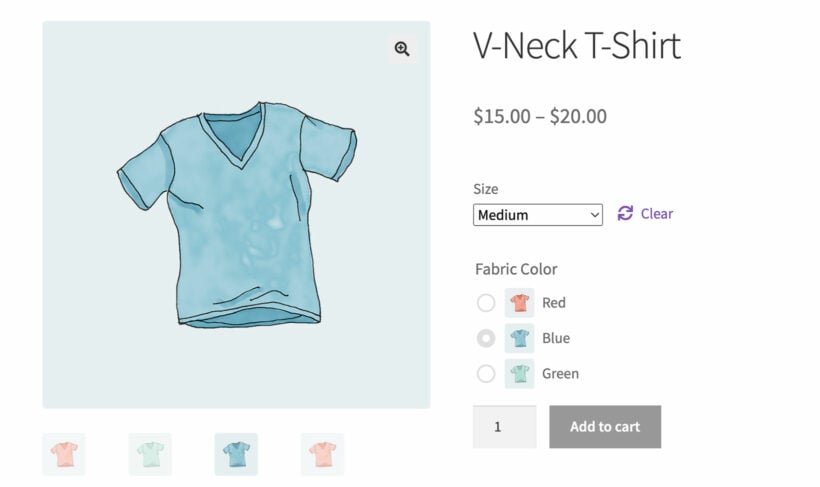
The next step is to display some or all of your WooCommerce variations as radio buttons. We'll do this separately for each variation attribute in your store. For example, we might choose to replace the 'Size' dropdown as radio buttons, the 'Color' dropdown as color swatches, and leave any other attributes as dropdowns.
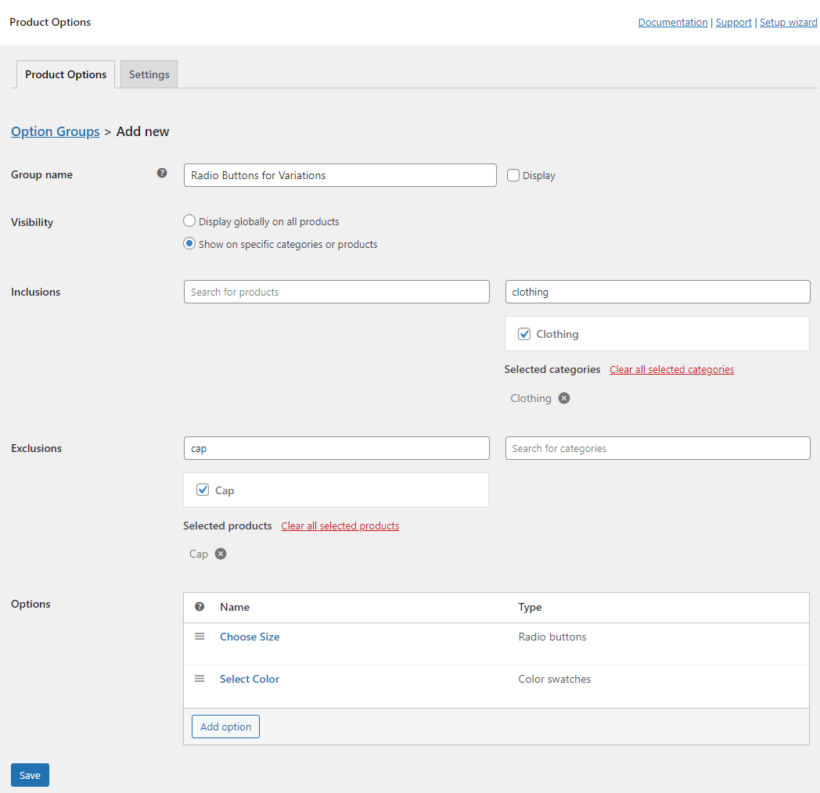
- First, navigate to Products → Product Options and click on the Add Group button.

- Next, enter a name for your product options group.
- Choose whether to display radio buttons for all products on your WooCommerce site or for specific categories or products.
- Now choose what style you'll be using for the radio buttons. Choose from radio buttons, color swatches, text labels, or image buttons.
- Click on the Add Option button to create new radio buttons.
- In the 'Choice type' question, slect the radio button titled "Create choices using existing variation attributes".
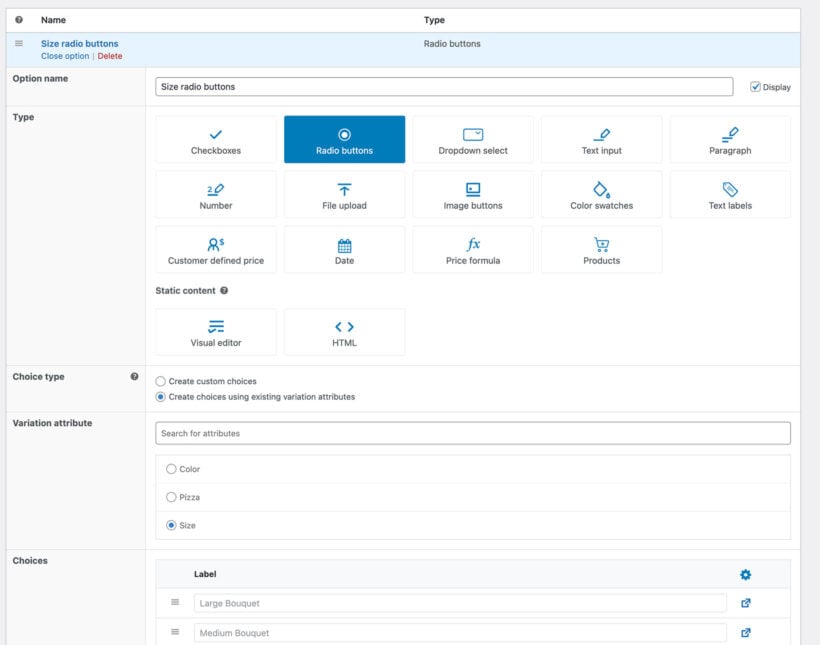
- After that, choose which variation dropdown (e.g. Size or Color) you want to change to radio buttons. (Tip: In order to display variations as radio buttons, you must add the attributes centrally via Products → Attributes. Don't create them directly on the Add Product screen.)
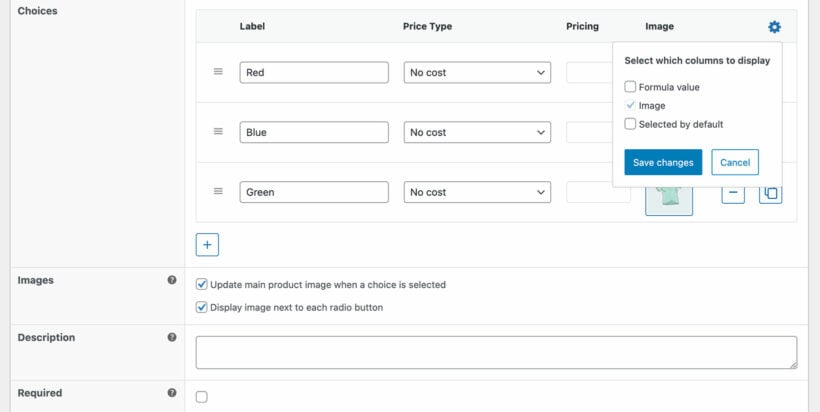
Optional: To show an image next to each radio button, use the blue cog icon in the top right of the list of choices to show the 'Image' column. You can then upload an image of each radio button variation. Two additional options appear below, allowing you to choose whether to update the main product image when a radio button is selected, and/or display an image next to each radio button:
To replace more variation dropdowns with radio buttons, keep adding more options to the group. Select a different variation attribute for each one.
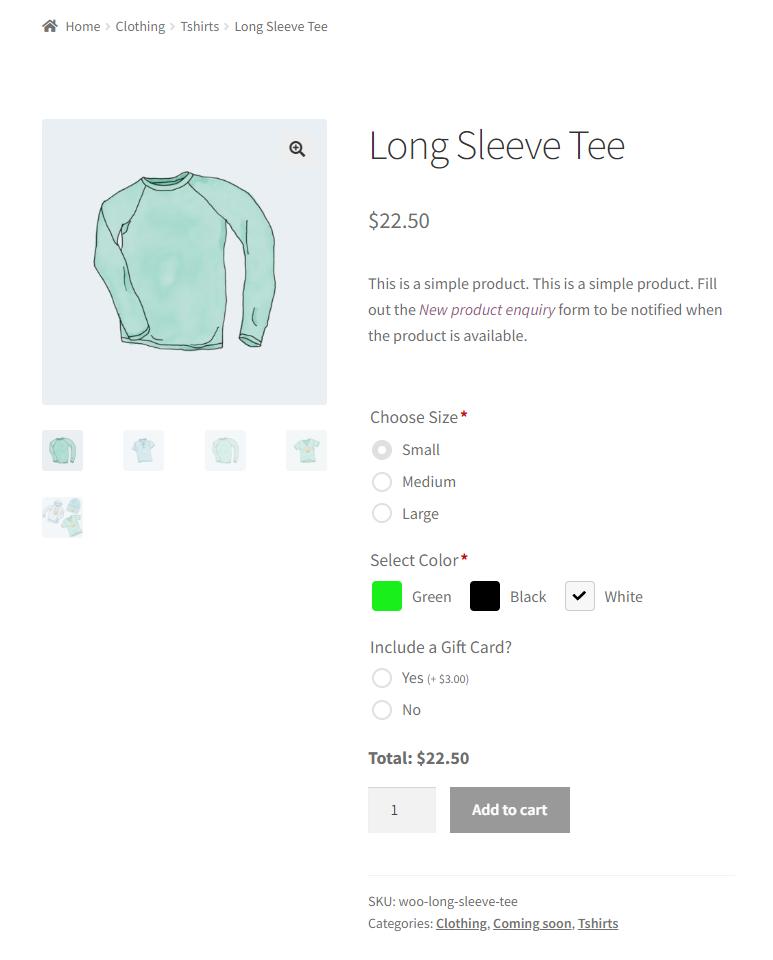
Now, all the selected products that have the variation attributes you selected will display them as radio buttons instead of dropdowns. Your product pages will look something like this:
Advanced options
So far, we've learned how to replace your variation dropdowns with radio buttons. However, WooCommerce Product Options can also do much more than this 🚀
Add other types of options
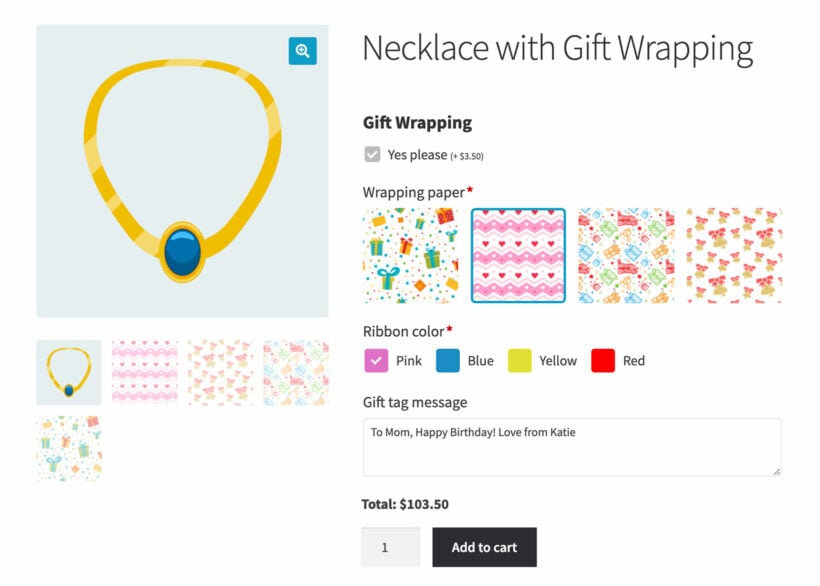
You can also use the plugin to create product add-ons directly. This lets you do things that aren't possible with variations.
For example, if you wanted to add a 'gift wrap' checkbox then you don't need to use variations for this. Instead, you can use WooCommerce Product Options to create a checkbox and assign an extra fee to it. Alternatively, you can add other field types like text input fields or file upload fields.
Conditional logic
Conditional logic lets you dynamically show and hide variations based on the customer's other selections. For example, maybe you're selling a training course and have a 'Course type' attribute with variations for 'Online' and 'In person'. To do this, you'll only want to display the lunch options when the customer selects 'In person'. You can do this using conditional logic.
Check out our video tutorial for more inspiration on different ways to use WooCommerce Product Options:
Add radio buttons to your product variations today
As you can see, you're no longer stuck with boring dropdown lists for your product variations. WooCommerce Product Options makes it easy to create WooCommerce variations radio buttons, offering a range of customer-friendly and flexible styles to choose from.
As well as displaying product variations in more eye-catching ways, the plugin provides access to advanced options. This includes conditional logic, so you can display extra options that are relevant to your customer.
Ready to start displaying WooCommerce product variations as radio buttons? Install WooCommerce Product Options on your WordPress site today. It comes with a full 30-day money back guarantee, so you can try it on your site risk-free!
FAQ
What is a radio button?
Let's first understand what exactly radio buttons are in the context of WooCommerce product options.
A radio button in WooCommerce essentially gives customers a choice that they must select one of. For instance, if a product is available for purchase in 3 different colors, you can let customers select their desired color variation using radio buttons.
Radio buttons are different from checkboxes, where the customer can select multiple options. So, it’s technically possible to display product variations using checkboxes. They are different from radio buttons because they allow your customers to select a single variation only.
What are the different types of radio buttons?
Most people think that WooCommerce radio buttons are just little circles that you click on. However, there are several possible styles for radio buttons on product pages:
- Standard radio buttons. You can add standard radio buttons that appear as clickable circles with text labels (and maybe a small image) next to each one.
- Clickable images. You can add larger clickable images to display extra options for your product better.
- Clickable text labels. You can also add clickable text labels to represent your product’s extra options better. This is particularly useful if you’re designing for accessibility.
- Color swatches. If your product has unique color options, it might be best to display them using color swatches.


2 Comments
Wow! Just the plugin I've been struggling to find! Installing it today!
Maria, thanks so much!
Hi Bob, thank you for the comment. Glad to hear we helped. If you have other WordPress/WooCommerce needs, feel free to browse through our plugins. Cheers.