Guide to adding terms and conditions in WooCommerce

As an ecommerce store owner, communicating your terms and conditions in a clear and concise manner can save you a lot of headaches. What if your checkout page included a compulsory checkbox and a link to your WooCommerce terms and conditions page? Let me show you how to do this in a few steps.
Trust and transparency are critical components of every successful online business. If you want your WooCommerce visitors to engage with your brand confidently, it's important to clearly set the right expectations and outline the rules of engagement.
In a WooCommerce store, your terms and conditions page serves as the contractual framework that governs the relationship between you and your customers. It's a powerful tool that you can use to:
- Earn customer trust
- Limit legal risks
- Protect your intellectual property
- Lawfully terminate customer accounts when necessary
- Meet certain industry standards
- Reduce the likelihood of chargebacks
The main purpose of this article is to walk you through the process of crafting a robust terms and conditions page in WooCommerce and integrating it seamlessly into the checkout process with a checkbox. You'll also learn how to go the extra mile of enhancing your store's user experience by displaying terms and conditions on product pages. That way, you can provide clear information about your terms and conditions, refund policies, etc. even before the customer adds products to their cart.
Let's dive right into it!
Quick setup guide: Create and link to a WooCommerce terms and conditions page
If you're in a hurry, then here's a quick guide of all the key steps. For full step-by-step instructions, read the detailed tutorial below.
- Go to Pages → Add New, add your terms and conditions, and publish the page.
- Go to Appearance → Customize → WooCommerce → Checkout and select the terms and conditions page.
- Next, install the WooCommerce Product Tabs plugin and create a 'Terms and conditions' custom tab for the product page. Add a summary of your terms and conditions here so that customers can review them before adding products to their cart.
Step 1: How to create a WooCommerce terms and conditions page and tick box
Having established the importance of having a WooCommerce terms and conditions page, it's time to add one to your site. The good thing is doing this doesn't require any additional plugins or adding HTML, CSS, or shortcode to your site. It's as simple as creating any other WordPress page.
To get started, log into your WordPress dashboard and go to Pages → Add New. You'll be redirected to the Gutenberg editor, or whatever you use to create pages in WordPress.
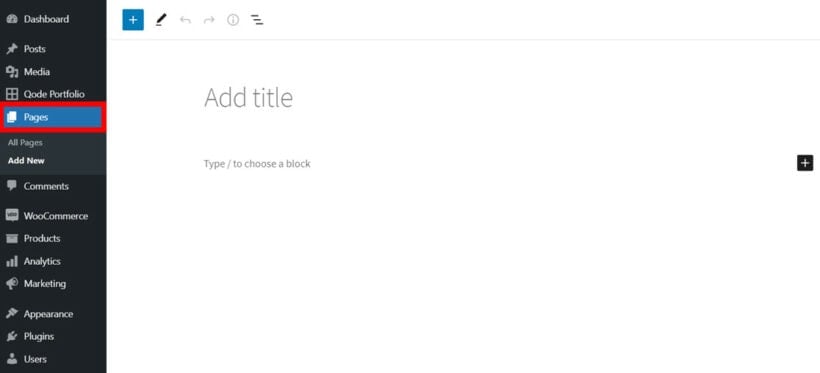
Here, you can start by adding a title to your WordPress terms and conditions page. Then add the necessary information to the body of the page using WooCommerce blocks.

Not sure what to add to this page? You can get help using a policy generation service like Termageddon. The service allows you to generate unique content for your WooCommerce terms and conditions page in under 30 minutes. All you need to do is answer a few questions about your business and website.
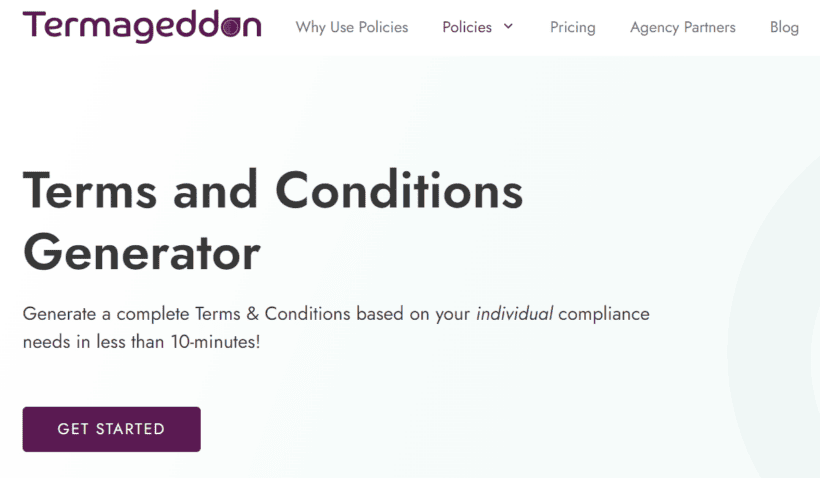
The service is very good at identifying your business's key compliance needs, provided you fill in the right information in the questionnaire. Once you've generated your content, you can easily copy and paste it into the Gutenberg block editor in your WordPress site admin panel.
Next, go over your WooCommerce terms and conditions page content and click Publish when you're done editing.
What to include in your WooCommerce terms and conditions page
Typically, your terms and conditions page should cover the following elements, especially if you sell physical products:
- All shipping details such as timeframes, methods, fees, and other terms
- Returns processing procedures
- General and specific conditions of use
- Payment methods, payment gateways, commissions, and special fees
- Buyer's and seller's legal liabilities
- Copyright and intellectual property ownership information
- Website terms of use
- Cancelation policies
- Product and service description including specifications, pricing, availability, and any other limitations or crucial information
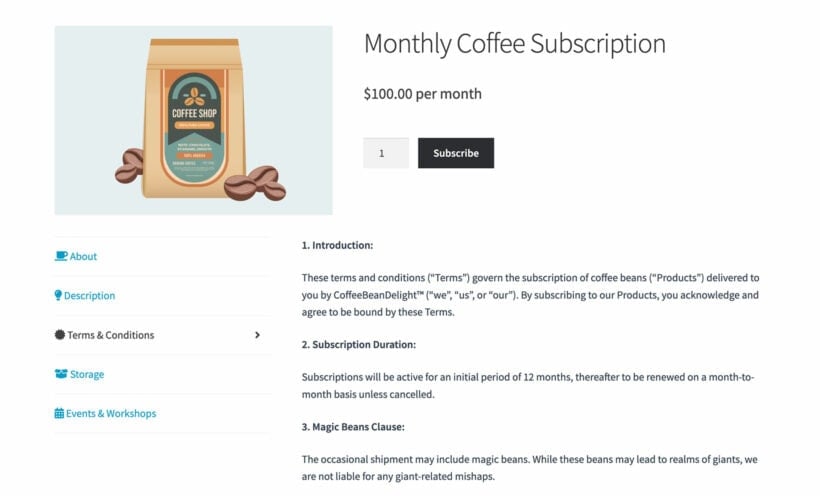
Here's a screenshot of a sample page below.
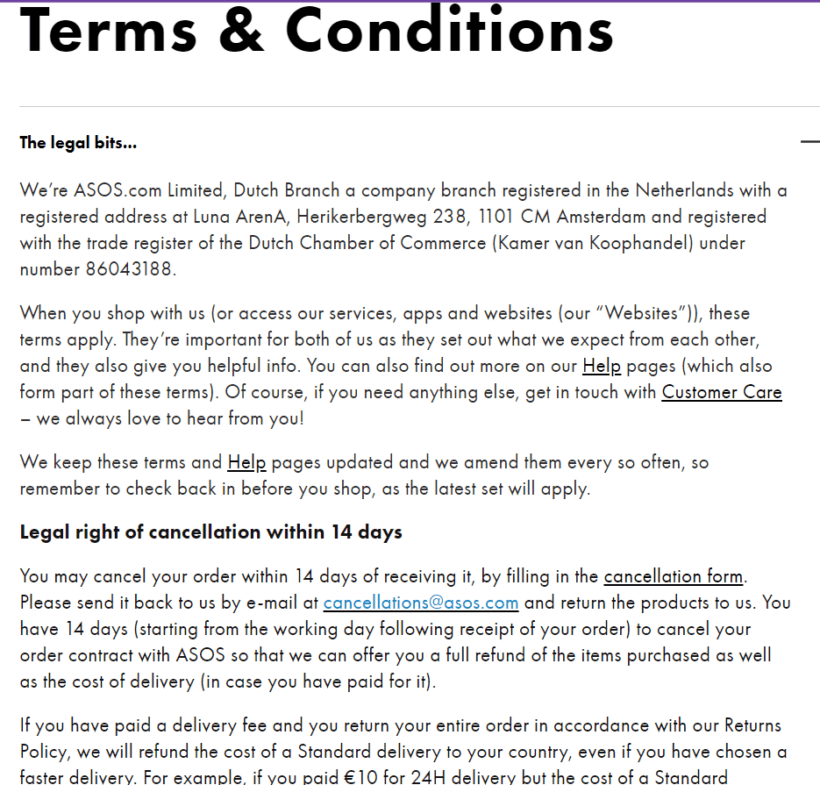
As you can see, the language used is in line with the overall brand messaging. But of course, bear in mind that no one WooCommerce terms and conditions document fits all. You'll need to come up with the best content for your unique business case.
In general, your terms and conditions should be written in clear and understandable language, avoiding legalese as much as possible. It's also good practice to have it reviewed by a legal professional. This is the best way to ensure compliance with relevant laws and regulations in your jurisdiction .e.g EU GDPR and California's CCPA.
Once you've published your WooCommerce terms and conditions page, it's time to link to it on the checkout page.
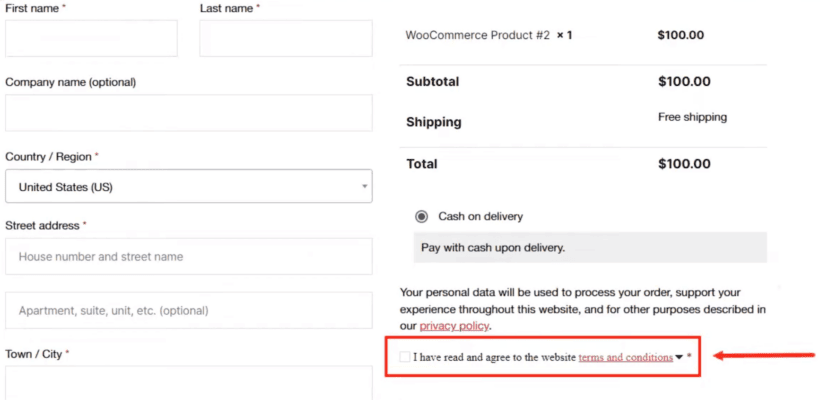
Step 2: Adding a terms and conditions checkbox to the WooCommerce checkout page
Adding a terms and conditions checkbox and link to your WooCommerce checkout page ensures that all customers agree before completing their order. It's a surefire way to protect yourself in the case of any legal dispute. It also enhances the user experience (UX) significantly since buyers can simply click the link to quickly access the WooCommerce terms and conditions page.
WooCommerce and WordPress allow you to add this to your checkout page easily. Simply go to Appearance → Customize. This will send you to the default WordPress Customizer.
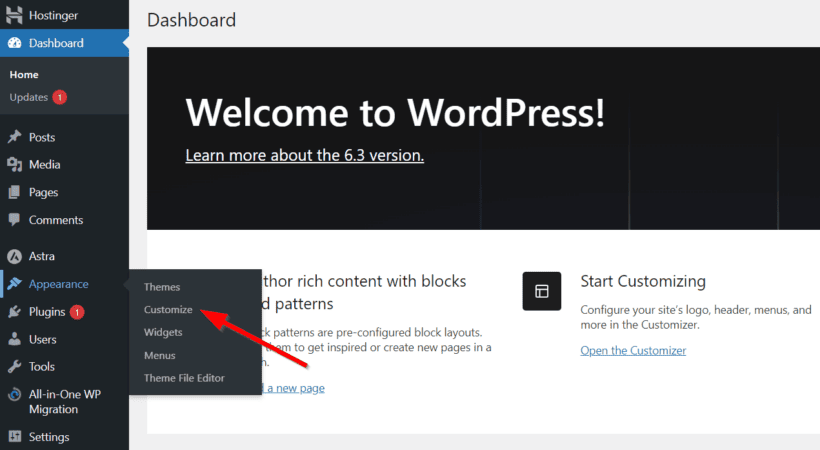
Next, go to WooCommerce → Checkout. Of course, you must have installed and activated the WooCommerce plugin earlier. In the 'Terms and conditions page' field, select the newly created terms and conditions page in the dropdown menu.

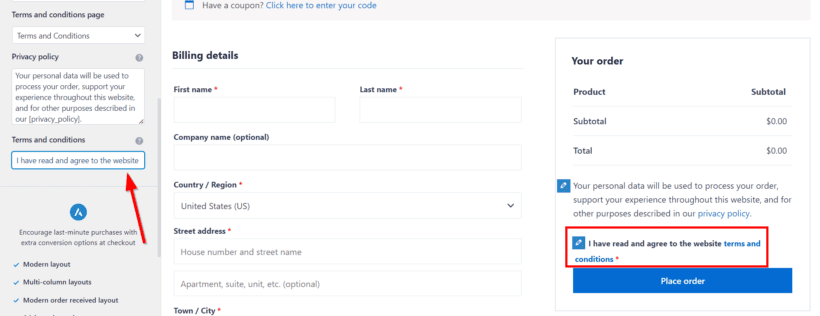
A new terms and conditions checkbox with appear above the 'Place order' button. You can go ahead to edit the supporting text as well.
Once you're done, click Publish in the top left corner and you're good to go.
Another smart way to enhance your store's UX is to add a link to the WooCommerce terms and conditions page to your footer. It could go into a 'Quick links' section if you have one. This way, your customers can access the page at any time, even before kickstarting the checkout process.
Step 3: Add a terms and conditions tab to WooCommerce product pages
So far, I've covered the crucial steps to implementing global terms and conditions that customers acknowledge during checkout. This ensures a fundamental layer of legal protection and customer understanding.
However, it's important to note that not all relevant information can fit into a single WooCommerce terms and conditions page. Sometimes, essential product details need to be presented to the customer upfront. While the product description is ideal for listing your product's features and benefits, it doesn't make sense to display extensive terms, conditions, and policies there. Doing this can easily result in an overwhelming customer experience. This is where extra product page tabs come in handy.
Adding extra tabs to your WooCommerce product page helps strike a balance between transparency and a clean, user-friendly interface. You can use them when you need to add:
- Critical portions of your terms and conditions Certain terms are of such significance that they demand conscious customer attention. Placing them within an extra tab ensures customers are fully aware of their implications. This can even apply to information already included in the global WooCommerce terms and conditions page. For instance, a subscription-based service may need to highlight auto-renewal terms, enabling users to make informed decisions about their commitment.
- Product and category-specific terms Some products and product categories require unique terms and conditions that may not align with your global policies. By utilizing extra tabs, you can distinctly outline these specific terms. This assures customers that your transparency extends to each product's unique legal requirements. A good example is an artist's shop with both physical prints and digital downloads or a multi-vendor marketplace. Extra tabs allow you to showcase individual terms for specific products or different vendors. You can also fit in safety information e.g. a health supplement store that needs to provide comprehensive details on ingredients and usage.
- Refund policy and disclaimers Clearly outline your refund policy, including eligibility criteria, timelines, and return percentages in case of product failure. If your products have specific limitations or disclaimers, such as allergen warnings or usage guidelines, an extra tab offers an unobtrusive platform to communicate these important points.
- Shipping information and policies It also makes sense to dedicate an extra tab to product shipping details, delivery times, tracking options, and any associated costs.
Looking for the easiest way to add extra tabs to your WooCommerce product pages? Then Barn2's WooCommerce Product Tabs is your best bet. This tab manager WordPress plugin is perfect for organizing your product pages while maintaining a high level of transparency across your store. You can use it to add unlimited tabs to the product page - either globally or for specific products and categories.
Creating a privacy page in WooCommerce
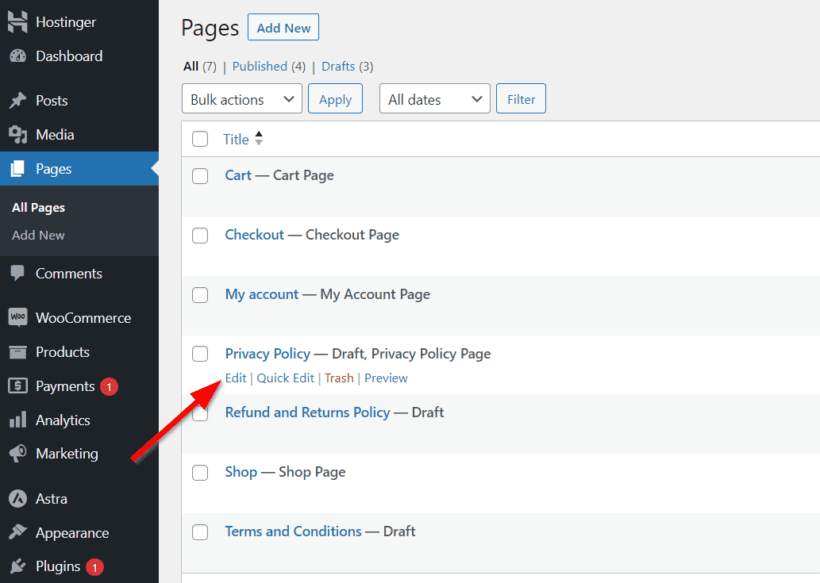
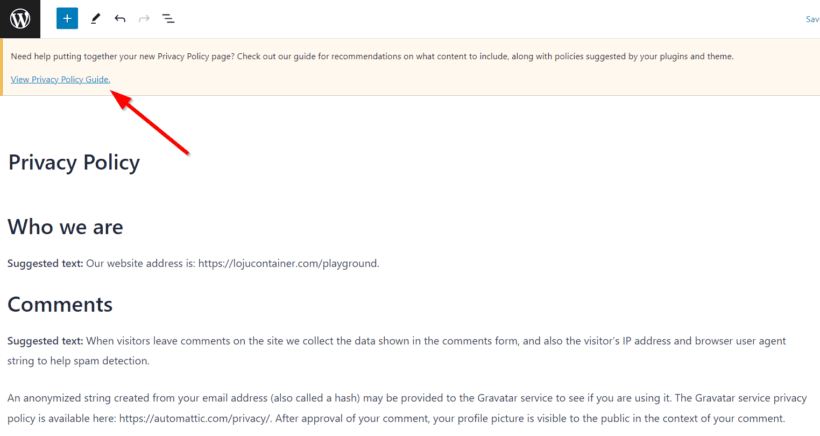
Creating a WooCommerce privacy page is very similar to setting up a terms and conditions page. You'll need to first create a page by navigating to Pages → Add New. WooCommerce adds a privacy page template to your store automatically during installation. So, you can easily tweak this by clicking Edit after hovering over the page.
The default WooCommerce privacy page simply generates a generic policy based on the plugins installed on your website. You may want to finetune this to make it more compliant legally and tailor-made for your business.
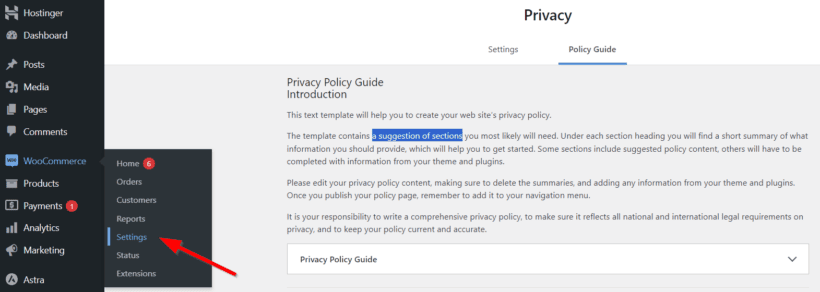
You'll find a link to the 'Privacy Policy Guide' that suggests sections and content to be added to the page. Just like the WooCommerce terms and conditions page, you can also use Termageddon to generate content for your privacy page.
To add your new privacy page to the WooCommerce checkout page, you can follow the same procedure we used previously. Otherwise, go to WooCommerce → Settings.
Navigate to the Accounts & Privacy tab and enter the text you want to display on the checkout and registration page. This text should encourage visitors to check out your privacy page, without interrupting their journey on your site.
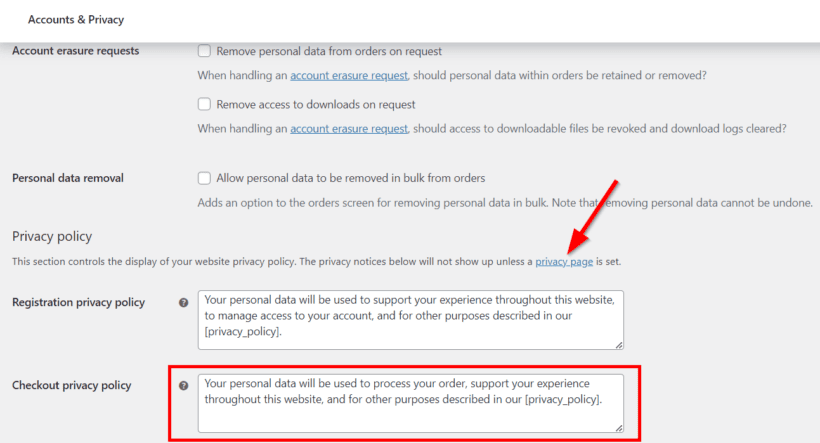
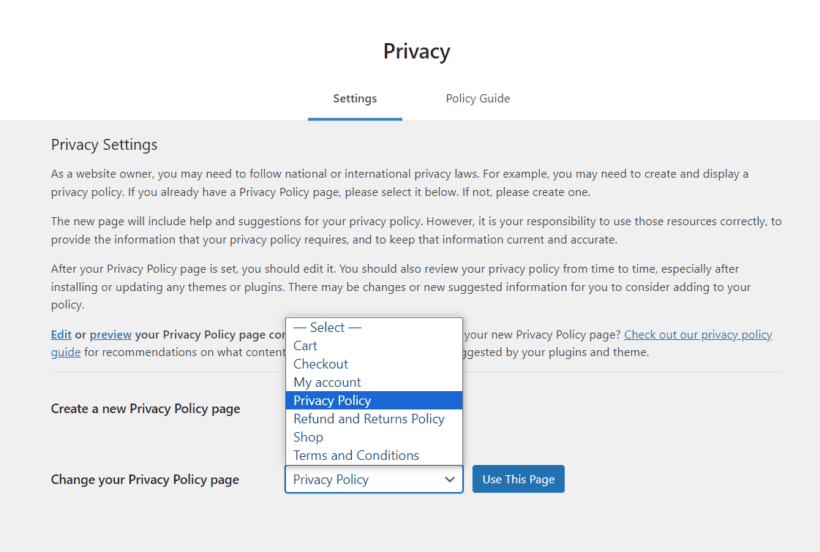
This message will only show if you've set a privacy page in WooCommerce. If you haven't already, simply click the link the arrow above is pointing to. Then select the page you just created and click Use This Page.
That's it! You've successfully notified WooCommerce which page to link to within the checkout form. For easy access, I also recommend adding a link to the privacy page to your store's footer.
Add clear and transparent terms and conditions to WooCommerce
The importance of a terms and conditions agreement in an online store cannot be overstated. A well-drafted WooCommerce terms and conditions page fosters customer trust, ensures legal compliance, and safeguards each commercial transaction.
In this tutorial, I walked you through the process of adding both terms and conditions and privacy pages to your store. I also showed you how to add a checkbox with a link to these pages to your WooCommerce checkout page. I highly recommend using the in-built WooCommerce settings as this is highly intuitive and requires no extra plugin or addon.
But if you want to add other essential information directly to individual product pages, then WooCommerce Product Tabs is the perfect tool to use.
Is there any other feature or issues you'll need more information on? Kindly let me know in the comments section below.
2 Comments
Currently, our theme, iBid/WooCommerce Simple Auctions have stated that I cannot put a terms and conditions with a check mark for bidders to agree to them before being able to bid. The option is available in the cart, but that is useless as they need to read and agree to them prior to bidding.
This function is necessary as if someone bids on an auction item, say, a home going up for auction, each auction item/product will have their own terms and conditions that the bidder must agree to prior to bidding, such as the auction requires 10% down, another house may require 15% down, another may require payment in 5 days another immediate, etc.
For instance, if a user clicks the bid button, a pop up there would work, that way they have to agree to the terms before being able to bid. We also need to be able to track those users did agree in case they state they never did. Isn't there options in the products area to implement this?
The other item of concern is that with house auctions, unlike other auctions, we need a way for the bidders to agree to put their credit card down as "insurance" they have the ability to pay the down payment within the time period as stipulated in those terms they have agreed to, so we need an additional page or pop up for when they register that states this, or it can be written within the terms and conditions, which, again, are going to be different for each real estate "product"/auction.
Thank you in advance and kindest regards,
Hi, thank you for your comment. For what you described, I suggest looking into "Age Verification" plugins, ones that offer lots of flexibility. It's not the exact same use case, but functionally, it sounds the closest to what you are looking for. With regards to storing credit card information for potential future charges, I'm afraid I can't find a suitable out-of-the-box solution. Most likely, you'll need something custom for this. If you're interested, we also offer development services. We can give you a free quote. I hope this helps. - Carl