Customize tax exemptions for WooCommerce roles

Want to make specific users or specific user roles in WooCommerce tax-exempt? In this tutorial, I'll show you how to set up a system to verify customers' tax exemption status and prevent certain customers from being charged sales tax.
If you run a WooCommerce store, you know firsthand how complex managing tax exemptions can be - especially if you sell to customers in different locations and have to comply with different tax laws and VAT requirements.
In this detailed guide, I'll show you how to set up your store's basic tax settings and add user-based tax exemptions using the powerful WooCommerce Wholesale Pro plugin.
Let's begin with a quick overview of what it means to add a sales tax exemption in WooCommerce.
Does WooCommerce have a tax exempt option?
Setting up a tax-exempt option allows certain customers to place orders from a WooCommerce store without paying sales tax on the orders. This feature is particularly useful for stores that sell to individuals or organizations who are exempt from paying taxes due to their status.
When a customer is marked as tax-exempt in WooCommerce, they won't be charged any taxes on their purchases, regardless of the tax rates set up for the products or services they're buying. This streamlines the purchasing process. It simplifies transactions for exempt customers as they aren't charged taxes they're not required to pay, and ensures compliance with tax regulations.
Tax is a complex minefield in e-commerce (eCommerce/ecommerce). With so many different tax rules for different countries, removing barriers to a customer’s purchase is vital. If you don’t use a plugin that allows qualifying customers to manually or (better yet) automatically remove tax at the checkout, then you are losing sales, customers, and future revenue.
Simon HarperFounder, SRH Design
Why tax exempt certain customers in WooCommerce?
Online businesses or users may qualify for tax exemptions when placing orders for a variety of reasons, primarily due to their specific legal status or the nature of their purchases. Here are some common reasons:
- Wholesalers: Businesses that purchase goods for resale, aka wholesalers, rather than for their own use are often eligible for tax exemptions on these purchases. This exemption is based on the principle that sales taxes should only be levied once, at the final point of sale to the end consumer.
- Non-profit organizations: Charities, religious institutions, educational institutions, and other not-for-profit organizations in many countries are often exempt from paying taxes on certain purchases. Since these organizations operate for charitable, religious, or educational purposes, they are often relieved from paying taxes to support their missions.
- Government entities: Government agencies and entities, such as federal, state, and local governments, are typically exempt from paying taxes on purchases. The idea behind this is that tax revenues collected from government entities would essentially be circulating within the same system, making taxation unnecessary.
- Specialized industries: Certain industries or transactions are granted tax exemptions due to their importance or specific regulatory considerations. For instance, medical equipment purchases by healthcare providers may be exempt from sales tax to ensure affordable access to healthcare services.
An overview of the best WooCommerce tax exemption plugin

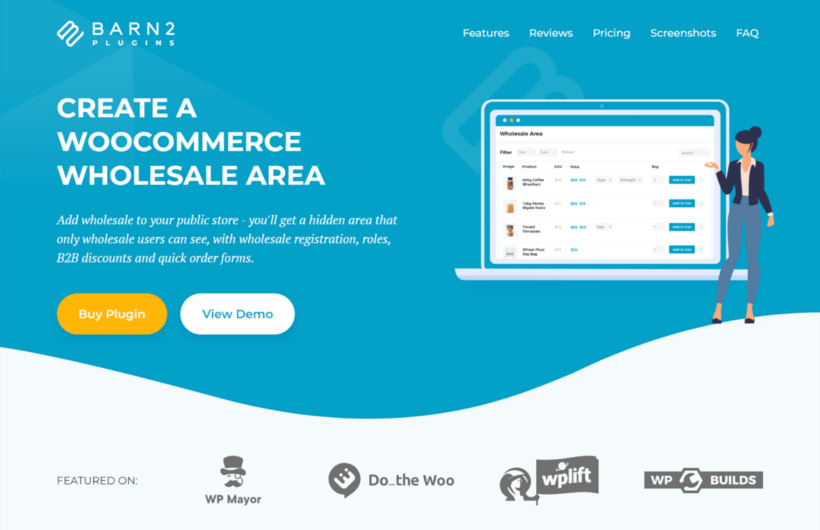
WooCommerce Wholesale Pro is an easy-to-use plugin that lets you create user roles in your WooCommerce store and choose whether or not to charge tax for each role.
As the name implies, it's a fully-featured wholesale plugin. It creates a wholesale version of your WooCommerce shop and is packed with a ton of extra useful features. (If your store doesn't sell to wholesalers or you don't need these extra features, that's ok. Simply use the ones you do need.)
WooCommerce Wholesale Pro's key features
- Easily create an unlimited number of user roles and add users to each role.
- Enable or disable tax for each user role individually.
- Build a custom user registration form to collect customers' details (business name, email, tax exemption status, etc.) before they place orders from your online store.
- Allow customers immediate access to your store after they register or hold new customer registrations for moderation.
- Set flexible wholesale prices and discounts: per user role, per category, per product, etc. Specific customers will see the prices and discounts based on their user role.
- Powerful visibility settings to control who can access each part of your store: product categories, coupons, payment options, etc. That way, you can show custom content to logged-in versus guest users.
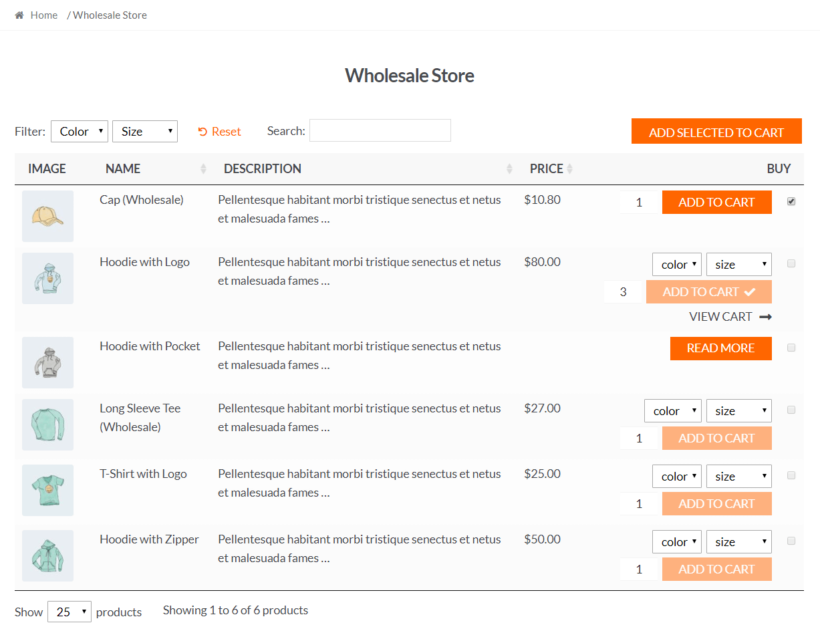
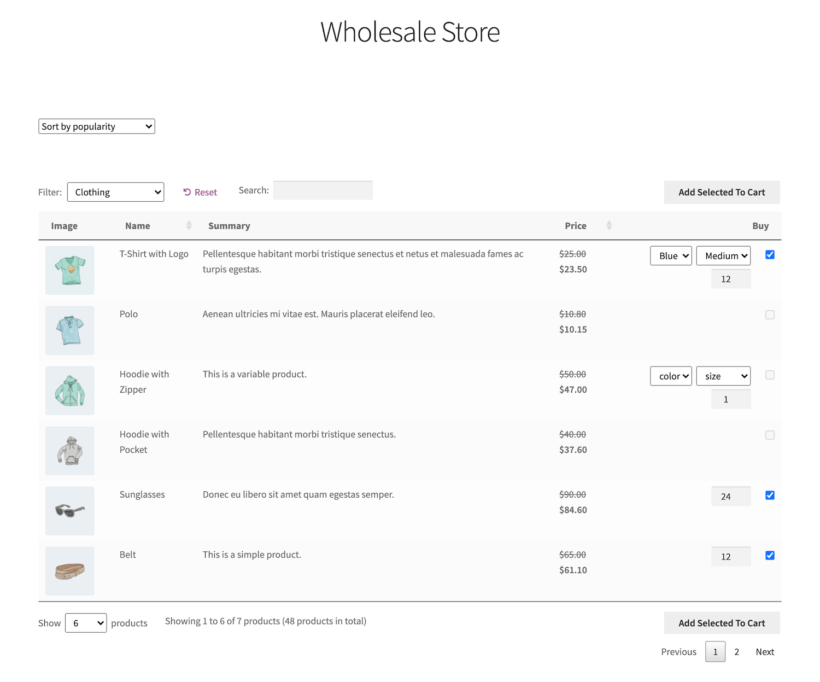
You can use WooCommerce Wholesale Pro on its own to add the tax exemption option to your ecommerce site. Alternatively, opt for the 2-plugin bundle which pairs it with WooCommerce Product Table to build a beautiful and super-intuitive wholesale ordering form like this:

Now, let's look at how to create tax-exempt user roles in WooCommerce.
How to set a WooCommerce tax exemption
First, the quick version. Here are the steps to set up a tax exemption for WooCommerce:
- Configure your WooCommerce store's default tax settings.
- Configure WooCommerce Wholesale Pro's global settings.
- Build a custom registration page to collect users' tax information.
- Create tax-exempt user roles.
- Bonus: Create wholesale quick-order forms.
Now here's the detailed version, with some screenshots sprinkled in to help.
1. Configure your WooCommerce store's default tax settings
You need to make sure your store is set up to properly calculate taxes before you can add the tax exemption option. Here's how to do this:
- Navigate to WooCommerce → Settings → General in your site's admin and locate the "General options" section.

- Tick the "Enable taxes" checkbox to activate tax calculations for your store. Scroll down to save your settings.

- Navigate to the newly created tax tab in WooCommerce → Settings → Tax → Tax options, and select "No, I will enter prices exclusive of tax".
- Fill in the remaining details to update your store's tax settings. Click "Save changes" once done.
- Next, navigate to the appropriate standalone tab(s) within WooCommerce → Settings → Tax to set your preferred tax calculation methods and tax classes. You can set:
- Standard rates: This calculates taxes based on your store's base location and the customer's shipping or billing address.
- Reduced rates: This allows you to set reduced tax rates for specific products or locations.
- Zero rates: This applies a 0% tax rate to certain products or locations.
- Hit "Save changes" once done.
2. Configure WooCommerce Wholesale Pro's global settings
Follow these steps to add the plugin to your site and configure its general settings.
- Add WooCommerce Wholesale Pro to your website and enter the license key in the setup wizard to activate it.

- Enable the option to show the user registration form on the wholesale login page.
- Enable the "Moderate new registrations" option to set up manual approval for new users. You will receive an email notification every time a new user registers. This gives you time to check customers' tax status and decide whether to assign them to a taxable or tax-exempt wholesale role when you approve their account.
- If you plan to apply tax to some wholesale user roles, don't select the "Disable tax" option. Otherwise, select it.
- If you want to offer a storewide percentage discount, enter it in the "Global discount" field. If not, leave it blank.
- Now, choose the preferred layout for the wholesale section of your store as well as product category and tag pages.
- Save your settings and then go to the main settings page.
3. Build a custom registration page to collect users' tax information
Now, it's time to create the signup form where customers can register and share their tax-related details. This removes the need to create an additional tax exemption form.
- Navigate to WooCommerce → Settings → Wholesale → Registration Fields in your WordPress admin to customize the fields to be shown on the dedicated customer registration page.

- Add custom field(s) that confirm customers' tax exemption status, and other relevant customer details you want to collect, such as business name, email addresses, business addresses, vat number, vat certificate expiry date, etc.
- As you enabled the option to show the user registration form on the wholesale login page in a previous step, the registration form will automatically appear on the wholesale login page on the front end. You can also add it to any page on your site with the
[wholesale_registration]shortcode if you prefer.
A quick note: By default, you can only add text fields to collect details about customers' tax exemption status. If you want to further customize the tax exemption form fields — such as to add a tax exemption checkbox or enable users to upload documentation to prove their tax-exempt status, you can use one of the methods detailed here. This lets you create a more advanced customer registration form that works with WooCommerce Wholesale Pro.
4. Create tax-exempt user roles
WooCommerce Wholesale Pro automatically creates a wholesale user role when you install it on your site. Earlier, I showed you how to assign a storewide discount and tax status in the setup wizard. But you can create extra wholesale user roles and assign a different tax exemption status (if needed). This will automatically remove tax charges from all orders they place on your site. Follow these steps:
- Head to WooCommerce → Settings → Wholesale → Roles in your site's admin.

- Select "Add new role".
- Name the user role. I recommend something relevant like "Wholesale User [Tax Exempt]" or "Tax Exempt Wholesale User".
- Update the global percentage discount for the role.
- Decide whether to automatically assign new wholesale customers to this role. (Of course you can manually assign and exempt specific customers later).
- Set the tax status for this role. Note that if you have set your base rule to be tax exempt, you can leave this set as the inherited setting. If your base rule is taxed, then disable tax here.
- Update the remaining options as you prefer and hit "Add role" once done.
That's about it! Now you can create a test user with this role and register, update customer details, and place an order to make sure that everything works as expected. You'll notice that the tax field will be removed from the entire WooCommerce checkout process, i.e., the cart and checkout pages as well as the order details page for exempt customers.
Bonus: Create wholesale quick-order forms
Optional: Many store owners choose to combine WooCommerce Wholesale Pro and WooCommerce Product Table to create intuitive, one-page order forms. This can help streamline the ordering experience and increase conversion rates. Feel free to skip this section if this doesn't fit your use case.

How to create a wholesale quick order form
Follow these steps to add the quick order form to your online store.
- Add WooCommerce Product Table to your site.
- Complete the steps in the plugin setup wizard to configure your order form's global settings. You'll find the same settings by navigating to WooCommerce → Settings → Products → Product Tables in your site's admin.

- Decide where to display the quick order form on your site's front end: Shop page, product search results, product categories, product tags, and product attributes.
- State the columns you'd like to show in the quick order form, such as
image,name,summary,price,buy. Check out the full list of product table columns here. - Enable lazy loading if you plan to showcase many products in the quick order form. This makes sure the form loads quickly.

- Select the preferred style for the add-to-cart button. I suggest "Cart boxes and checkboxes" for most stores.
- Allow quantity pickers to enable shoppers to easily adjust the product quantity when selecting products from the form.
- Decide how the variable products should be displayed in the product table: one variation per row, as dropdown lists, or with the 'Read More' button linking to the product detail page.

- Add your preferred filter options to allow customers to find products even quicker. You can add filters based on the table's contents or set up custom ones.
- Update other relevant options based on your preference. Check out this guide for additional ideas.
- Hit "Save changes" once done.
A quick guide to sales tax exemption certificates
A sales tax exemption certificate is a document provided by a government authority to certain businesses — such as B2B companies and nonprofit organizations - that excuses them from paying sales tax on purchases.
B2B entities often use sales tax exemption certificates to avoid double taxation on goods they purchase for resale. For instance, a software company buying computers for resale wouldn't pay sales tax with a valid exemption certificate.
Nonprofit WooCommerce stores use them to exempt themselves from sales tax on items bought for charitable activities — for example, buying supplies for a fundraising event.
Best practices for managing sales tax exemption certificates
In addition to updating your store's tax exemption settings, it's equally important to set up a proper process to verify information customers share about their sales tax or vat tax-exempt status.
Follow these tax exemption best practices
- Collect tax-exempt certificates and other relevant information upfront: Add all the necessary fields to accept customers' tax exemption details — customer's name, business name, certificate number, expiration date (if applicable), issuing authority, etc. — on the registration form. This ensures you have the necessary documentation on hand to verify the tax exemption requests. Each field accepts text, so add instructions telling people to enter the URL of an online location where you can download the form (e.g. on Dropbox or Google Drive). Alternatively, simply ask for their tax ID and verify it yourself instead of requesting the certificate.
- Verify the details with relevant issuing authorities: For example, If your store is located in the US, you should be able to easily verify the certificates on the Streamlined Sales Tax Governing Board's website. You can use the EU's VIES service to verify EU tax numbers. Similarly, many countries offer central online databases where you can verify the validity of certificates. If online verification isn't available or inconclusive, you may need to contact the issuing authority directly to authenticate the certificate before you grant tax exemptions.
- Maintain detailed records: Keep accurate records of all tax-exempt certificates and verification efforts. This documentation is essential for audits and ensures transparency in your tax compliance processes.
A quick note: Regulations vary depending on location. For instance, EU vat exemption rules are different from the US's. Work with a tax expert and conduct thorough research while setting up your tax exemption processes.
Related: How to add a VAT number field to the WooCommerce checkout.
That's how to tax exempt a user in WooCommerce!
If you sell to wholesale buyers, educational institutions, non-profit organizations, goverment entities, and the like, you'll likely need to make certain user roles or users in WooCommerce tax-exempt.
While role-based tax exemption isn't a default WooCommerce feature, WooCommerce Wholesale Pro lets you easily create unlimited user roles and set tax exemptions for each role.
Plus, it's an all-in-one plugin packed with ton of extra useful features — advanced pricing and discount rules, automatic and manual approval systems, robust visibility options to control who has access to which sections of your site, and much more. It comes with a 30-day money back guarantee so you can try it on your site risk-free.
Get started with WooCommerce Wholesale Pro today: