How to create a WooCommerce product gallery lightbox
As an online store owner, the easier you make it for customers to find what they’re looking for, the greater the chance of landing a sale. One way to achieve this is by making the process of buying from you as easy and efficient as possible, for example, by creating a WooCommerce product gallery lightbox.
Practically speaking, if visitors are interested in looking at product images, you might consider implementing quick view functionality into your e-commerce store that allows them to view product images and galleries without having to navigate to the single product page.
In this article, we’ll show you how to display your WooCommerce products in a lightbox along with the:
- Product image (with or without extra product information),
- Image zoom functionality, and
- Full product image gallery (with a choice of 2 gallery styles).
We’ll also step through some advanced display options to help you fine-tune your WooCommerce product gallery lightbox.
What is WooCommerce Quick View Pro?
WooCommerce Quick View Pro is a WordPress plugin that allows users to display product information and product images in a lightbox view. This makes it easy for customers to browse products and make purchases – without having to navigate to the single product page. Essentially, it works like a WooCommerce product image lightbox plugin.
The plugin adds a quick view option directly to your WooCommerce store’s main shop page and category pages. You also have the option to launch a gallery lightbox whenever a customer clicks on the product image or product name. This automatically disables links to the single product page i.e. the links are replaced with the quick view links.

As a result, you’re able to display the information a prospective customer would need to make a buying decision without any distractions or additional steps while delivering an outstanding user experience.
How to create a lightbox containing product images, image zoom, and the full product image gallery
Assuming you have a WordPress-powered website with ...
- WooCommerce installed, activated, and set up.
- Some products added to your online store.
… follow the step by step instructions outlined below to create a lightbox containing product images, image zoom functionality, and the full product image gallery.
Step #1: Install and activate the WooCommerce Quick View Pro plugin
If you haven’t done so already, get the WooCommerce Quick View Pro plugin and install and activate it on your WP website. I'll tell you how to set it up as a WooCommerce product gallery lightbox plugin.
Next, head over to WooCommerce -> Settings -> Products -> Quick view from the admin panel to activate the plugin license.
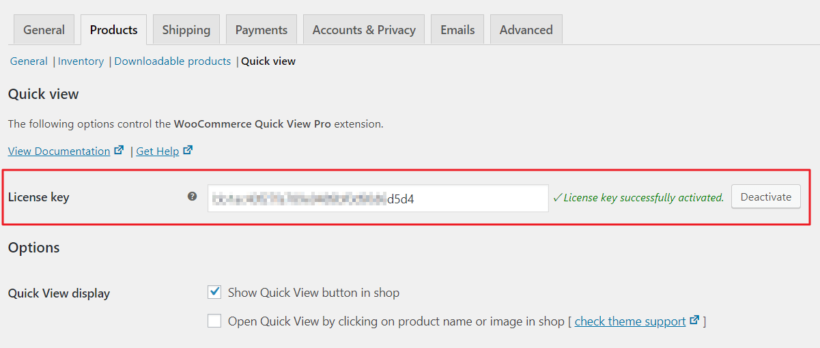
Click the Save changes button to proceed.
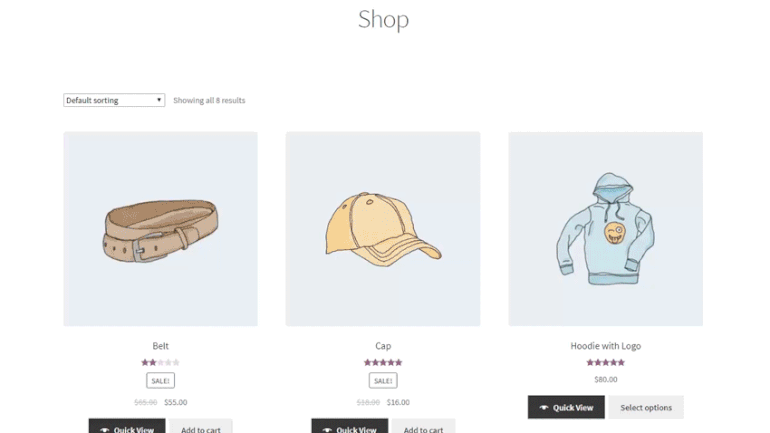
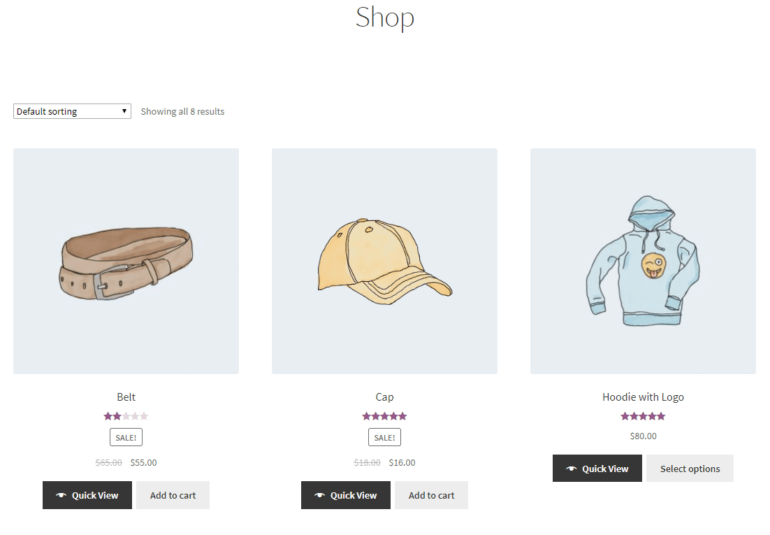
You’ll notice that the Woo Quick View plugin automatically displays products in a quick view layout as soon as you activate it. Your main shop page (and category archives) should have Quick View buttons under each product.
It should look something like this:
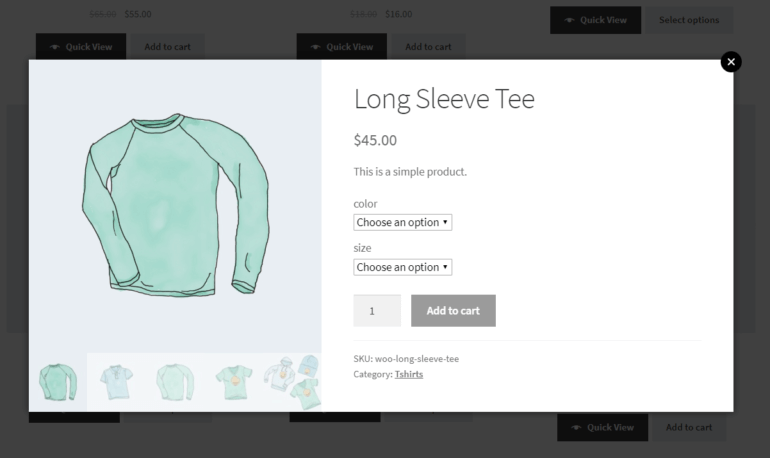
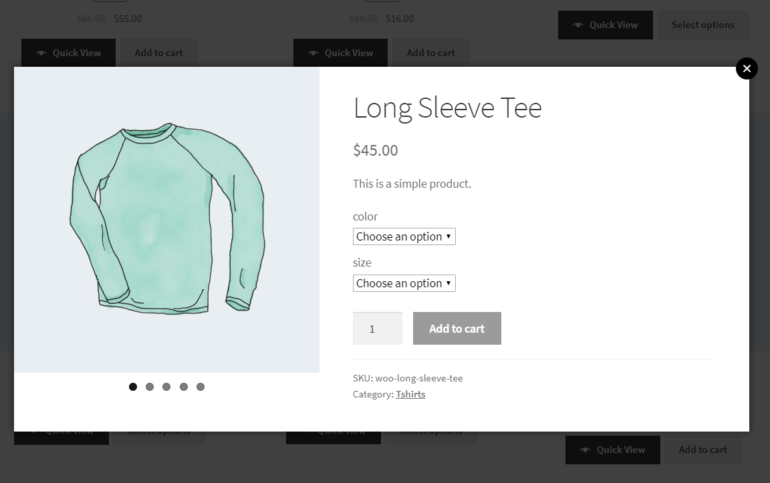
When customers click the Quick View button, the quick view lightbox opens and displays the following information:
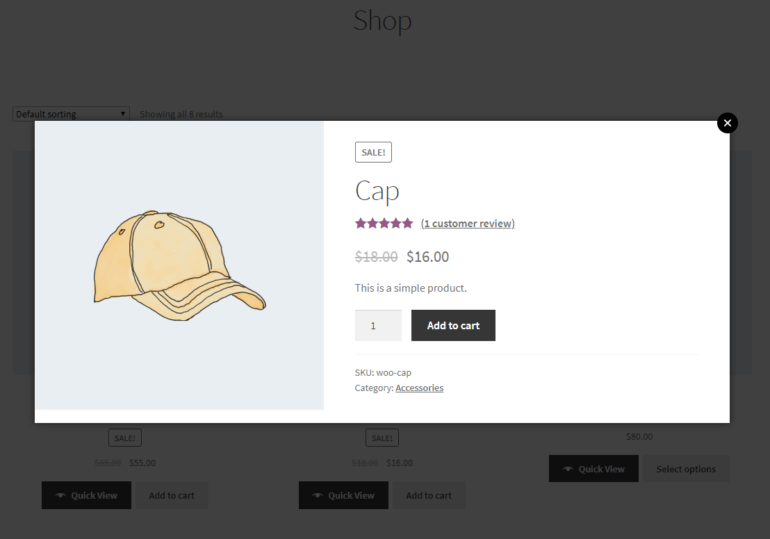
- Product name
- Product image
- Reviews
- Price
- Quantity selector
- Add to cart button
- Product information (SKU, category)
Step #2: Choose what information to display in the product quick view lightbox
Out of the box, the plugin displays the above-mentioned information in the lightbox view.
However, you can choose exactly what you’d like to display from the plugin’s settings page. Specifically, you’re able to display images with (and without) the product image and product details. Product details include product name, variations, attributes, SKUs, and categories. Here’s how:
From the WooCommerce Quick View Pro plugin’s settings screen (WooCommerce -> Settings -> Products -> Quick view), scroll down till you reach the Quick View contents option. Use the dropdown menu next to it to decide what to display inside the quick view lightbox:
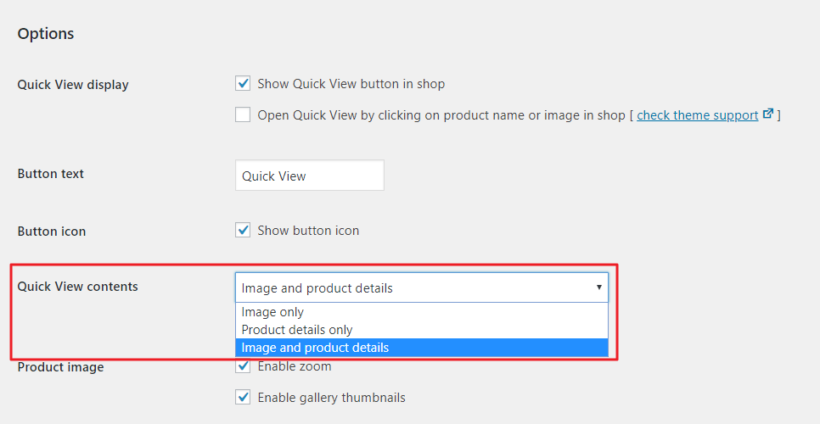
- Image only
- Product details only
- Image and product details (default setting)
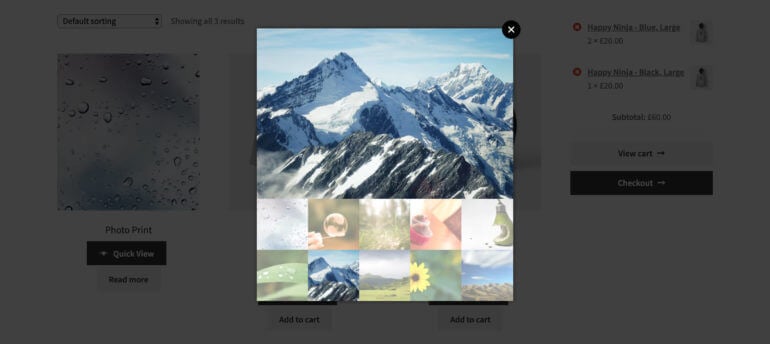
For example, if you set the Quick View contents to Image only, the lightbox will only display the product gallery. It will look something like this:
However, if you decide to go with the Image and product details setting, you can choose which product details to include in the quick view lightbox. The available options include:
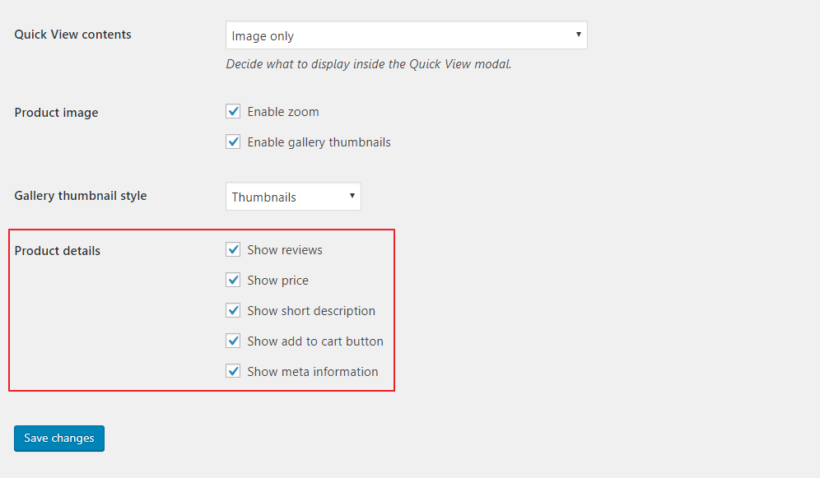
- Reviews
- Price
- Short description
- Add to cart button
- Meta information
Simply tick the checkboxes next to the product details you’d like to display in the quick view lightbox.
Step #3: Select a gallery thumbnail style
With WooCommerce Quick View Pro, you can choose how to display product gallery images in the quick view lightbox. You can decide between Thumbnails and Bullets.
From the same screen (WooCommerce → Settings → Products → Quick view), scroll down till you reach the Gallery thumbnail style option. Use the dropdown menu next to it to decide between displaying product gallery images as thumbnails or bullet navigation in the quick view lightbox.
If you decide to go with Thumbnails, the quick view lightbox will look something like this:
And if you decide to go with Bullets, the quick view lightbox will look like this:
With the bullet navigation option, customers can click through the bullets to browse the product gallery.
Related: How to create image galleries in WordPress using shortcodes.
Use WooCommerce Quick View with product tables
WooCommerce Quick View Pro integrates seamlessly with the WooCommerce Product Table plugin. Use them together to list products in an interactive table or order form layout, complete with add quick view buttons or links.
As a result, customers will be able to open up the full product image gallery in a WooCommerce product image lightbox directly from the table. 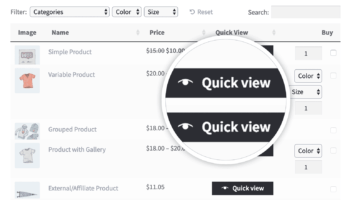
You can choose to add a Quick View button to the table. Or you can choose to have it launch whenever a customer clicks on the product name (or image) in the table.
When both the WooCommerce Quick View Pro plugin and the WC Product Table plugin are installed and activated to your website, you’ll see a new Quick View Pro option the the WooCommerce Product Table plugin’s settings screen (i.e. WooCommerce -> Settings -> Products -> Product tables).
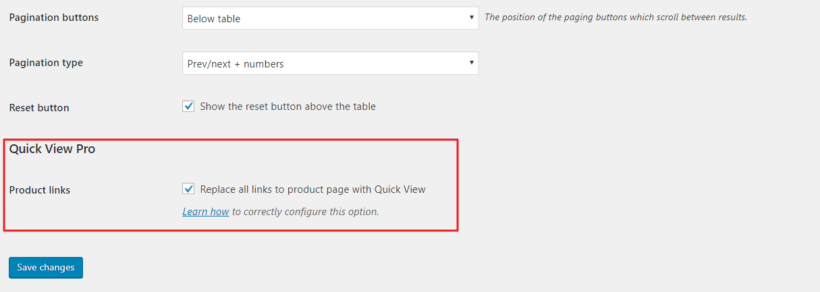
Ticking the checkbox next to the Product links option makes it so the product page links in your table layout open the quick view box instead of linking to the single product page. This is the perfect option for users who want to completely disable the individual product page.
Case study: Ink This and That’s product table with quick view functionality
Ink This and That sells different sorts of matching products including backpacks, dresses, t-shirts, swimsuits, and leggings. They use WooCommerce Quick View Pro along with WooCommerce Product Table to showcase their product galleries in a lightbox view.
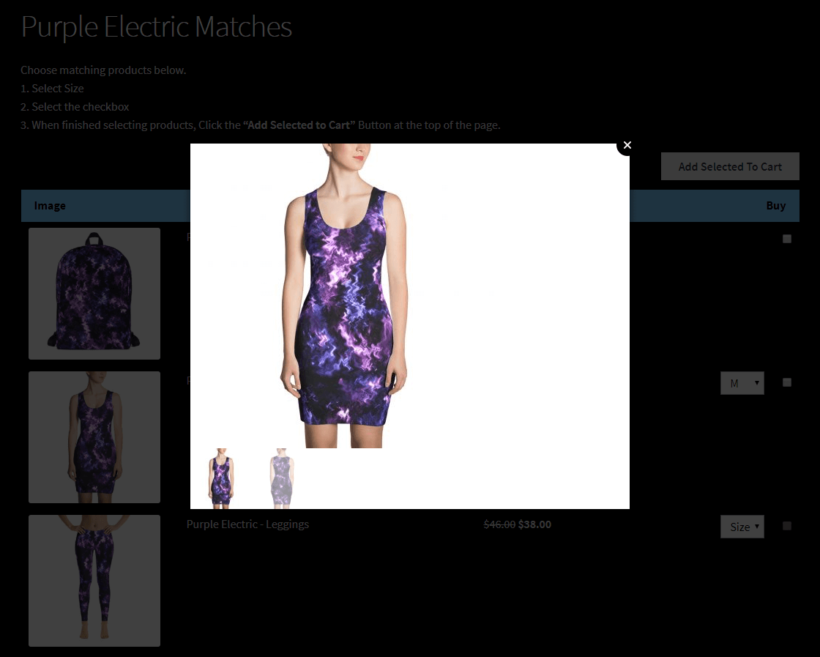
Whenever a customer clicks on the product image in the table layout, the product gallery opens up in a lightbox view. Customers can then zoom into the image and browse other images in the gallery. The e-commerce store chose to go with the Thumbnails gallery style for their WooCommerce gallery lightbox.
Further reading: Discover the best WordPress lightbox plugins.
Where to get the plugin
Integrating quick view into your main shop page and category archive pages makes it easy for customers to view product images and product galleries without having to click through to the single product page. It effectively optimizes the purchase process and helps you deliver a professional and enhanced user experience to your customers.
Do you have any questions about how to use a WooCommerce gallery lightbox plugin in your own online store? Let us know in the comments below!