How to let customers make an offer in WooCommerce

Want to allow shoppers to name their best offers instead of paying the listed product prices? Here, we'll share the best WooCommerce make an offer plugins available and show you how to use our top picks to create a well-functioning make-offer system in WooCommerce — no coding required.
Searching for the best WooCommerce make an offer plugin? Allowing customers to name the price they are comfortable to pay is a great way to boost sales in your online store. It also enhances customer engagement by providing a unique shopping experience. In this post, I'll discuss the top make an offer plugins to consider. Then, I'll show you step-by-step how to set up and manage a full-featured "Make an Offer" system.Plugins used to set up the make-an-offer system in this tutorial:
- WooCommerce Product Options — We'll use this robust plugin to add a "Make an Offer" field to product pages where customers can input their offers.
- WooCommerce Order Approval — We'll use this powerful plugin to upgrade the default ordering system in WooCommerce. This will allow us to accept or reject offers, and send automated emails to customers.
An overview of how WooCommerce make an offer plugins work
In WooCommerce, make an offer plugins enable customers to submit custom price proposals for items they are interested in buying. Setting up a make-an-offer system transforms the regular ecommerce shopping experience by allowing customers to submit the price they are comfortable paying, instead of paying the fixed amount that's listed as the product price. This gives buyers more control in the ordering process, and can lead to increased conversions, as buyers feel empowered to negotiate a price that works for them.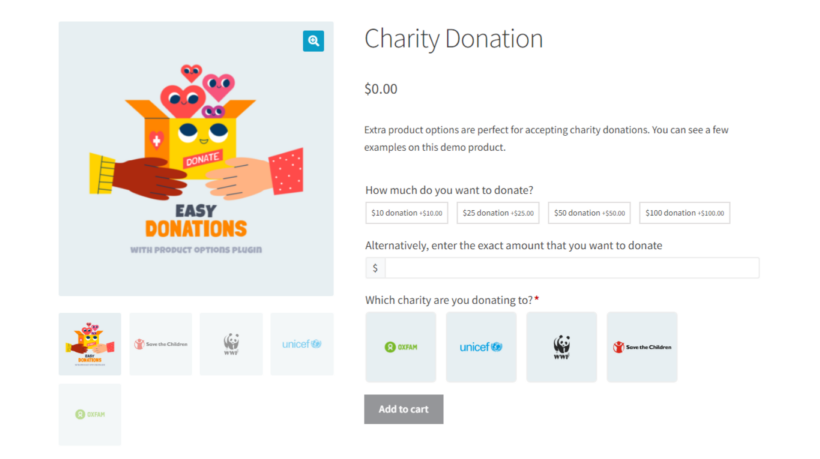
Overview
- An online shopper views an item on your WooCommerce site, likes it, and decides to make an offer.
- They enter their proposed price in the appropriate field and click on the "make an offer" button to submit it.
- The potential customer's offer is then sent to you, the store admin, for review.
- You can choose to accept the offer, decline it, or respond with a counteroffer to further negotiate with the prospective customer.
- Once both store admins and customers agree on the amount, the customer can pay to complete their purchase at the negotiated price.
Setting up a make-an-offer system is especially useful for items with flexible pricing, whether that's due to their unique nature, custom dimensions, or high value. It allows WooCommerce merchants to maximize the revenue they might have otherwise missed out on. By now, you may have noticed that WooCommerce make an offer plugins function similar to ebay’s "Best Offer" feature which enables buyers and sellers to negotiate prices. So it's fair to say that this feature can deliver similar results for WooCommerce businesses. For instance, research shows that items listed on eBay for immediate purchase with the "Best Offer" option achieve 20% more sales than those without. Considering its many benefits, enabling customers to name the amount they are comfortable paying for your products is a no-brainer. Below, I'll introduce you to the types of plugins that you'll need to set this up.Integrating a Make an Offer feature in WooCommerce can really drive customer engagement and boost sales. From my research across hundreds of stores, those that allowed offers saw a noticeable uptick in sales - around 27% on average in just three months. This feature not only keeps customers engaged but also helps move inventory that’s been sitting too long.
MahdiAli KhanusiyaCo-Founder at Ilmosys
What are the best WooCommerce make an offer plugins?
There are two main ways to set up WooCommerce make an offer. Each works in slightly different ways:- Option 1 - Bundle a product options plugin with an order approval plugin: This method involves combining 2 types of plugin:
- A product add-ons plugin which adds a "Name your price" field to product pages, which allows customers to propose the price they are happy to pay for the product.
- An order approval plugin to enable store admins to accept or reject the offers that customers make.
- Option 2 - Install a make an offer plugin: There are plugins on the market which combine the two functions that I mentioned above. However, the quality of these tends to be lower than the 2-plugin combo. That's why it's generally best to use Option 1 instead.
The best WooCommerce make an offer plugins
- WooCommerce Product Options
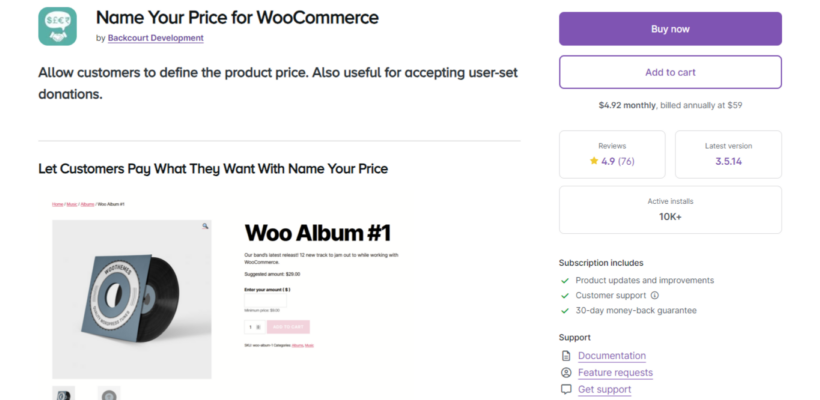
- Name Your Price
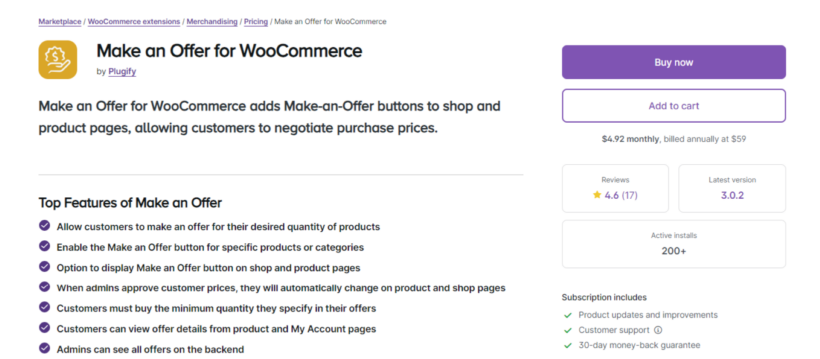
- Make an Offer for WooCommerce
- WooCommerce Offers
- WooCommerce Name Your Price
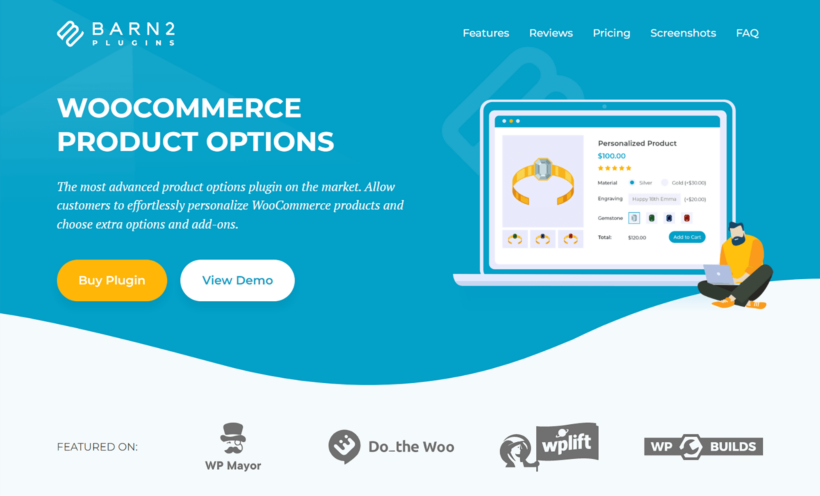
WooCommerce Product Options
Name Your Price
Make an Offer for WooCommerce
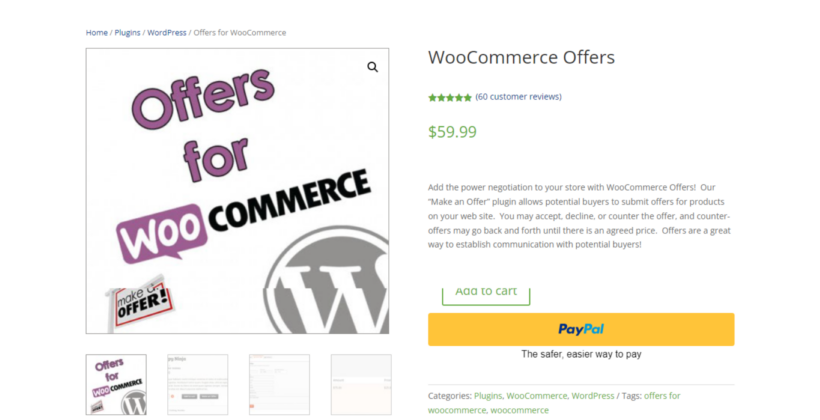
- Send custom automated email notifications to customers to inform them whether their offer was approved or rejected.
- Add a "make an offer" button next to the default "add to cart" button on WooCommerce Shop and product detail pages.
- Control which users can make offers based on their user roles, and more.
- Add a popup form where shoppers can specify the product quantity, and per-unit price, and add a comment along with their offer.
- Allow shoppers to chat with admins and view the status of their offers right from the product detail pages after making the offers.
WooCommerce Offers
WooCommerce Name Your Price
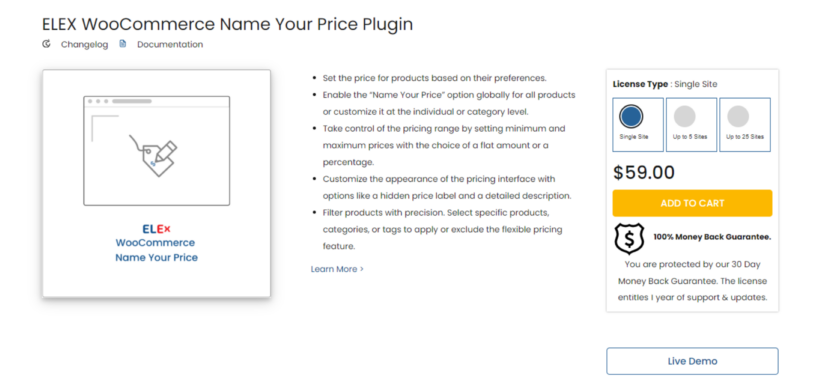
- Set minimum and maximum price rules.
- Restrict which customers can make offers for products based on their user role.
- Reword the text on the add-to-cart button.
- Apply the make offer option storewide, or at the product category or individual product level.
How to add make an offer features to WooCommerce
Next, I'll show you step-by-step how to set up a fully functioning make-an-offer system in WooCommerce. First, we'll use WooCommerce Product Options to add the 'Make an offer' field to your store. Then, we'll upgrade the order approval process using the WooCommerce Order Approval plugin. Together, they're the perfect combination for allowing customers to make an offer in WooCommerce. Let's get started.Add the 'Make an offer' field to product detail pages
Visual learner? Feel free to check out the video on how to use WooCommerce Product Options on your site. Otherwise, read on for written step-by-step instructions.- Add WooCommerce Product Options to your site.
- In your site's admin panel, navigate to Products → Product Options → Add Group.
- Name the group, ideally something simple and descriptive. Ticking the checkbox next to the "Display" option will make it visible on your site's front end.

- Next, choose the visibility settings, i.e., which products you wish to add the "Make an offer" field to. You can add it storewide (to all products), to specific categories, or to specific products.
- Locate the "Options" section and click on "Add option".

- Name the field, ideally something simple and descriptive too. As before, ticking the checkbox next to the "Display" option will make it visible on your site's front end.
- Select "Customer defined price" from the "Type section. Note: Check here for more details on the product options.
- Update the label that appears alongside the "Make an offer" field on the front end. You can also add a brief description which will be shown under the "Make an offer" field.

- Tick the "Required" checkbox to make it mandatory for customers to input their desired offer into the make an offer field.
- Optionally, you can also set up conditional logic to control whether the product option fields (including for "Make an offer") are hidden or shown.
- Hit "Save changes" at the bottom of the page once done.
Implementing order approval for seamless offer management
So customers can now input their desired offer price from the product detail pages. But there's still one more step until the purchasing process is complete. For that, we'll need the WooCommerce Order Approval plugin. WooCommerce Order Approval gives store admins control over incoming orders by allowing them to review and decide on each order before the payment is processed.Step 1: Update your site's payment method
Note: WooCommerce Order Approval is available in both free and premium versions. By default, its free version replaces the ordering process globally, i.e. for all orders. To enable order approval on a category or product level, you'll need to get the pro version. For this tutorial, we'll use the free version.- Add the WooCommerce Order Approval plugin to your site.
- In your WordPress admin, navigate to WooCommerce → Settings → Advanced → SG Order Approval.

- Click on the payments hyperlink in the "Enable order approval at payments" section. This automatically takes you to the WooCommerce → Settings → Payments → Payment methods page.

- Scroll until you find the WooCommerce order approval section and click on "Manage" to customize the option.
- You'll notice the "Enable Woocommerce Order Approval Payment" is enabled by default. Leave it as is.

- Update the text in the "Title" field to match the phrasing used for the "make an offer" button. This controls the title for the payment method the customer sees on the checkout page.
- Update the description field to match the phrasing for the payment method description the customer sees on the checkout page.
- Update the details in the "Instructions" field as this is shown to the customer on the Order Thank You page.
- Hit "Save changes" once done.
Step 2: Update email notifications sent to admins and customers
- Head back to WooCommerce → Settings → Advanced → SG Order Approval in your WordPress admin.
- Click on the email hyperlink in the "Enable order approval at payments" section. This automatically takes you to the WooCommerce → Settings → Emails page.

- Click on the "Customer preorder notification". This is the email sent to customers once they submit their offer for each product. From the edit page, you can amend the subject, email heading, and body of the email. You can also select the type of email, whether plain text, HTML, or multipart.

- Click on the rest of the relevant order email notifications to amend the emails sent to both store admins and customers once the offer is placed. The email templates you need to update are:
- Admin pre order notification.
- Order approved notification.
- Order rejected notification.
Step 3: Update inventory calculation settings
Allowing customers to make an offer isn't WooCommerce's default order management process. So, you'll need to decide how to calculate inventory for these kinds of products in your store.- Go to WooCommerce → Settings → Advanced → SG Order Approval in your WordPress dashboard.
- Select the desired option from the "Manage inventory" dropdown. You can either enable the WooCommerce Order Approval plugin to reduce stock when your store receives a new order, reduce stock when store admins approve a new order, or let WooCommerce or another inventory management plugin handle the inventory management.
Best practices for setting up a WooCommerce make an offer system
These tips will help you set up a robust make an offer system that not only engages customers but also drives revenue for your WooCommerce store.Apply selectively
Unless your pricing strategy demands it, may not be ideal to enable the make an offer option for every product in your store. Instead, set this up only for items where customer-defined pricing makes sense. Typically, this means unique or high-value items like antiques or bespoke items with custom measurements like handcrafted furniture or items can pay for in custom amounts like gift cards, gift certificates and donations.Set clear guidelines
Establish the minimum amount you're prepared to accept for each item to speed up the negotiation process and make sure that you're not wasting time on low offers.Provide transparent information
The ordering process for make-an-offer orders varies slightly from the regular ecommerce journey. Adding a section that clearly explains how the make-an-offer process works on your website (whether on product detail pages or in a dedicated FAQ section) can help set realistic customer expectations and reduce confusion. Include details such as how long it typically takes to respond to an offer, what happens after an offer is accepted, and any terms or conditions that apply.Set up automatic notifications
Automating the process of sending email notifications to store admins when offers are accepted or rejected reduces the burden of sending them manually. This keeps all parties informed and improves the overall customer experience (CX). Plus, prompt notifications can build excitement and encourage customers to complete their purchases quickly.Use a clear call-to-action
Make sure the "make an offer" button is highly visible on your product pages so customers can't miss it. You can use contrasting colors or prominent placement to draw attention to this option. The text on the button should clearly communicate its purpose, so use text like "Make an Offer" or "Suggest Your Price" to eliminate any ambiguity.Supercharge your revenue with the WooCommerce make offer feature today!
There's a good reason why ebay, Etsy, Vinted, and Depop enable buyers to make an offer. Creating a make-an-offer system transforms the regular shopping experience on your online store and gives customers more control in the buying process. The result? More sales and improved customer satisfaction. However, WooCommerce doesn't include this option by default. Luckily, you can set this up in ten minutes or less with the WooCommerce Product Options and WooCommerce Order Approval plugins — zero css, php, or html coding skills required.- WooCommerce Product Options is a robust plugin used to add the make an offer field on product detail pages where customers can input their offers.
- While, WooCommerce Order Approval is a powerful plugin that overhauls the default ordering system in WooCommerce, automatically sends email notifications to admins and customers throughout the ordering process, and more.