WooCommerce coupons guide for store owners
Looking for the best way to attract new customers and boost sales in your WooCommerce? You should consider using a WooCommerce coupon field. Let’s explore how to do this using the best coupon plugins.
Coupons are a great way to drive sales, reward loyal customers, and encourage repeat purchases in your WooCommerce store. Whether you're offering discounts on specific products, running seasonal promotions, or providing exclusive deals to subscribers, WooCommerce coupon fields give you a solid starting point. However, it does have its limitations.
In this guide, we’ll show you how to create WooCommerce checkout coupon codes the default way and explore the challenges that come with using the built-in system. You’ll also learn how to add a coupon field to checkout and generate coupons with custom code, integrate them with subscriptions, and display them in a popup cart for better visibility and conversions.
Read on to get started or watch this video for a complete walkthrough.
How to create a WooCommerce coupon code the default way
Here, we'll go over the step-by-step guide to creating discount coupon codes using the default feature with WooCommerce. Follow these steps:
1. Create a new WooCommerce coupon
The first step is to add a new coupon code to your site:
- Log into your WordPress dashboard.
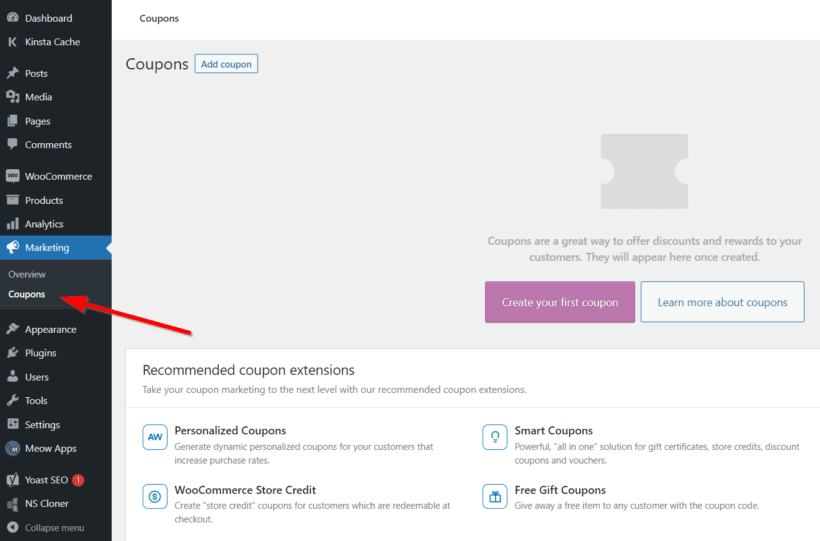
- From the left panel, navigate to Marketing → Coupons.

- If you've never created a coupon before, click on the "Create your first coupon" button. If you have, click on the 'Add coupon' button.

- You should now be on the "Edit coupon" page. Enter a unique code for your coupon in the "Coupon code" field. This code is what shoppers will use to apply the discount on the checkout page. Make sure that it's memorable, relevant to the campaign, and easy to type. For example, if you want to create a unique code for people who follow your business's social media page, you can use a distinct code like "SocialSquad". Alternatively, you can have WooCommerce automatically generate a coupon for you by clicking on the "Generate coupon code" option (I don't recommend this as it'll generate a totally random code).
- Optional: Add a brief description for internal reference in the "Description" field. For example, you could describe the discount type or the campaign it's associated with. This makes keeping track of things easier, especially if you have multiple active coupons.
2. Customize the general coupon details
After you've created your unique coupon code, it's time to customize it:
- Locate the "General" tab in the "Coupon data" module (it's right underneath the "Description field").
- Select your preferred discount type. There are three basic options to choose from: percentage discount, fixed cart discount, and fixed product discount. Here's what they mean:
- Percentage discount: A fixed percentage off the customer's entire cart.
- Fixed cart discount: A fixed amount off the customer's entire cart.
- Fixed product discount: A fixed amount off specific products rather than the entire cart.
- Set the value of the discount in the "Coupon amount" field.
- Tick the "Allow free shipping" checkbox if you want to offer customers both a discount and free shipping.
- Optional: Pick a desired date from the calendar to set an expiration date for the coupon. This limits the timeframe during which customers can use the coupon. After the expiry date, the coupon will no longer be valid.
3. Specify usage restrictions for the WooCommerce coupon
The 'usage restriction' tab is where you can set basic conditions to govern the coupon usage on your WooCommerce site:
- Set minimum spends and maximum spends, i.e., subtotal to be allowed to use the coupon.

- If you want to restrict the coupon to be used individually and not combined with other coupons, tick the "Individual use only" checkbox. This prevents shoppers from stacking multiple discounts on a single order.
- Tick the "Exclude sale items" checkbox to prevent customers from using the coupon code on items that are already on sale.
- If you want the coupon to be valid for all products in your store with no exceptions, leave the "Products", "Exclude products, "Product categories", and "Exclude categories" fields blank.
- To apply the coupon code to specific products, add them in the "Products" field. Note that all variants of the product will be eligible for the coupon code as there's no way to exclude specific variations.
- Optional: Specify selected products to be excluded from the coupon code.
- If you want to apply the coupon code to entire product categories, add them in the "Product categories" field.
- As with individual products, you can exclude entire categories from the coupon code. Specify them in the "Exclude categories" field.
- Optional: Specify emails to check against when a purchase is made in the "Allowed emails" field.
4. Specify usage limits for the WooCommerce coupon code
As the label implies, the 'Usage limits' tab is where you'll enter any limits to govern how the coupon code is used in your WooCommerce store:
- Specify the maximum number of times this coupon can be used until it's no longer valid in the "Usage limit per coupon" field. This helps you prevent abuse or overuse.

- In the "limit usage to X items" field, enter the maximum number of individual products the coupon can apply to. If you leave this field blank, the code will apply to all products in customers' shopping carts.
- You can limit the number of times individual customers can use the coupon in the "Usage limit per user" field. This prevents customers from overusing the coupon code.
- Scroll to the top of the page and hit "publish" to save the coupon.
5. Publish and test the WooCommerce coupon code
Once you've created the coupon, you'll find it in the Marketing → Coupon section of your WordPress admin dashboard. I recommend that you test it first and confirm that everything works as expected before rolling it out to real customers.
To test it: Simply head to the front end of your WooCommerce site, add eligible products to your shopping cart, and then apply the coupon code. You'll know it works if it's successfully applied to your purchase.
How to add a WooCommerce coupon code field to checkout
Adding a coupon code field to WooCommerce checkout is relatively easy. To get started, you first need to enable the coupon field in WooCommerce. Now you're probably wondering, where is the coupon section in WooCommerce?
You can find the coupon submenu in the Marketing section on your WordPress dashboard. Clicking Coupons will take you to the coupon management page. Here, you can create, edit, and manage coupon codes for your online store.
To enable coupons, go to WooCommerce → Settings → General on your WordPress dashboard.
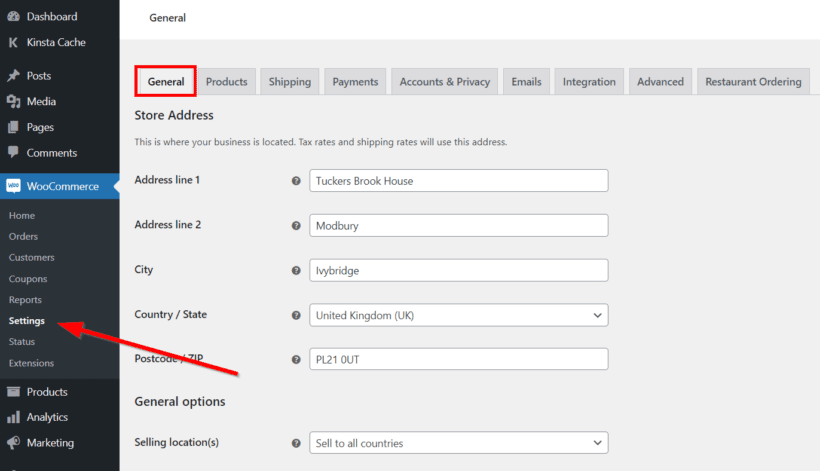
Scroll down to the Enable Coupons section and check the Enable the use of coupon codes box to enable the coupon field. Click Save changes at the bottom left corner of the page to save your changes.
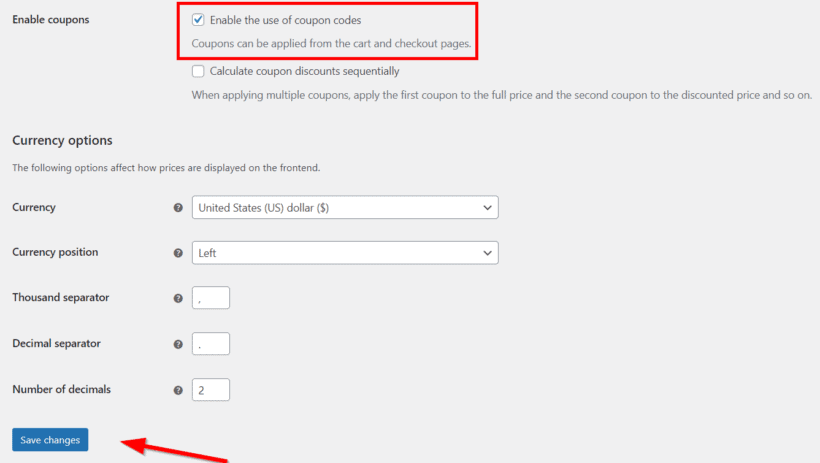
By enabling or disabling the coupon field, you can control whether customers can apply coupon codes at checkout. If the coupon field is disabled, customers cannot enter coupon codes on the cart or checkout pages, even if you have created coupon codes in your store.
The problem with using the default WooCommerce coupon feature
It's worth mentioning that there are several limitations with the default coupon options:
- It can only create basic coupon offer types: The default coupon feature only offers three discount types: percentage, fixed cart, and fixed product discounts. You can't offer more effective discount types like buy X get Y (think: buy-one-get-one/BOGO deals), tiered pricing, and more.
- It doesn't let you add advanced coupon conditions: Conditions help tailor discounts to be as effective and profitable for your business as possible. WooCommerce's default coupon feature lets you set basic restrictions to control how the coupons are used, such as adding minimum and maximum spends. However, you can't set more advanced conditions like applying coupons only when certain items are in the cart, for specific user roles, and more.
- It lacks flexibility: You can apply coupons to specific products and product categories. You can also exclude them from specific products and product categories. However, it doesn't let you apply coupons or exclude individual product variants. For example, let's say you sell hoodies in three colors: black, blue, and pink and you only want to offer blue hoodies for sale. If the hoodies are set up in your store as variable products, you'll have to offer discounts on all three colors, not just the blue ones.
Best plugins to improve the WooCommerce coupon code field
The inbuilt WooCommerce coupon code functionality is excellent. But you may need more to provide the best possible customer experience when redeeming coupons. In this case, we recommend using a plugin that enhances the WooCommerce coupon field. Let's take a look at the 3 best plugins you should consider.
1. WooCommerce Fast Cart by Barn2
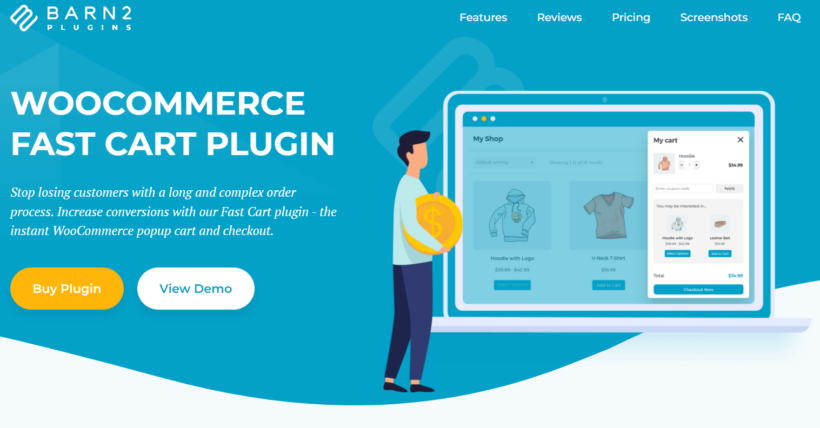
WooCommerce Fast Cart is a feature-rich plugin that enhances customers' shopping experience by giving them the option to swiftly add items to their cart without leaving the product page. Customers can add several products to their cart at once with the help of this plugin, which shortens the buying process.
WooCommerce Fast Cart improves the coupon code field by allowing customers to seamlessly apply a coupon code to an order. This can be achieved by autocompleting coupon codes, displaying coupon code suggestions based on the customer's purchase history, or providing an AJAX-powered form for applying coupons directly from the cart page without reloading the entire page.
Benefits
- High coupon redemption rates You can display the checkout in a popup with the coupon code field so that customers can redeem coupons and complete their orders without leaving the page. This encourages more customers to use coupons, resulting in more sales and revenue.
- Quicker checkout Shortens the time needed to finish a transaction and enter a coupon code, giving customers a better checkout experience overall.
- Enhanced coupon tracking management Integrates with WooCommerce's built-in coupon functionality to allow store owners to manage coupons and monitor their effectiveness without stress.
See below for full setup instructions.
2. Advanced Coupons for WooCommerce
Advanced Coupons is a powerful plugin that allows you to create amazing coupons on WooCommerce. The plugin provides advanced coupon features and options to the existing coupon functionality in WooCommerce, such as creating and managing custom coupon rules, offering several discount deals, and more.
Benefits
- Improved coupon analyses Gives store owners comprehensive coupon reports so they can monitor the effectiveness of their coupon promotions.
- Custom coupon rules This enables store owners to set up and manage specific coupon rules, such as 'buy one get one free,' minimum purchase amount, product restrictions, etc.
- Tiered discounts Offers tiered discounts depending on how many items are in the cart or the cart totals.
3. YITH WooCommerce Coupon Email System
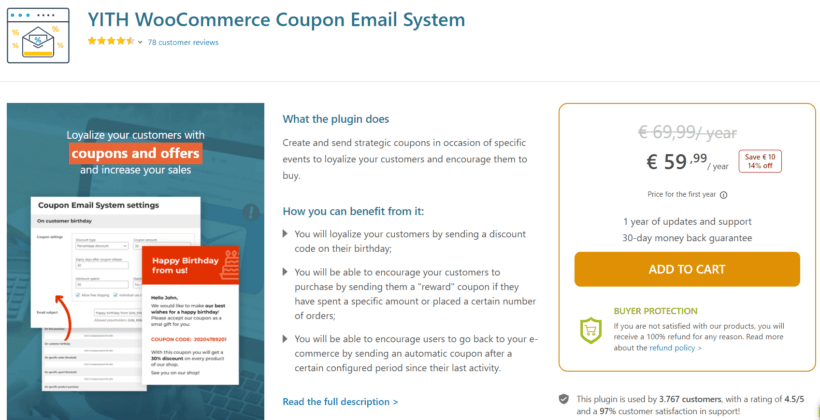
YITH WooCommerce Coupon Email System is a WooCommerce plugin that lets store owners create and manage coupon campaigns straight from the WooCommerce dashboard and provides an email system for sending coupons to customers. The plugin enhances the coupon code field by allowing store owners to send coupon codes directly to their customers through email.
Benefits
- Automatic coupon generation Generates coupons automatically and includes options for customizing the format, length, and prefix/suffix of coupon codes.
- Detailed reporting Offers in-depth analysis of coupon usage, enabling store owners to evaluate the effectiveness of their coupon campaigns.
- Email scheduling Store owners can schedule email campaigns and specify the precise time and date they want coupons to be sent.
- Personalized coupon campaigns These campaigns let store owners create and send customized coupons to customers based on their shopping history or to all customers as part of a promotional campaign.
How to create WooCommerce coupons with code
Customizing the appearance and functionality of WooCommerce coupons manually is time and energy-draining. This is where programmatic coupon creation and customization come in.
Adding and customizing WooCommerce coupons programmatically eliminates the need for manual coupon creation. This saves time and reduces the risk of errors. Programmatic WooCommerce coupon creation can also:
- Handle many coupons. This is ideal for stores with a large customer base or multiple promotions. In addition, customizing coupons programmatically saves time.
- Provide more control and flexibility over coupon design and behavior. This allows store owners to fine-tune their promotions. And meet specific goals and target specific customer segments.
- Be integrated with data from other systems, such as customer behavior data. You can use this to create targeted and personalized promotions. These types of promotions are more likely to be successful.
- Ensure consistent coupon design, messaging, and behavior across multiple promotions. Hereby, improving the customer experience and brand image.
If you are not a developer we strongly recommend hiring a developer to help you set up coupons using custom code.
If, however you're comfortable editing code, you may find these tutorials/resources helpful.
How to combine WooCommerce coupons with subscriptions
Do you want to support coupons for your subscription products? YITH WooCommerce Subscriptions integrates perfectly with WooCommerce coupons. This allows you to offer discounts on recurring payments for subscription products. When a customer applies a coupon code to a subscription product, the discount will apply to all recurring payments for the subscription duration.
You need to create a new coupon code and assign the coupon to a subscription product. When a customer adds a subscription product to their cart, they can enter a coupon code on the checkout page.
If the coupon code is valid, the discount will be automatically applied to recurring payments for the subscription duration. The discount will be applied to all future recurring payments for the subscription as long as the coupon is valid and the conditions are met.
Note that some restrictions apply when using coupons with WooCommerce Subscriptions. For example, you can apply one coupon code per subscription. You're also limited to certain types of coupons, such as Fixed cart discount coupons. It's important to carefully review the coupon conditions and restrictions before using them with subscription products.
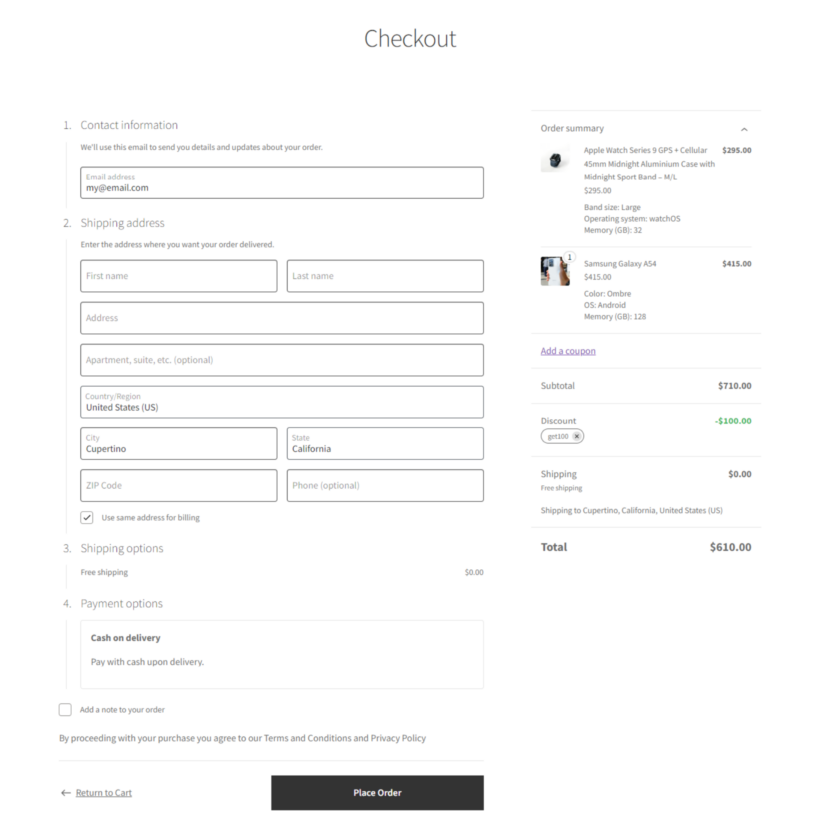
How to display WooCommerce coupons in a popup cart
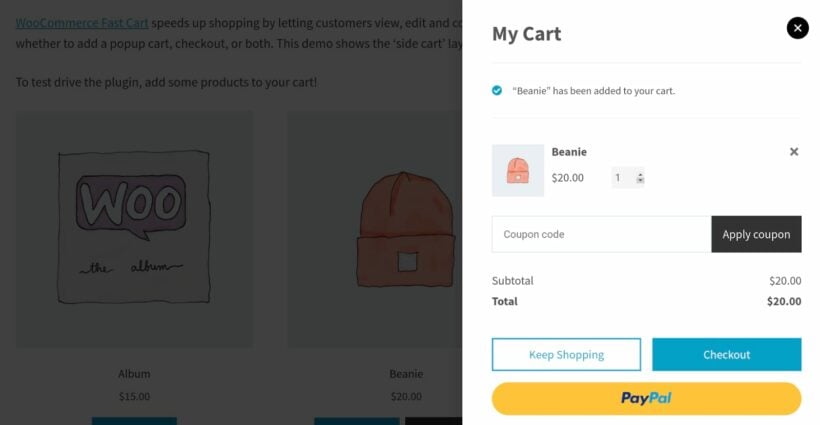
If you want to streamline the checkout process and make it easier for customers to redeem discounts, displaying the WooCommerce coupon field directly in a popup cart is a great solution. With the WooCommerce Fast Cart plugin from Barn2, you can move the coupon field to a quick-access cart, allowing customers to apply coupon codes without leaving the page.
Here’s how to set it up:
- Install and activate WooCommerce Fast Cart - Download and install the plugin on your WooCommerce store.
- Enable the popup cart - Navigate to the plugin settings and configure it to display a fast checkout cart when customers add items.

- Enable the WooCommerce coupon field to the popup cart - In the plugin settings, ensure the coupon field is enabled so customers can enter their discount codes easily.

- Test the WooCommerce checkout coupon functionality - Add a product to your cart and check that the WooCommerce coupon checkout page field appears in the popup.
- Optimize the user experience - Use AJAX to apply coupons instantly without refreshing the page, ensuring a seamless experience.
By using WooCommerce Fast Cart, you can improve conversions by making it easier for customers to apply coupons on the checkout page. This eliminates friction, reduces cart abandonment, and enhances the shopping experience.
Streamline your coupon checkout process with Barn2
WooCommerce coupons are a powerful tool for increasing sales and enhancing customer satisfaction. In this guide, we’ve covered how to create coupons using WooCommerce’s built-in features, the limitations of the default system, and how to overcome them with custom code and plugins. We also explored ways to maximize the impact of coupons, such as integrating them with subscriptions and displaying them in a popup cart.
By implementing these strategies, you can create a more engaging shopping experience and encourage customers to take advantage of your offers. If you have any questions or need further clarification, feel free to ask in the comments!
FAQs
What is a WooCommerce coupon field?
A WooCommerce coupon field is an input field in the checkout process of a WooCommerce-powered online store. Customers can use this field to enter a coupon code to apply a discount to their order.
WooCommerce coupons are discount codes customers can apply during the checkout process in a WooCommerce online store. These coupons may provide a percentage off the total order value. They can also be in the form of a specific amount discount, free delivery, or buy one get one free (BOGOF) offers.
Coupons encourage customers to shop more and increase revenue for the online store. The WordPress admin generates and manages the coupons. They can set conditions such as a minimum purchase value, product restrictions, and expiration dates.
What are the benefits of using WooCommerce coupons?
Using coupons on your WooCommerce store, you get to:
- Increases sales and customer loyalty by offering discounts and promotions.
- Clear out slow-moving inventory by encouraging customers to buy clearance items.
- Provide an incentive for new customers and first-time visitors to try your store.
- Encourage repeat business by offering special deals to existing customers.
- Track the effectiveness of marketing campaigns through detailed coupon statistics.
- Offer special deals to certain groups of customers, such as premiemail subscribers.
- Promote customer retention through loyalty-building incentives and exclusive deals.
- Enhance customer engagement through targeted email campaigns and social media promotions.
- Increase customer satisfaction and perceived value through special offers and savings opportunities.
A popular example of how coupons work is the annual Black Friday sales. During these sales, various online businesses slash their prices and offer different discounts.
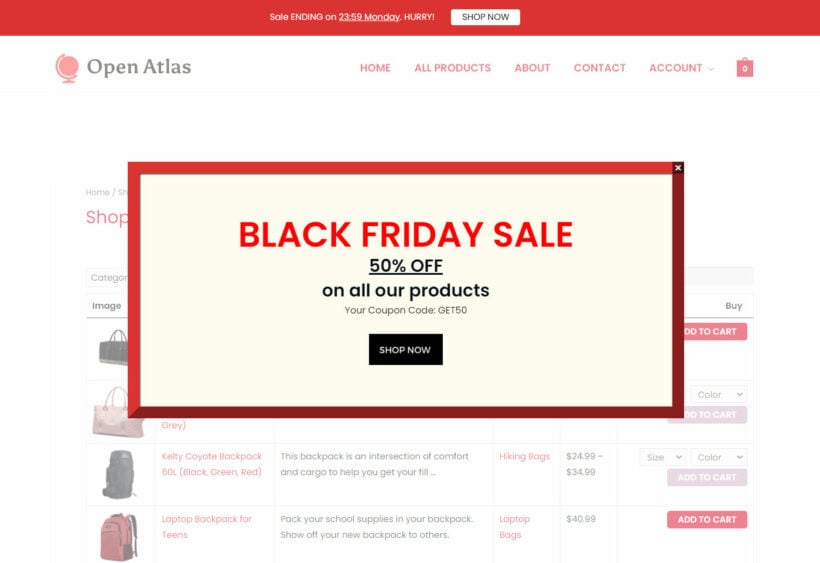
Sometimes, the original price is suspended and the discounted price is attached. So you don't need to enter a code. In other cases, online businesses offer their customers discount codes via mail or on their websites which they can apply during checkout. These codes are redeemable only within a particular period, after which they become invalid.