How to set up filtering by category in WooCommerce: Complete Guide (2025)
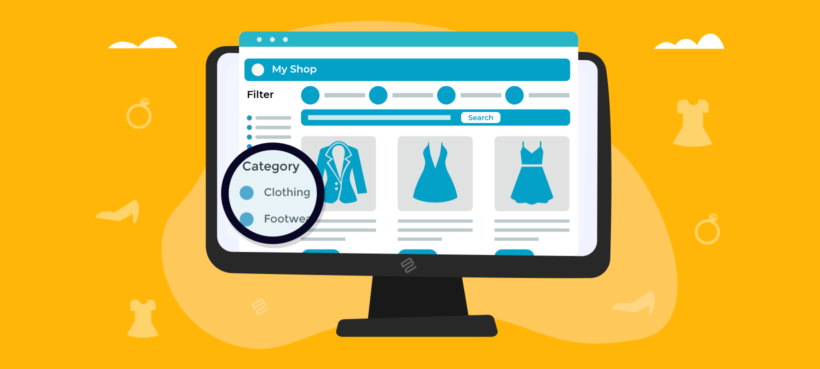
If you run a WooCommerce store with lots of categories, then it's essential for customers to have a quick way to find products by category. Discover the easy way to add a WooCommerce category filter to your store, and watch your sales grow!
Product filters add value to online stores and help customers to find products quickly and easily. It’s no surprise that more and more store owners are adding product filters to their online stores.
However, the filters that come with the WooCommerce plugin are pretty basic and don’t include a category filter. There's a basic categories widget that simply lists the categories in your store with links to each one, but no actual category filter widget.
When your customers shop in popular non-WordPress online stores, they're used to being able to filter by category. So why is this so difficult in WordPress and WooCommerce?!
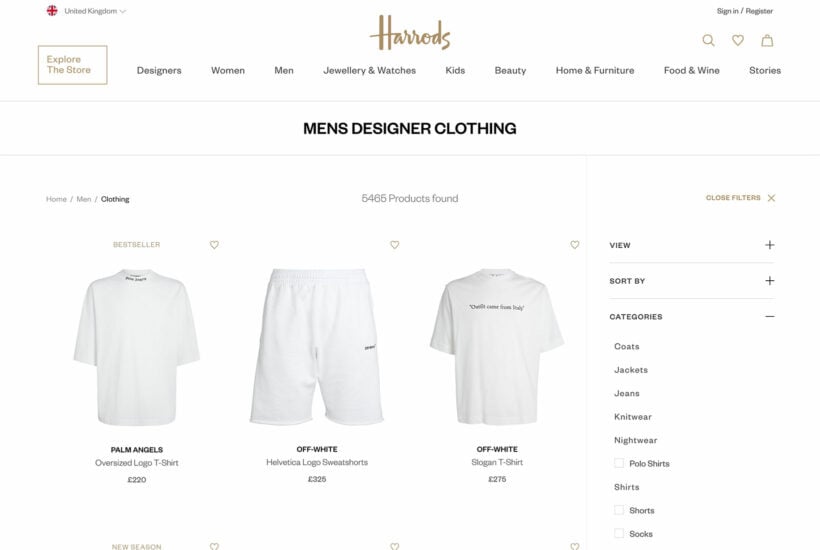
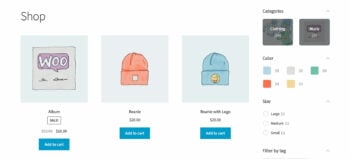
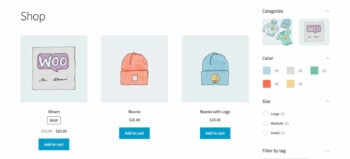
Fortunately, there's an easy solution. Keep reading to learn how to add a category filter in WooCommerce. You'll discover how to add WooCommerce filter by category using checkboxes, just like in the example above. And for even more flexibility, you'll learn how to create other types of category filter. This might include clickable images, radio buttons, dropdown lists, text labels, and more.
Why do you need product filters and how does filtering by category help?
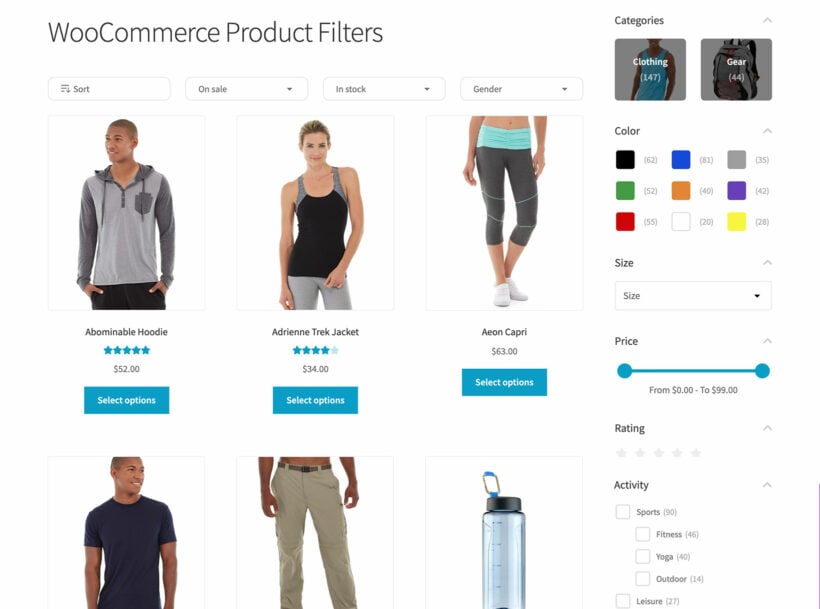
WooCommerce is the best e-commerce platform to sell online with ease. It’s also the most popular.
However, the built-in widgets for filters are pretty limited. You can only filter products by basic information such as attribute, price or rating. The page refreshes every time a customer chooses an option from a filter. And even worse - there's no built-in WooCommerce category filter. As a result, there’s no way for customers to refine their search by category and see more specific types of products.
By adding WooCommerce category filters to your store, you make it easy for customers to narrow down their search and find the products they want to buy faster. The faster they find the products, the faster they’ll move to checkout.
Let’s step through some of the main benefits of filtering by category in WooCommerce:
- Improves user experience. When customers are given the option to filter by a category, they have an easier time finding the exact types of products they’re looking for.
- Reduces your bounce rate. After running a search if customers see the type of product they’re looking to purchase quickly, they’ll be more likely to visit the product page, add it to their cart, and proceed to checkout.
- Increases product views. By allowing customers to filter by category, you can increase product views. Customers can quickly refine their search and see the exact types of products they’re looking for.
- Boosts your store conversions. As a WooCommerce store owner, if you show products that customers are looking for, they’ll be more likely to act on your conversion goal.
And the best thing about filtering by category?
The best part is that WooCommerce category filters are even more useful when used alongside other types of filters. For example, if you set up a category filter with a price filter, attribute filter, and in-stock status filter, customers will be able to refine their search even more.
Picture this: a customer is looking to buy a red t-shirt and has a $40 budget.
Scenario 1: You’re not using category filters – The customer will use the category widget to see all T-shirt products. They’ll see a product catalog of dozens of t-shirts to browse through to find a red one that’s under $40.
Scenario 2: You’re using category filters – The customer will use category filters to make the following selections and refine their search:
- Category: T-shirt
- Color: Red
- Price range: $20 to $40
And the result? They’ll only see red t-shirts that are within their budget.
Introducing WooCommerce Product Filters

The WooCommerce Product Filters plugin makes it easy for store owners to set up AJAX product filters, including by category, product attributes, or taxonomies. It lets you create different types of filters and display multiple filters on your WooCommerce shop pages and category pages at a time.
The WooCommerce Product Filters plugin was built out of a necessity for a high-quality AJAX product filter plugin for WooCommerce that’s easy for non-coders to use. Store owners can use it to add a customized product category filter to their WooCommerce store in a few steps.
The product filters can be based on categories, attributes, custom taxonomies, product tags, colors, price sliders, and more. You can also display the total product count next to each filter option. It's perfect for anyone looking for a WooCommerce category filter plugin.
Different options for adding a category filter to WooCommerce
Using the WooCommerce Product Filters plugin, you can add a category filter to your store in a variety of different ways:
Dropdowns
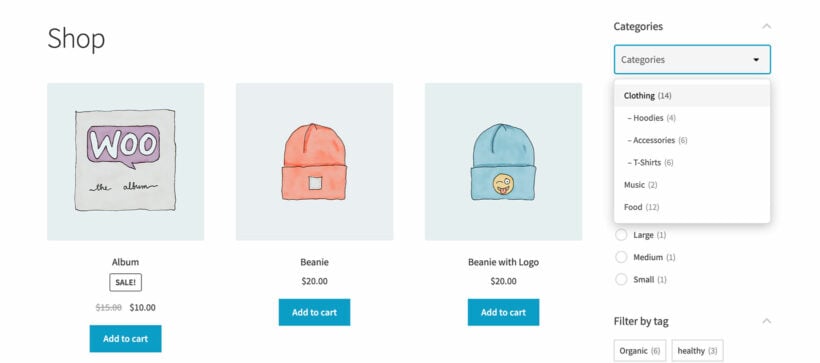
The dropdowns option lets you display the different categories in a hierarchical list view. Customers can select a single category at a time to filter their search results. This is useful for stores that sell lots of different products organized into a few different categories and sub-categories. The parent-child category relationships are visible at a glance.
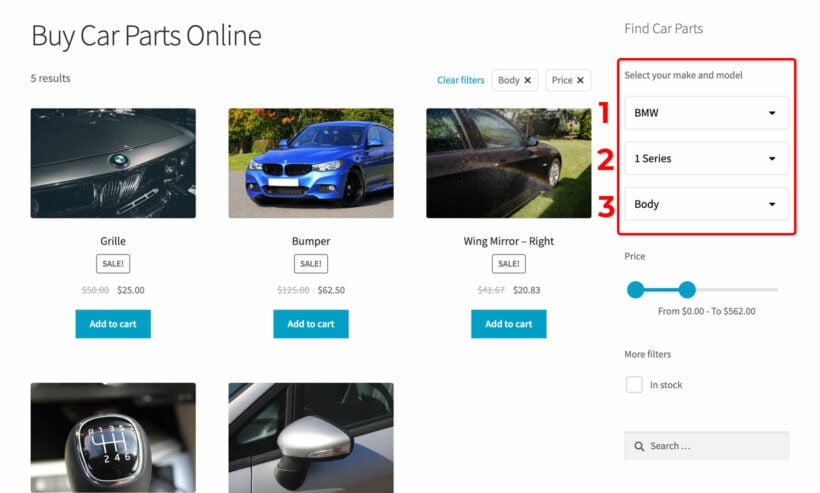
A huge benefit of creating category filter dropdowns is that you can make them dependent on each other. This means that only one dropdown appears when the page first loads, and then additional dropdowns appear as the customer makes their selections. Linked filters like this are popular for websites that structure products in a hierarchical way, for example when selling car parts online:
Checkboxes
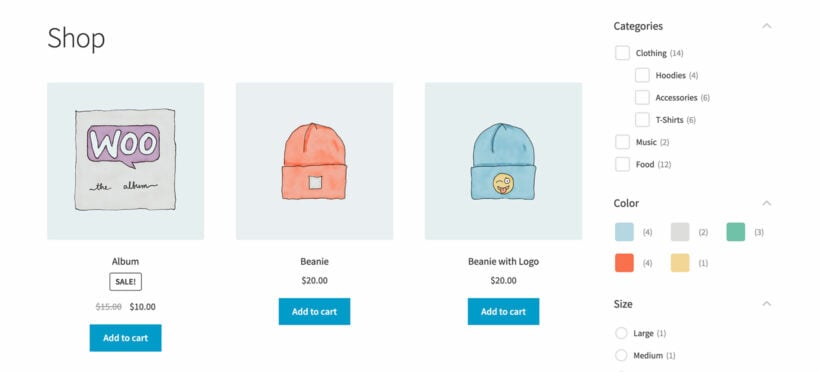
The checkboxes WooCommerce category filter lets you display categories with a checkbox next to each one. This way, customers can select multiple categories. This is useful for stores that sell lots of similar types of products such as clothing. Customers can tick the checkboxes next to Blouses, T-shirts, Tunics, and Dress shirts to find a suitable top.
Category checkbox filters are probably the most popular way of filtering by category. That's because it's so easy for customers to select multiple categories at a time.
Radio buttons
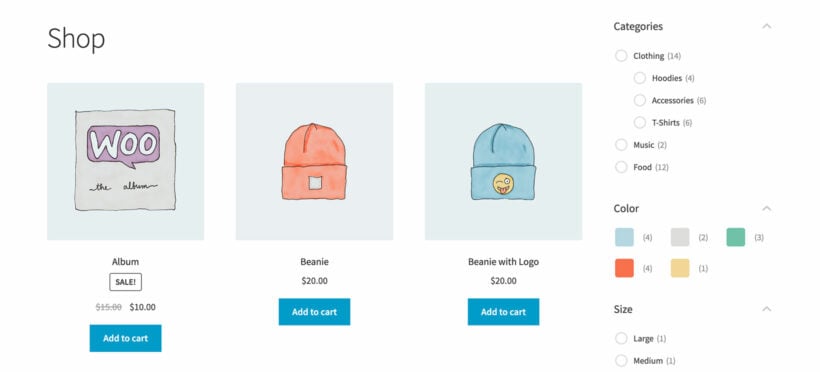
The radio buttons category filter lets you display categories with radio buttons next to each one. This way, customers can filter by category to see the available categories at a glance and select the one they want to filter by.
With radio button filters, you can only select one category at a time.
Text labels
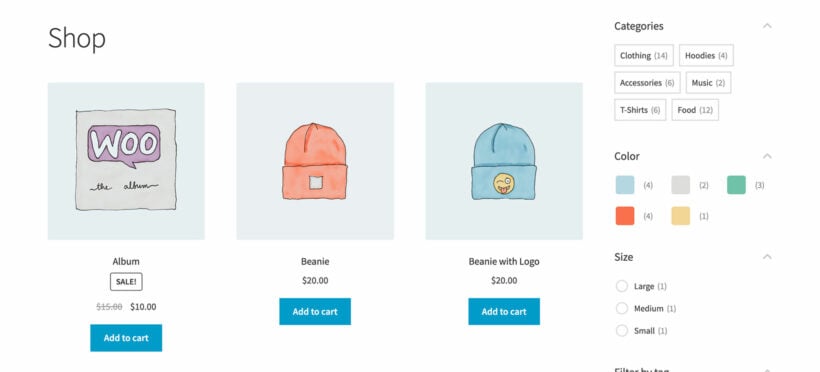
The labels option lets you display WooCommerce categories like a tag cloud. Customers can quickly click on a label to view products from that category only.
Like the category checkbox filtering, you can filter by multiple text labels at a time.
Images
The images option lets you display category image thumbnails, with or without the category name over it. This way, customers can click on the category image to refine their search. It's a much more visual way to filter by category in WooCommerce.
As with WooCommerce category checkbox and label filters, image filters support multiple selections.
Add a category filter the list of products
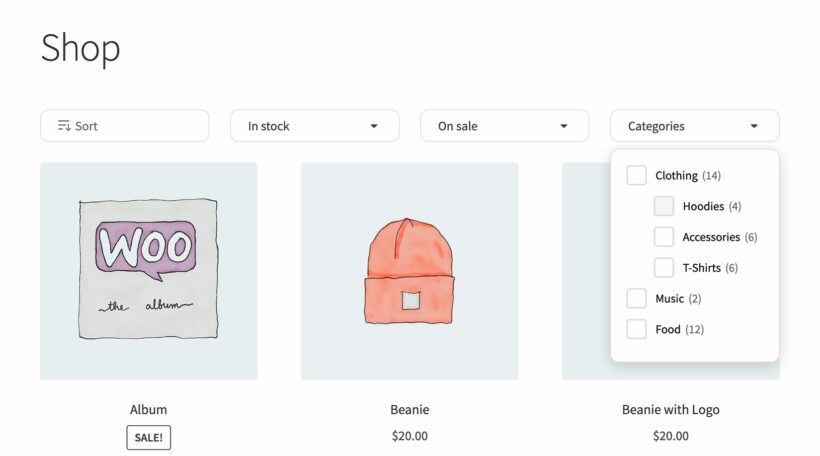
All of the screenshots above show WooCommerce category filters as sidebar widgets. However, that's not the only option. You can also show each type of category filter at the top of your shop.
With this option, the filters appear as dropdowns at the top of the main Shop page, category pages, and so on. You can display any of the category filter styles (checkboxes, radio buttons, images etc.) within the dropdown. For example, the screenshot above shows how a category checkbox filter looks at the top of the shop.
Mobile category filters
Finally, let's not forget mobile filtering. The majority of e-commerce purchases now take place on mobile devices. However, filtering requires careful thought on mobiles because of the small screen size. You don't want the filters to take up the whole page!
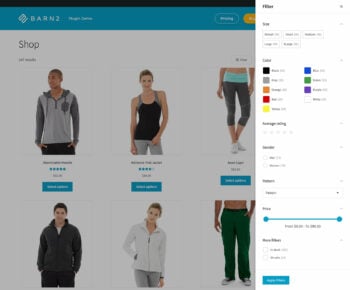
Fortunately, the WooCommerce Product Filters plugin handles this perfectly in its category filters. You can either show the mobile filters as dropdowns above the shop, or in a mobile-friendly slide-out panel:
Organizing WooCommerce category filters
One of the standout features of this WooCommerce category filter plugin is that it lets you create individual filters and then structure them into groups. The groups can then be added anywhere on your WordPress website or automatically be enabled on store pages.
The plugin lets you customize filters to offer dependent items, hide invalid filters, and hide products that are uncategorized. It also enhances the customer experience by offering the option to clear filters and scroll to the top of the page at the click of a button.
Finally, WooCommerce Product Filters lets you display the product count against each filter option. This means that you can show the number of products in each category next to the category name in the filter.
How to add WooCommerce category filters using the Product Filters plugin
Here’s what you need to do to add WooCommerce category filters to your online store:
Step #1: Install and activate the WooCommerce Product Filters plugin
Get the WooCommerce Product Filters plugin if you haven’t done so already. Install and activate it on your WordPress site.
The filter plugin setup wizard will now open. Use it to activate your license key and choose other options to configure your filters. For example, you can:
- Choose whether to use instant AJAX category filters or whether to apply filters when the customer clicks a button.
- Configure filter visibility to deliver a good user experience to your customers. You can show or hide filters by default, either on mobile or desktop.
- Customize the text - you can change the text that appears on your filters to make it more relevant to your store, and in your language.
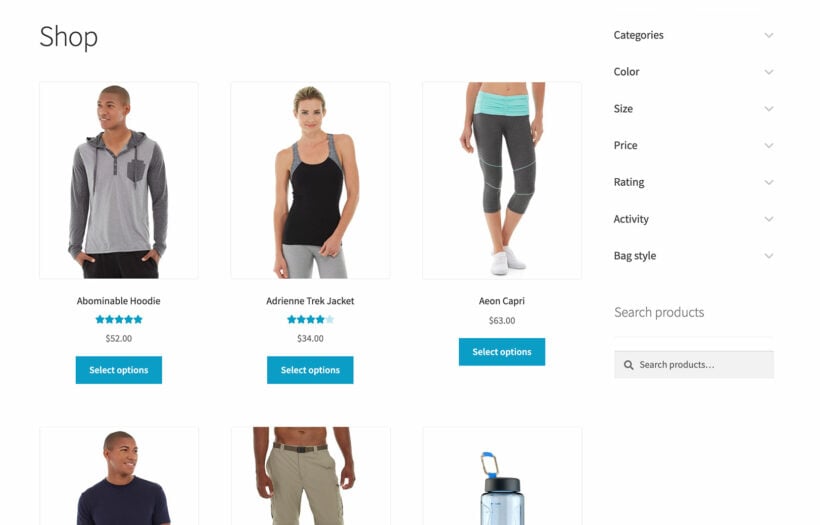
- Hide filters within space-saving toggles like this:
Step #2: Create filters and group filters together
The WooCommerce Product Filters plugin makes it easy to create a category filter:
- Navigate to Products → Filters in the WordPress panel.
- Either open the default filter group or create a new one.
- On the 'Edit filter group', page, click the 'Add new filter' button.
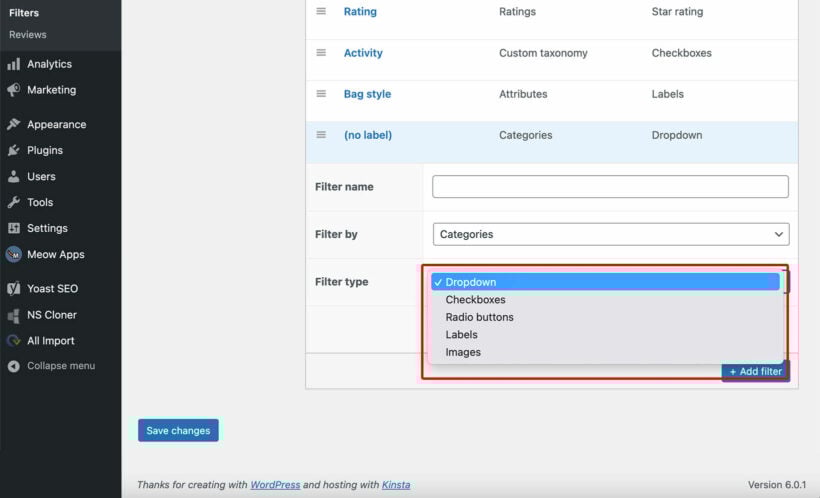
- Fill in the details to add a new filter. You can set the name, filter by, filter type, and assign to group options. Set the filter data option to Categories to create a category filter.
- When you select a category filter, an option appears letting you choose the style of the WooCommerce category filter. This is where you choose whether you want checkboxes, a dropdown, images, etc.
- Repeat this step to create more filters. For example, you might want to create an attributes filter and price filter to go with the categories filter. This way, customers will be able to narrow down their search even further.
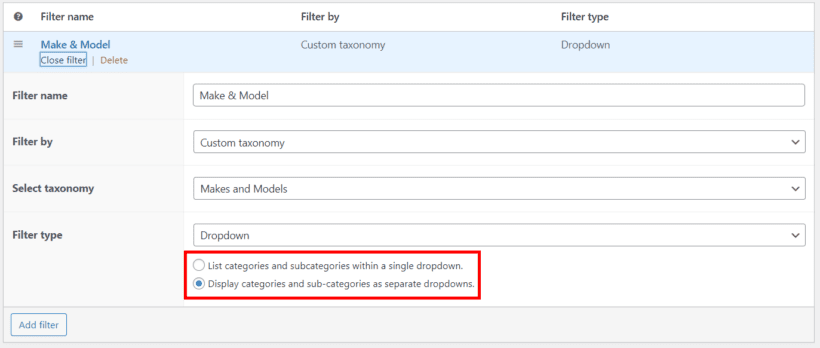
Tip: If you're creating category dropdown filters, then you can choose whether they will always be visible, or whether additional dropdowns will appear as the customer makes their selections. (Like in a car parts shop.) To do this, select the "Display categories and sub-categories as separate dropdowns" option.
Step #3: Add filters to shop pages
It's easy to display a group of filters anywhere on your WooCommerce site.
You can configure the WooCommerce Product Filters plugin’s settings to enable filters on the shop page and archive pages. The filter group you select will appear on the product list pages that WooCommerce creates – including the shop pages, categories page, and product tag archives.
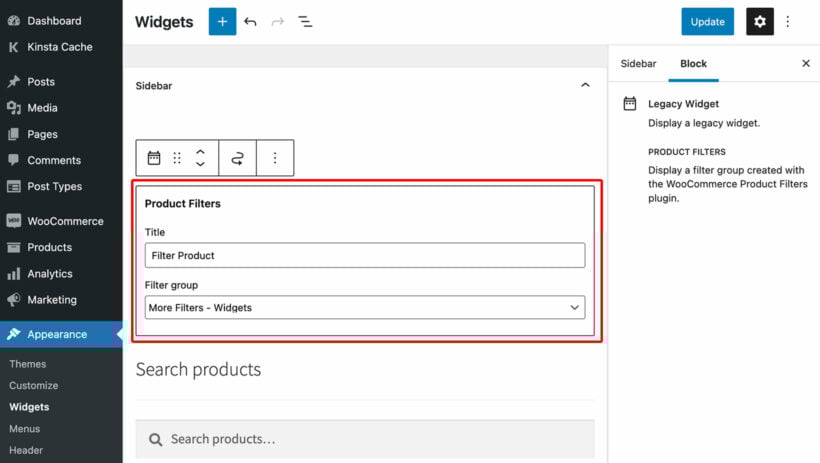
By default, the category filter will appear in a horizontal layout above the list of products. Optionally, you can choose to display the filters in a sidebar or on specific pages using shortcodes. Simply go to Appearance → Widgets, add a 'Product Filters' widget to the sidebar, and select the group containing your category filter:
Alternatively, the category filter plugin comes with a shortcode which you can use to display filters anywhere. This is useful if you're listing your products in custom ways, for example using Gutenberg, Elementor, Divi Builder, or the [products] shortcode that comes with WooCommerce. Just copy the shortcode from the main list of filter groups in the admin, and add it where you want the filters to appear. (See the plugin documentation for a list of shortcode options.)
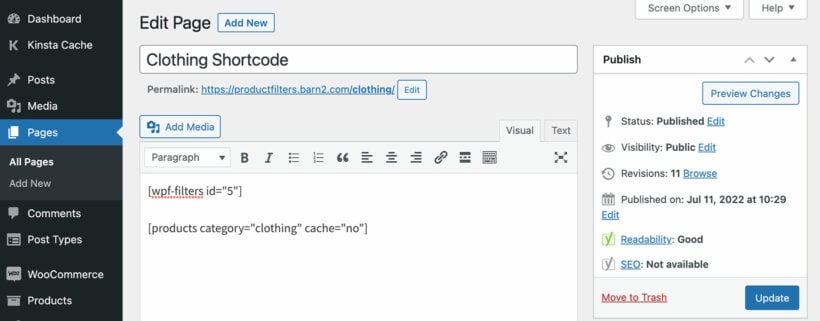
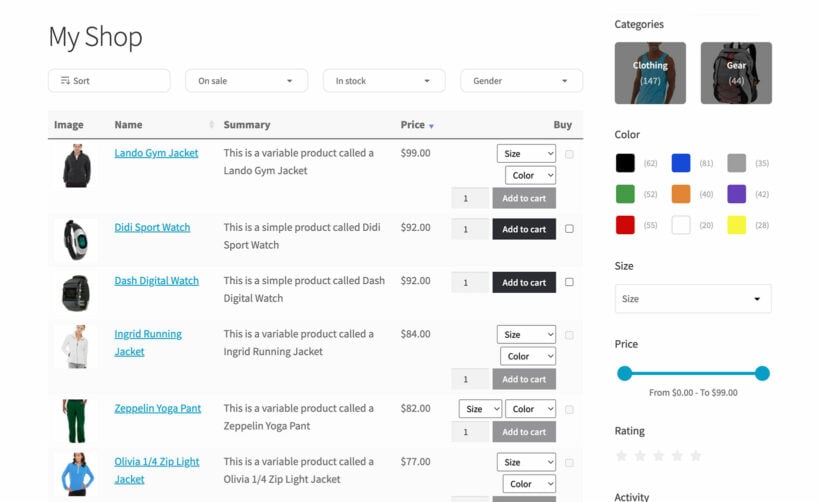
This method is also useful when you're using WooCommerce Product Filters with third party plugins. For example, it integrates with the WooCommerce Product Table plugin so that you can create one page order forms with category filters:
Add category filters to WooCommerce today
Adding WooCommerce category filters to your online store makes it easy for customers to narrow down their product search and quickly find the product they’re looking for. The easiest way to do this is by using the WooCommerce Product Filters plugin.
This well-designed plugin makes it incredibly easy for non-coders and developers to add product category filters. It can save you valuable time and effort, while also enabling you to have a professional and organized store. And the end result? More sales for you.
Ready to set up a category filter in WooCommerce? Get the WooCommerce Product Filters plugin today!
