How to export Shopify products

The definitive guide to exporting Shopify products - including how to export inventory, combine multiple CSV files, and when to skip the export-import cycle entirely with Setary.
Store operators and inventory managers export Shopify products every day. The reasons vary: accounting reports, stock analysis, bulk price updates before a big sale, migrating to a new store.
But Shopify splits your data across multiple files. Product details come in one CSV. Inventory levels need a separate export. International pricing sometimes needs a third. And if you sort that CSV wrong in Excel, your next import can scramble your entire catalog.
That last point catches a lot of merchants off guard. Shopify's CSV isn't designed for analysis - it's designed for re-import. The column structure, the multi-row variant format, the lack of inventory data - all of it makes sense when you're moving data between systems, and almost none of it makes sense when you're trying to run a report.
This guide walks through exactly which exports you need, how to combine them, and when it makes more sense to skip the export-import cycle altogether with a spreadsheet syncing tool like Setary.
Method 1: How to export Shopify products with native tools
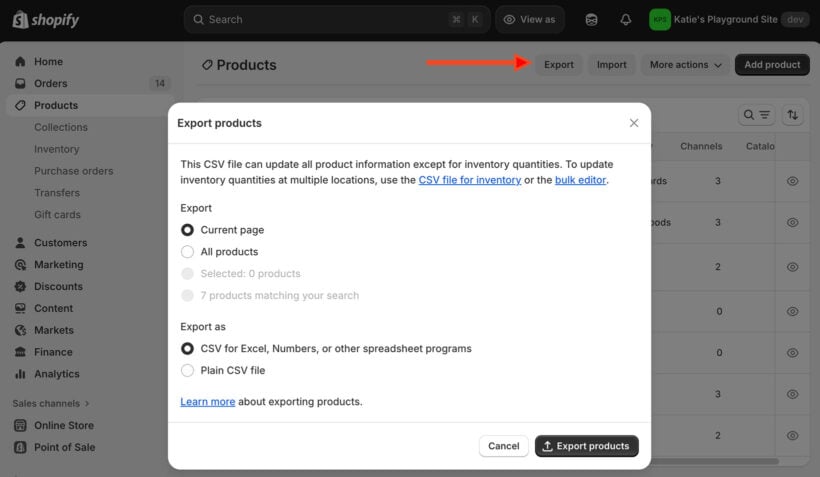
You can export products directly from Shopify. Navigate to Products → Export, choose your scope, and select your CSV format. Small exports download instantly. Larger catalogs arrive by email, which can take a few minutes.
Before you export, filter your products by vendor, type, or collection. That way you only export the rows you actually need.
Export scope options
Shopify gives you four scope options when you export:
- All products - Your entire catalog, regardless of active filters.
- Current page - The visible products on screen, typically 50 items.
- Selected products - Items you've manually checked.
- Filtered results - Products matching your current search or filter.
⚠️ Never sort your CSV in Excel
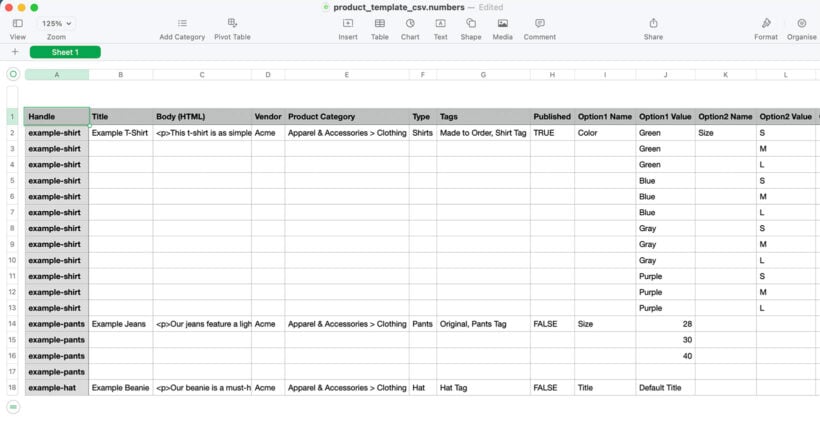
Shopify products with variants appear as multiple rows in the CSV. Sorting separates those rows. When you re-import, Shopify can't reassemble the product correctly, which causes CSV import failures. Shopify's own documentation warns against this.
Test any changes on a 10-product sample before running a bulk operation. It saves a lot of headaches.
The export also includes image URLs (not the image files themselves). If you're migrating stores, keep your old store active until the migration is complete so those URLs still resolve.
What the CSV doesn't include
The product CSV is built for re-import, not for analysis. It doesn't include inventory counts or location-specific stock levels. Those need a separate export.
How to export products with inventory from Shopify
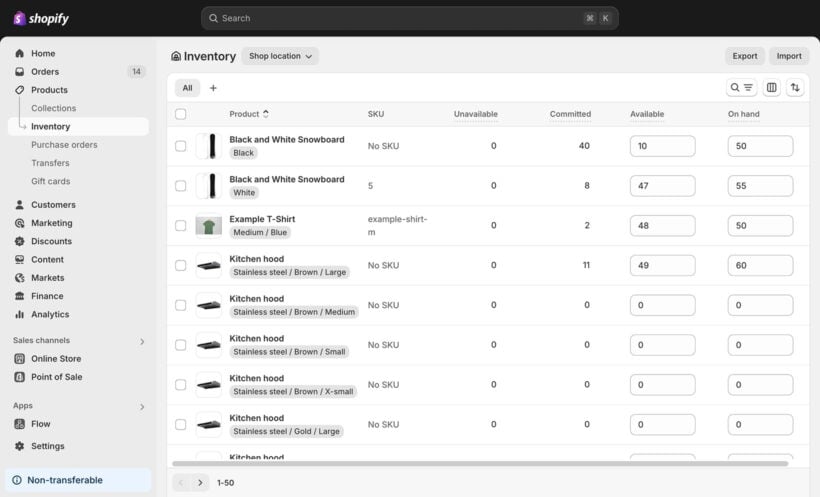
Inventory requires its own export. Navigate to Products → Inventory, then click Export. This creates a CSV with SKU, location names, and available quantities per location.
To get a complete picture, you'll need to join these two files in Excel or Google Sheets. Use the SKU as your matching key. If your SKUs are inconsistent, use the Handle instead. The VLOOKUP or XLOOKUP functions in Excel work well for this - match on SKU, then pull the inventory columns from the second file into your product rows.
A few things to plan for:
- Excel's row limit can be an issue for large stores with many variants across multiple locations.
- Email delivery for large inventory exports may take several minutes.
- If you hit row limits, filter by location or product type before exporting.
If you sell internationally, you may need a third export. Navigate to Markets → Catalogs → Export to pull regional pricing. Combining three separate CSVs is fiddly work, and it's where a lot of merchants start looking for an alternative.
Method 2: Edit products in Shopify without exporting
Most store operators export products for one reason: to make bulk changes in a spreadsheet, then re-import the file. That workflow introduces every risk covered above. Sorting errors, blank cell overwrites, variant association breaks, image URL failures.
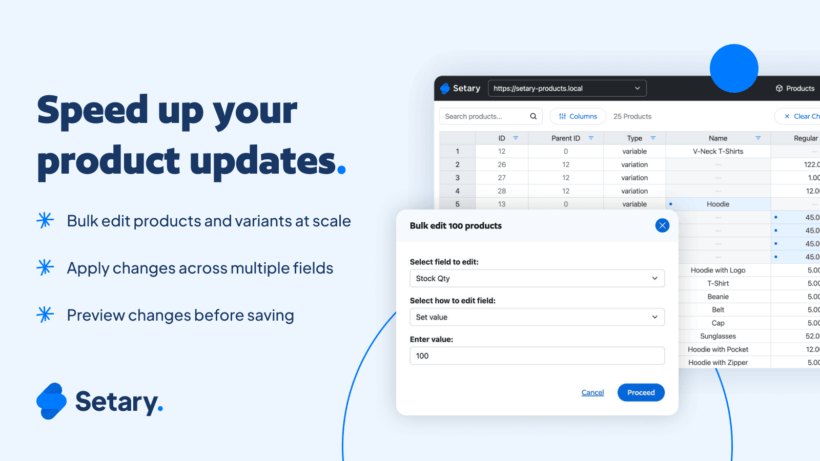
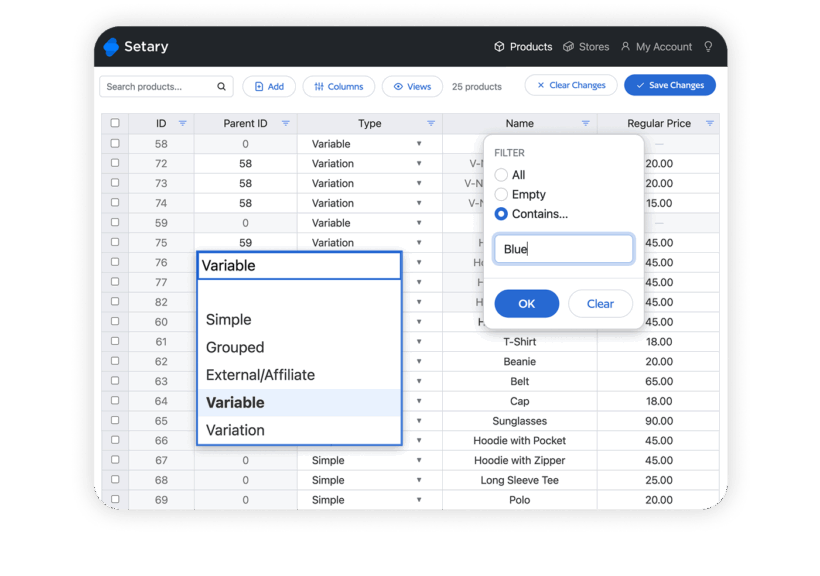
Setary removes the export-import cycle entirely. It brings spreadsheet-style bulk editing directly into your Shopify admin. You see your live product data in a grid, make changes, and those changes save straight to your store.
If you're exporting to bulk edit, here's what Setary lets you do instead:
- Edit prices, inventory, descriptions, tags, SEO fields, and variants in a familiar spreadsheet interface without leaving Shopify.
- Apply bulk actions across filtered products: increase all prices by 15%, add tags to specific collections, or update inventory across variants.
- Save changes instantly to your live store, with no CSV upload and no import processing time.
If you still need export files
Setary also provides CSV exports that go beyond what Shopify offers natively.
You can select exactly which fields to include, skip columns you don't need, and add custom metafields or variant IDs. You can filter with granular precision by collection, vendor, product type, tags, price ranges, inventory levels, or stock status.
The safety advantages over traditional export-import are significant:
- No sorting risk - Variants stay linked to their parent products automatically.
- No blank overwrites - You edit live data and only change what you intend to.
- No formatting errors - The validated interface prevents CSV formatting violations before they happen.
- Instant validation - Errors appear immediately, not during import processing when it's too late to catch them.
Tips for working with your exported CSV
If you're using native Shopify exports, here's what your CSV actually contains:
- Product details: titles, descriptions, prices, SKUs.
- Variants as multiple rows per product (sizes, colors, materials).
- Image URLs, not the actual image files.
- If you sell internationally, extra price columns like 'Price / International'.
What it doesn't contain: inventory levels and some market pricing. Those need separate exports, as covered above.
Shopify offers two CSV formats when you export: a spreadsheet-optimized version and a plain text version. For most purposes, the spreadsheet-optimized format is the right choice. It handles special characters and line breaks in product descriptions without breaking the column structure.
Editing your CSV safely
Use Excel or Google Sheets. A plain text editor like Notepad is a last resort, and only if Excel refuses to open the file. Whatever editor you use, keep the file in UTF-8 format. Shopify will reject CSVs that aren't UTF-8 encoded.
When editing, don't separate variant rows from their parent product rows. A product with three sizes appears as three rows with the same product title. Keeping those rows together is how Shopify knows they belong to the same product.
Blank cells in your CSV will overwrite existing data on re-import. That's one of the most common causes of unexpected data loss after a bulk edit. If a cell is blank in your CSV and that field has data in Shopify, the import will erase it. The solution is to only edit the columns you actually need to change, and leave everything else as it was.
Before any large import, test on a 10-product sample first. Import those 10 products, check the results in Shopify, and confirm everything looks right before running the full operation.
Good file naming also helps: use a format like YYYY-MM-DD-products so you always know which export is which. When something goes wrong mid-migration (and it occasionally does), having a clearly dated backup file saves a lot of time.
Shopify's official CSV documentation covers the full column spec if you need to check formatting requirements.
Need one row per variant for analysis?
Shopify groups variants under products, but inventory reports often need one row per item. Two options:
- Quick fix - Use Excel's Power Query to flatten the data.
- App solution - Matrixify exports in this format automatically and includes variant IDs and column selection.
Which approach should you use?
The right method depends on what you're actually trying to do.
Use native Shopify exports when:
- You're migrating to a new store and need a full data extract.
- Your accountant needs inventory values in a spreadsheet - export products, export inventory, then join the two files in Excel using SKU as the key.
- You're pulling data for a third-party system that requires a CSV input.
- You need a one-time snapshot of your catalog for external analysis or archiving.
Use Setary when:
- You're exporting to make bulk edits. Setary skips the export-import risks and lets you edit prices, inventory, and descriptions directly in Shopify, with instant saves.
- You need filtered exports that go beyond what Shopify offers, without manually combining multiple files.
- You want to update prices for Black Friday across a specific collection without touching anything else in your catalog.
- You're making regular ongoing edits and the export-import cycle is slowing you down.
If you do use traditional exports, follow these rules every time: never sort CSVs in spreadsheets, always test with a 10-product sample, keep image URLs accessible during migrations, and remember that blank cells overwrite existing data.
Whether you're backing up before a sale, migrating stores, or pulling inventory reports for finance, you now have a clear path. Get started with Setary to bulk edit products directly in Shopify without the import risks, or to export complete product data with all the fields you need in a single file.