Quick guide to bulk edit Shopify tags

Discover three ways to bulk edit Shopify tags, from the free native editor to CSV imports and spreadsheet-style apps like Setary.
Your flash sale launches tomorrow morning. You need to add a "summer-sale" tag to over 1,000 products, and Shopify's bulk editor only handles 50 at a time. That's over 20 separate editing sessions of repetitive clicking for something that should take minutes.
While Shopify product tags power everything from automated collections to discount codes, bulk editing them remains surprisingly painful. The native tools have hard limits, CSV imports carry real risks, and it's easy to accidentally overwrite tags you wanted to keep.
This guide walks you through each method to Shopify bulk edit tags, explains when each one makes sense, and shows how the Setary spreadsheet editor can turn hours of tedious clicking into minutes of efficient editing.
What to know: Critical tag rules for bulk editing in Shopify
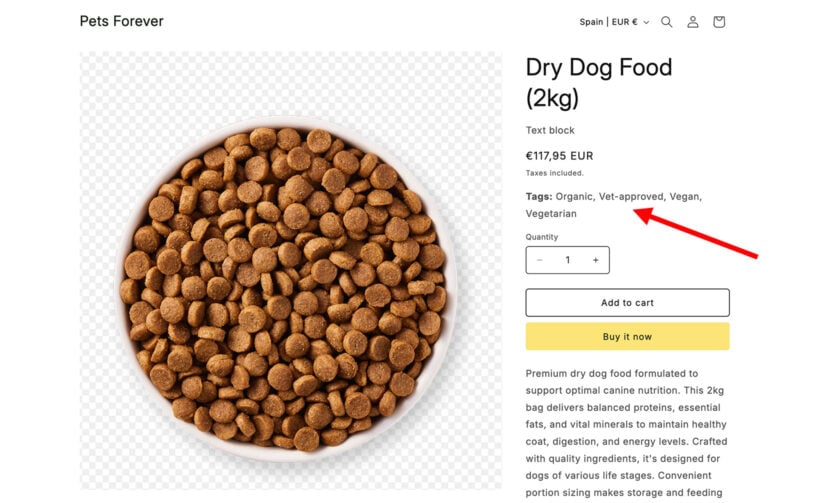
Shopify tags are labels you attach to products, orders, customers, and blog posts. They organize your catalog for automated collections, enable discount codes, improve internal search, and power smart collections. When you change a tag, any smart collection using that tag updates immediately. That's powerful, but it also means mistakes during bulk tag editing can ripple across your entire store in seconds.
Before you start to bulk edit tags in Shopify, you need to understand the key limits:
- Character limit - Each tag can be up to 255 characters long. You can only use letters, numbers, and hyphens. Letters with accents or special symbols can exclude products from search results.
- Tag limit - Each product can hold a maximum of 250 tags. The bulk editor will display all 250, though I find most stores rarely come close to this.
- Format - Tags are comma-separated with no special characters allowed.
- Case sensitivity - "Sale" and "sale" are treated as the same tag. This is actually helpful, since you won't end up with duplicate tags from inconsistent capitalization.
I'd also suggest planning your tag naming conventions before making bulk changes. Consistent formatting like "season-summer" or "promo-bogo" prevents the messy inconsistencies that slow down your store and confuse your inventory management later.
Method 1: How to bulk add tags with Shopify's native bulk editor
Shopify's built-in bulk editor is the quickest way to edit tags on a small number of products. It's free, requires no apps, and works on every Shopify plan.
Here's how to bulk edit tags in Shopify using the native bulk editor:
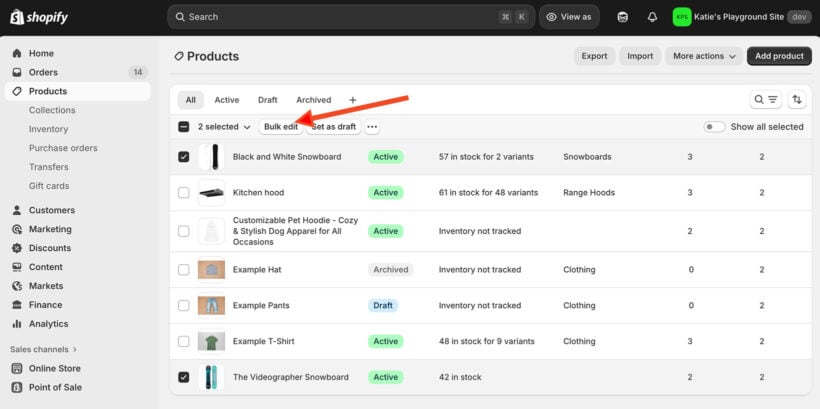
- Go to Products in your Shopify admin.
- Select up to 50 products using the checkboxes.
- Click Bulk edit at the top of the page.
- Click the Columns button and add the 'Tags' column.
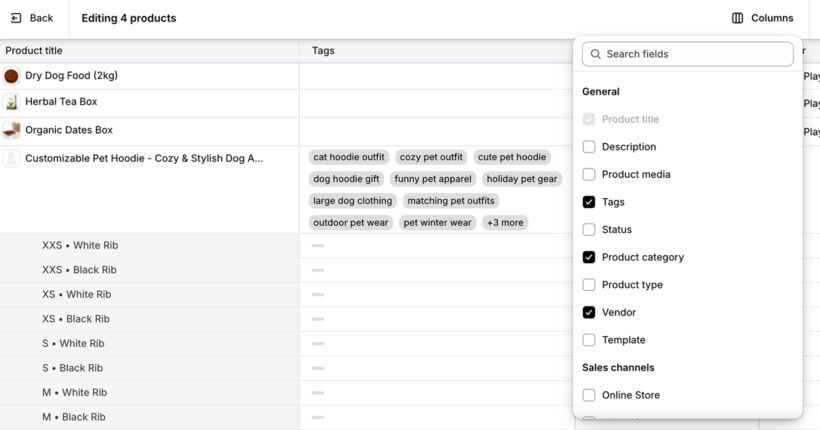
- Type your tags into each cell, separated by commas.
- Click Save to apply your changes.
The whole process takes about 5 minutes per batch of 50 products.
When to use the native bulk tag editor
This method works well for simple updates, for example:
- Quick fixes for collections under 50 products.
- Testing new tag strategies on small batches.
- Stores with small, curated catalogs.
- Emergency edits when you can't install apps.
However, if you need to Shopify bulk edit tags across hundreds or thousands of products, you'll hit the 50-product ceiling fast.
Where the native editor falls short
The native bulk editor handles basic tag updates, but it's missing several features that matter when you're managing tags at scale.
No search-and-replace. Need to rename "summer-2024" to "summer-2025" across your catalog? There's no way to find and swap that tag. You'll need to manually edit every single product that uses it.
Limited filtering. Before opening the bulk editor, you can filter products by vendor, tag, status, type, collection, sales channel, and catalog. But you can't filter by attributes, price range, inventory level, SKU, or metafields. So if you want to add a "fragile" tag to every product over 5kg, or tag all items under $10 as "budget", you'll need to find those products manually. There's also no way to save filter and column combinations for reuse, so you'll repeat the same setup steps every time.
No smart bulk actions. The native editor only lets you type directly into cells, copy-paste, or drag to fill. There are no dedicated actions like 'Append value' or 'Replace value', which means you can't add a tag to existing ones without overwriting them.
No variant tags. The native bulk editor can't bulk edit variant tags across multiple products. If you need to tag specific variants differently, you're stuck editing each product page individually.
Overwriting risk. Every copy, paste, and drag action replaces existing tags rather than adding to them. If three products already have a "best-seller" tag and you paste "summer-sale" across all cells, "best-seller" disappears. There's no undo button if you paste over the wrong products either.
To preserve existing tags in the native editor, click each cell individually, add a comma after the existing tags, and type your new tag. There's no bulk option for appending, which is why the 50-product limit becomes so frustrating.
These limitations are manageable for small stores with simple catalogs. But once you're past 50 products or need precise control over how tags are applied, methods 2 and 3 below offer better alternatives.
Method 2: CSV export-edit-import
CSV exports let you work around the 50-product limit by editing your entire catalog in a spreadsheet. Here's the process:
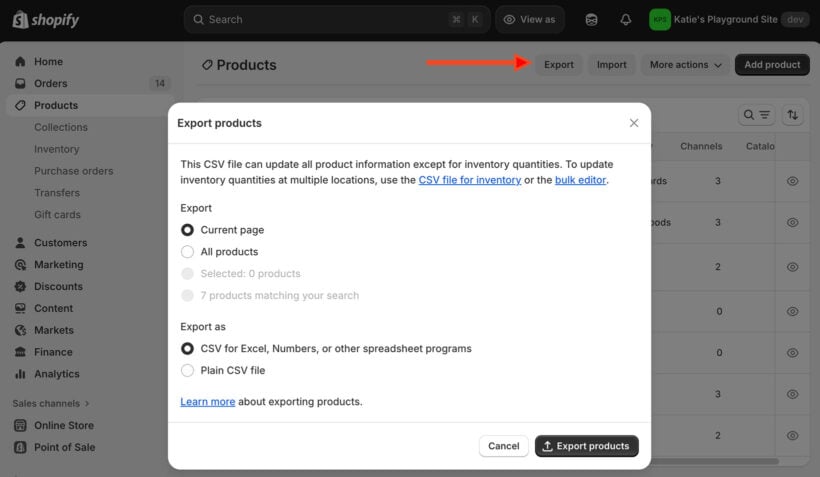
- Go to Products → Export → CSV file.
- Open the file in Excel or Google Sheets and find the 'Tags' column.
- Edit tags in each cell, keeping them comma-separated.
- Save as CSV and import back into Shopify.
- Wait for the confirmation email.
On paper, this sounds appealing for bulk tag editing. You can use Excel formulas to generate tags from other columns, like combining vendor and product type. You get search-and-replace across thousands of rows. And you can handle your entire catalog at once without app limits. If a supplier sends you tag lists, you can import them directly.
But in practice, CSV imports for Shopify tags tend to fail more often than they succeed:
- Encoding issues, formatting errors, and import rejections are common.
- You can't import just the tags column. You must reimport entire product data.
- Import failures often provide vague error messages that don't tell you what went wrong.
- There's no undo option. Mistakes need manual fixes.
- The process requires solid Excel knowledge and careful file management.
- Formula-powered tag generation from other columns, like combining vendor and product type.
- Complex find-and-replace across thousands of products at once.
Can you bulk edit Shopify tags in Excel? Yes, technically you can. Export to CSV, edit in Excel using formulas and find-replace, then reimport. This approach works well for formula-driven tagging or large-scale tag renaming. However, it requires confidence with spreadsheets and regular backups, because import errors can cause real problems.
As a result, I find this method is best reserved for one-off migrations or highly technical users who know their way around CSV formatting quirks.
Method 3: Setary for advanced tag management
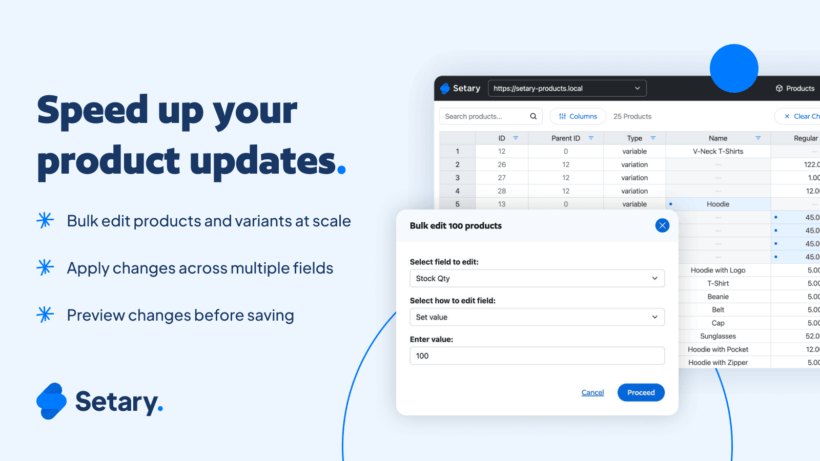
Setary is a spreadsheet-style bulk editor that connects directly to your Shopify store. It's designed to solve the exact frustrations that make the native bulk editor so limiting for tag management.
Where the native editor caps you at 50 products per session, Setary loads your entire catalog into a familiar Excel-like grid. You can edit tags, prices, inventory, metafields, and any other product data from the same screen. Every change syncs to your Shopify admin instantly, so there's no waiting for imports to process or worrying about whether edits actually saved.
Setting up and bulk editing tags
Getting started with Setary for Shopify takes just a few minutes. There's no CSV file to prepare and no complex setup.
- Sign up for a Setary account and connect your Shopify store.
- Your product catalog loads automatically into the spreadsheet view.
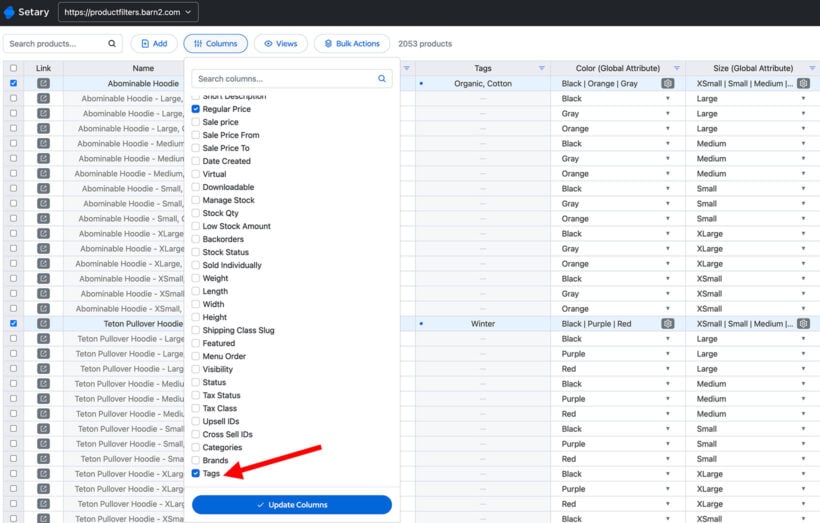
- Click the Columns button and make sure 'Tags' is visible.
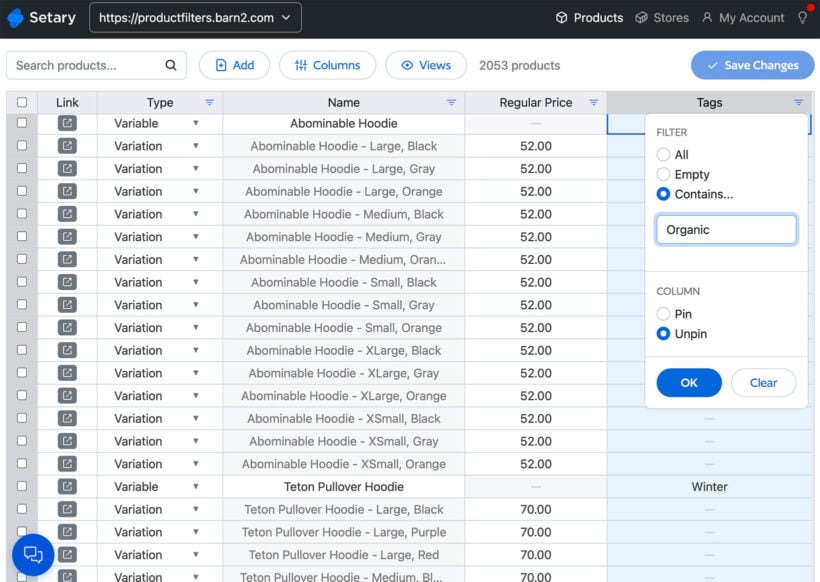
- Use filters to narrow down the products you want to edit.
- Click any tag cell and start editing, or select multiple products for bulk actions.
When to use Setary for bulk tag edits
Remember those native editor limitations? Here's how Setary handles each one:
Search-and-replace across your catalog. Discovered a misspelled "clearence" tag on hundreds of products? A single find-and-replace fixes it in seconds, instead of manually editing every product.
Filter by any product data. Unlike the native editor's limited filters, Setary lets you filter products by attributes, price range, inventory level, SKU, metafields, or any other field. Need to tag all products under $10 as "budget"? Filter by price, select everything, and apply the tag. You can also save filter and column combinations as reusable views, so your "seasonal tagging" setup is one click away next time.
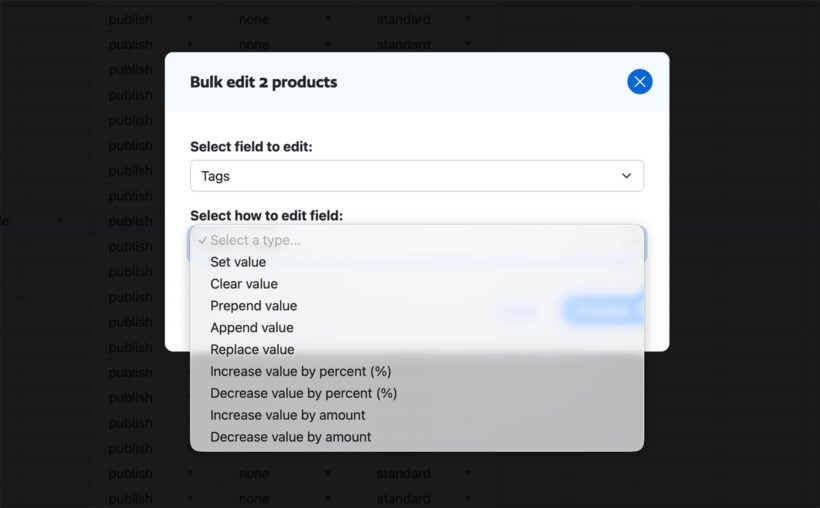
Smart bulk actions. Instead of typing into individual cells, select the products you want and choose from dedicated actions like 'Set value', 'Clear value', 'Append value', and 'Replace value'. Want to add "summer-sale" to existing tags without losing them? 'Append value' does exactly that.
Undo protection. Setary includes a 7-day undo history. If you accidentally overwrite tags, roll back the change instead of manually recreating everything from memory.
Variant support. Edit variant tags alongside parent product tags in the same spreadsheet view.
We regularly get large shipments of new inventory and updating quantity in stock and setting new prices in bulk has saved us a lot of time and makes intake much simpler, one screen to update it all at once.
Daniel IserSetary User
Apps like Hextom and Ablestar offer alternative approaches with scheduled edits and automated rules. These work well for recurring tasks like nightly tag removals for out-of-stock items. However, they tend to use job queues that can leave you waiting for edits to process. For most stores that need to Shopify bulk edit tags quickly and see confirmation right away, Setary's instant saves make it a better fit for weekly or on-demand edits.
Bulk edit your tags efficiently today
Most merchants need bulk tag editing during time-sensitive moments, like launching a flash sale, reorganizing collections, or cleaning up months of inconsistent tagging. The right tool depends on your specific situation right now.
- Native editor - Free, works for quick fixes on under 50 products. Risk of overwriting existing tags.
- CSV import - Handles your full catalog but carries real import risks. Best for one-off migrations.
- Setary - Best for most stores that need quick, safe bulk tag editing with instant confirmation and undo protection.
For stores beyond the native editor's 50-product limit, Setary handles unlimited products with instant saves and 7-day undo history. That's the difference between a confident product launch and anxiously refreshing your admin to check if changes went through.
Bulk tag editing is really about getting changes done correctly when the clock is ticking. Whether you're tagging products for a seasonal collection or cleaning up years of inconsistent labels, the method you choose matters. If you want to save time and see your Shopify tag edits reflected in real time, give Setary a try today.