How to customize and change WooCommerce sale badges (and text)

Looking for a quick and easy way to customize the sale badge on your site’s front end? In this detailed tutorial, I'll show you how to change the sale badge in WooCommerce via code and plugins.
If you're looking for a quick and easy way to change the sale badge in your WooCommerce store, this guide has your back. I'll show you two simple methods to change the sale badge text, color, styling, font, opacity, and more.
- Method 1: With PHP and CSS snippets.
- Method 2: Using plugins like YITH WooCommerce Badge Management, Improved Sales Badges for WooCommerce and Product Labels for WooCommerce.
Adding sale tags is the first step to running a successful promotion. Then as a bonus, I'll also show you how to use WooCommerce Discount Manager to upgrade the default WooCommerce sale badge (as pictured below) and automate most of the manual work of setting products on sale.
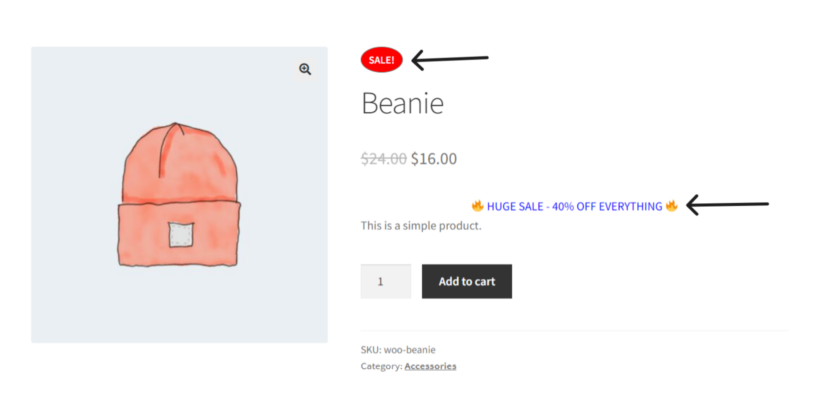
Ready? Let's begin by making sure that we're on the same page about what the WooCommerce sale badge is.
What is the sale badge in WooCommerce?
The sale badge is a visual indicator that shows customers when a product is being sold at a discounted price. Its appearance varies depending on your WooCommerce store's specific theme. It may be a small tag or label overlaid on top of the product image, below the product, or in one of its corners.
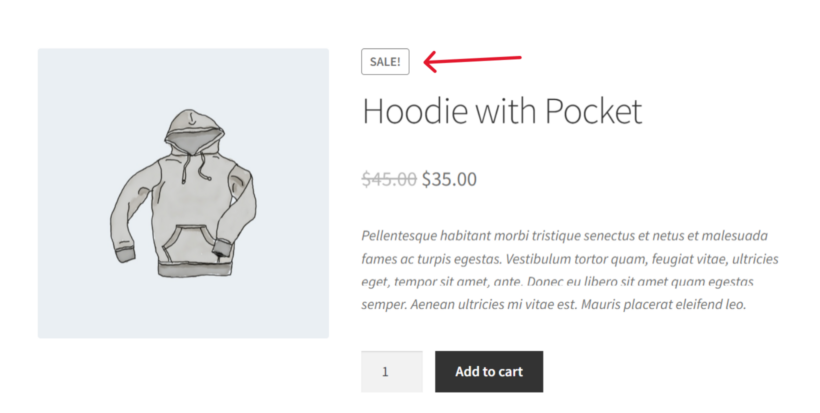
The sale badge appears on or near the product title or image, wherever they are displayed in a WooCommerce store — product detail pages, the shop page, product lists, product archive pages (categories, tags, etc), up-sells, cross-sells, related products, search results, etc. If you have a dedicated WooCommerce sales page listing on-sale products then it will appear there too.
So whether a customer is browsing through a list of products or viewing detailed information about a specific item, they'll see the sale badge if the product is on sale (unless you remove it through a code snippet or by using a plugin). This directs shoppers' attention to items on sale as they navigate through the store, and increases the likelihood of them making a purchase. Now it's time to learn how to edit the sale badge, you can watch this video or read on to find out how.
How to change sale badge text in WooCommerce with code
If you're confident making changes to your store with code, then I have just the snippets for you. In this section, I'll show you how to:
- Use PHP to change the sales badge text.
- Use PHP to display discount percentage instead of text.
- Use CSS to change the sales badge styling with basic and advanced customizations - unique badge shapes and a special ribbon effect.
Note: Remember to back up your site before making changes directly to its code.
Change the sales badge text using PHP
Access the functions.php file of your site’s child theme through your hosting provider, cPanel, an SFTP client like FileZilla, or the theme file editor in WordPress.
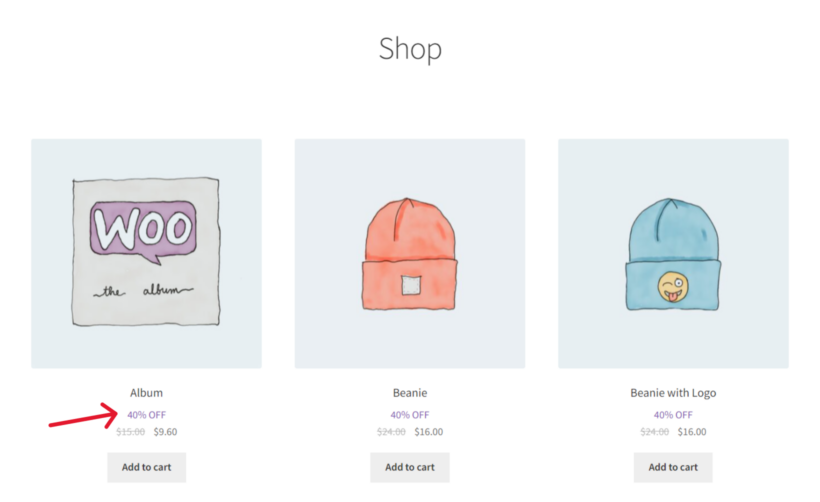
Add the following code snippet to the file template. You'll need to replace [NEW TEXT] with whatever you want to change the sales badge text, such as “Flash Sale!”, “Half Off!”, or "20% OFF" (as I did in the screenshot below).
add_filter('woocommerce_sale_flash', 'woocommerce_custom_sale_text', 10, 3); function woocommerce_custom_sale_text($text, $post, $_product) { return '[NEW TEXT]'; }
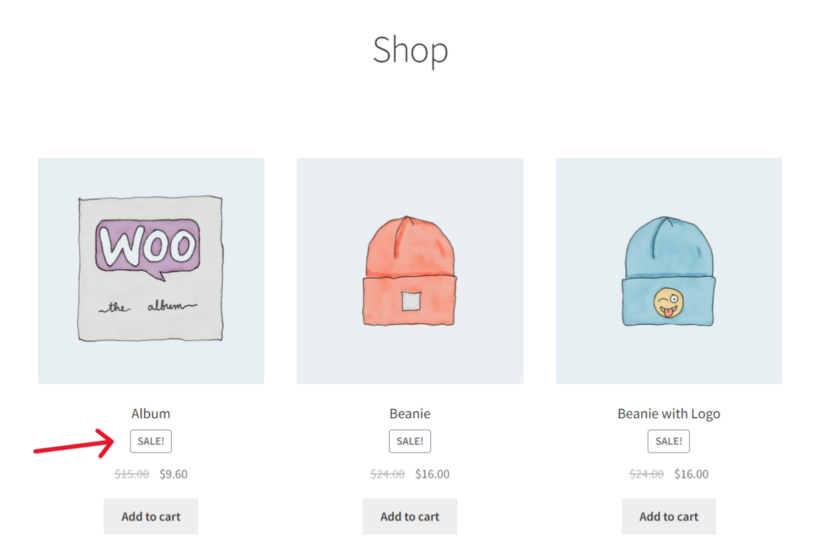
Here's the before version with the default on-sale badge text on the Shop page:
And here's after, the changed WooCommerce sale badge text on the Shop page:
Display discount percentage on the sale badge
Many customers find it more compelling to see exactly how much they're saving. Let's change our sale badge from text to showing the discount percentage.
For simple products, add this code to your functions.php file or a custom plugin:
This code calculates the discount percentage and displays it with a minus sign, like "-20%". It only affects simple products.
Use CSS to customize the WooCommerce sales badge styling
If you're not content with just changing the sale badge text, the CSS snippets I'm about to share will help you update its styling.
You can make basic customizations — change colors, adjust sizes, or add borders to the sale badge. You can also use CSS animations to add dynamic effects to the sale badge — animate properties like color, size, or rotation, and make it more eye-catching.
Here's how to change the WooCommerce sales badge styling using CSS.
1. Identify the sale badge text element on a WooCommerce product page
- Navigate to the front-end view of a WooCommerce product page where the sale badge is displayed. Right-click on the sale badge element itself to bring up a context menu.
- From the context menu, select the "Inspect" option. This will open the browser's developer tools panel and highlight the HTML code corresponding to the sale badge element.
- In the same developer tools panel, you'll see the HTML code for the sale badge highlighted. It will typically be within a <div>, <span>, or <img> element, depending on how WooCommerce is configured to display the badge.

- WooCommerce usually uses specific classes or IDs to style and target elements on the page. These identifiers are crucial for targeting the sale badge element with custom CSS or JavaScript code. Look for any CSS classes or IDs assigned to the sale badge element. For example, you might see a class like '.onsale' or an ID like '#sale-badge'.
- Once you've identified the CSS class or ID, note it down. You'll use this CSS selector to style or manipulate the sale badge element as needed.
2. Add the custom CSS to your site
Once you've written your custom CSS rules, you need to apply them to your site. There are several ways to do this and change the sale badge in WooCommerce.
Method 1: Via your child theme's stylesheet or by using a plugin
Update the child theme or using a plugin to add custom CSS ensures that the changes you make aren't overwritten by updates to your theme.
- Access your WordPress admin panel.

- Go to Appearance → Theme File Editor.
Method 2: Via the WordPress customizer
Although it isn't recommended, you can add changes directly in the WordPress theme customer. Follow these steps.
- Go to Appearance → Customize.

- Scroll down till you locate the Additional CSS option.

- Add either of the below CSS snippets.
Snippet 1
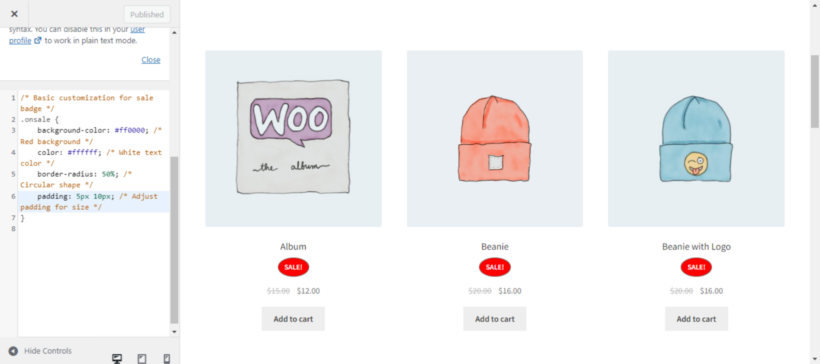
This will apply basic customizations — change the colors, adjust the size, and add borders to the sale badge text.
/* Basic customization for sale badge */

.onsale {background-color: #ff0000; /* Red background */

color: #ffffff; /* White text color */

border-radius: 50%; /* Circular shape */

padding: 5px 10px; /* Adjust padding for size */}
Here's the updated custom sale badge:
Snippet 2
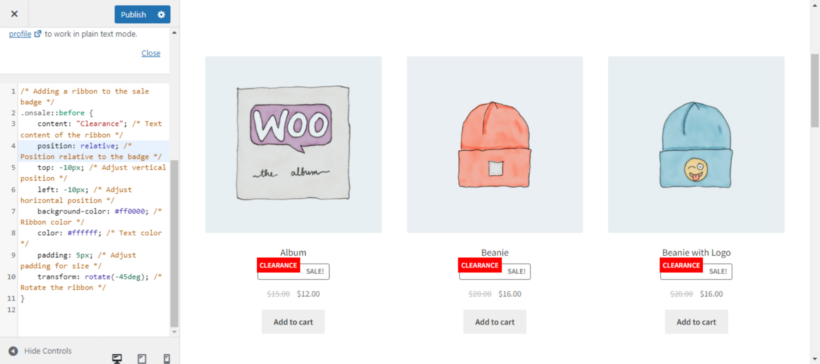
This will add a ribbon, an additional visual elements to the sale badge.
/* Adding a ribbon to the sale badge */

.onsale::before {

content: "Clearance"; /* Text content of the ribbon */

position: relative; /* Position relative to the badge */

top: -10px; /* Adjust vertical position */

left: -10px; /* Adjust horizontal position */

background-color: #ff0000; /* Ribbon color */

color: #ffffff; /* Text color */

padding: 5px; /* Adjust padding for size */

transform: rotate(-45deg); /* Rotate the ribbon */}
And here's the updated sale badge overlaid with a "Clearance" ribbon:
How to change the WooCommerce sale badge text with plugins
If you're not 100% comfortable with coding, you can still change the sale badge in WooCommerce using a plugin. I've handpicked three top-notch plugins that can help you get the same result.
1. YITH WooCommerce Badge Management
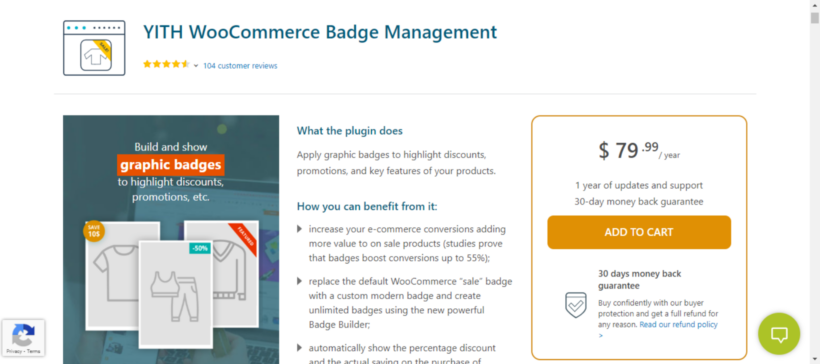
YITH WooCommerce Badge Management is a freemium plugin that lets you design graphic badges to highlight sales, discounts, or key product features.
You can use its badge builder to create as many badges as you like:
- Simple sale badges — text and background.
- CSS sale badges — change the color, text, size, etc.
- Image sale badges — Upload an image to be used as a badge or select an image provided by the plugin.
That's not all. It lets you make advanced customizations such as setting badge sizes and border-radius, setting padding for text badges, picking the badge position and alignment, and much more.
2. Improved Sales Badges for WooCommerce
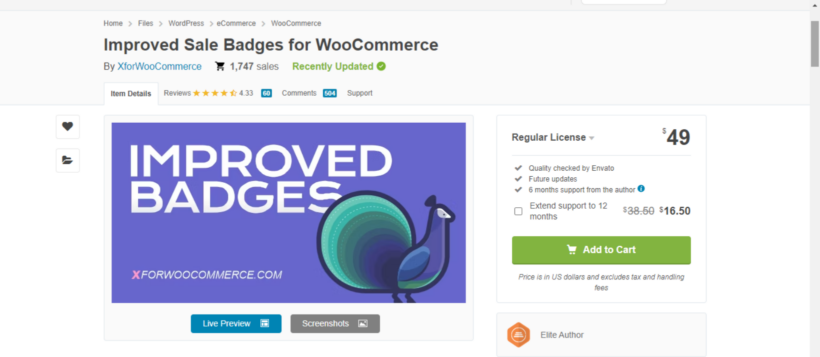
The Improved Sales Badges for WooCommerce plugin lets you choose from over 30 unique badge designs to replace the default WooCommerce sale badges. It also lets you tailor the presets and colors of the sale badge to match your brand.
You can use different badges for different products. If, for example, you're running a black friday cyber monday sale where you're offering 65% off some items, while other items are buy one get one free. You can show a "65% off" badge on applicable items and "BOGO" badges, as applicable.
You can combine up to 3 different badge styles into one to create a special badge. An added benefit is that it fully supports the WPML translation plugin, so you can use it to sell on sites that translate content to other languages.
3. Product Labels for WooCommerce
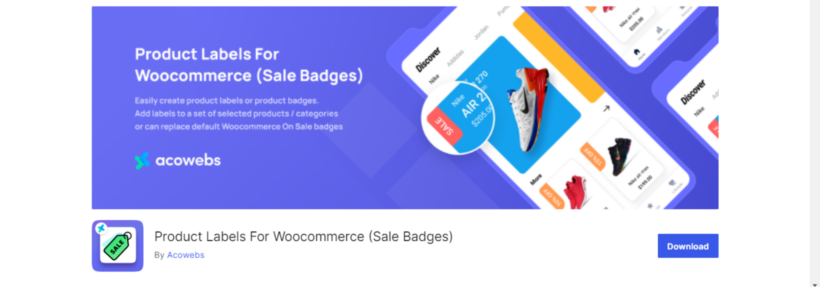
Another popular freemium plugin, Product Labels for WooCommerce, does exactly what it says on the box. It lets WooCommerce admins create a wide range of product badges, including sale badges.
You can choose from a wide range of badge styles and options. It also provides a super intuitive interface where you can design badges from scratch and customize the badge color, text, font size, opacity, line height, width, position, etc.
Product Labels for WooCommerce's standout feature is that it allows you to add the expiry date and time for the badges, so you can schedule how long the sale badge is visible for. And if you prefer, you can opt to hide the default WooCommerce ‘Sale’ badge from products that are on sale or remove sale badges entirely.
How to run more successful sales with WooCommerce Discount Manager
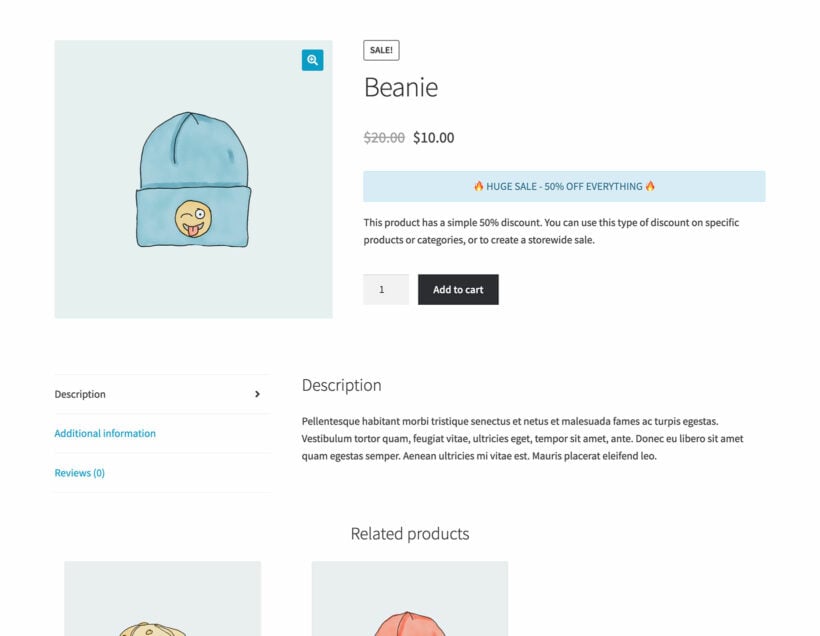
WooCommerce Discount Manager is a powerful plugin that improves upon the classic sales badge feature in two major ways:
- It lets you add custom promotional sale banners to the product and cart pages: Sale badges are an excellent way to draw attention to your sales, but they still only appear over a small portion of featured product images. This may not be the most effective. WooCommerce Discount Manager lets you add a prominent banner with custom text to promote the sale offer — in addition to the default sale badge.
- It lets you automatically update prices of on-sale products: The default method of adding sale badges to products in WooCommerce is to manually update the sale price per product. This can be tedious and time-consuming. This plugin lets you set sale prices storewide or for select categories with a few clicks.
An added bonus is that WooCommerce Discount Manager is a comprehensive discount management plugin. This means that it's packed with a ton of additional useful features to reduce the behind-the-scenes work of managing sale promotions and boost your online store's revenue.
WooCommerce Discount Manager's key features
- It lets you easily create any kind of discount and price rule: fixed percentage off, fixed amount, buy x get y free (e.g. BOGO), cart total, bulk pricing discounts, dynamic discounts, etc.
- You can set multiple products on sale automatically — apply discount pricing rules storewide, to select product categories and sub-categories, as well as specific products.
- It lets you create and schedule promotional campaigns based on various criteria, such as store-wide, category-wide, product-specific, and user-role-based (e.g. for a loyalty program or a members-only club).
- You can set rules and conditions — sale start and end dates, minimum cart value, minimum spend requirement, discount priority, and others, to control how shoppers use the discounts in your online store.
- You can add banners with custom promotional messages to advertise details about the sales offer to the product detail and cart pages. Note that promotional notices on the cart page will only be shown to customers who took advantage of a sale price.
In the sections below, I'll show you how to use WooCommerce Discount Manager. First, to automate key aspects of the sale process, by adding discounts to products automatically. Then, I'll show you how to use the plugin to upgrade the default sale badge on the product page.
Setting up storewide or category-specific discounts effortlessly
As I mentioned earlier, one of the key limitations of the default process of creating sales in WooCommerce is that you can't automatically set products on sale. You have to manually update regular prices and sale prices for every item, simple products, variable products, etc. That's a massive waste of time 😒!
With WooCommerce Discount Manager, you can automate this repetitive process and add advanced rules and conditions that aren't part of the default WooCommerce.
Follow these steps to set up the plugin and configure it.
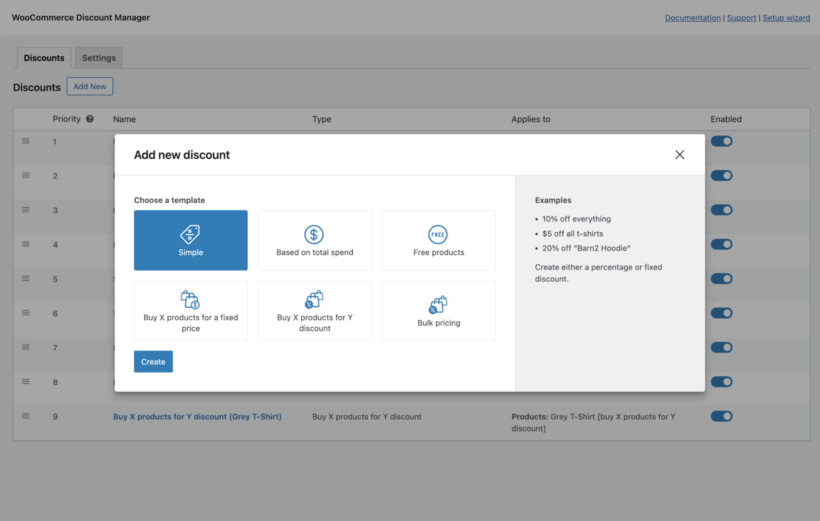
1. Add a discount rule to your site
- Add the WooCommerce Discount Manager plugin to your site, and activate it.
- Go to Marketing → Discounts in your site's admin area.
- Click on the "Add New" button to create a brand-new discount rule.
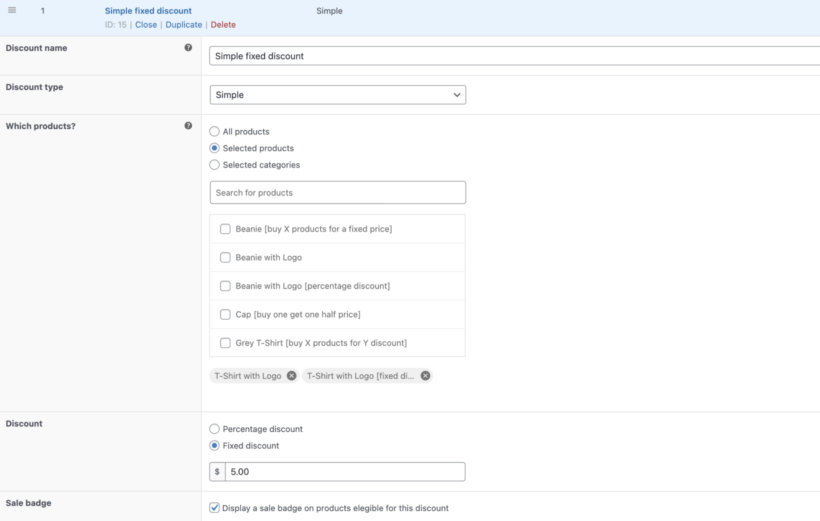
- Name the rule.
- Pick the discount type you want to offer for this sale campaign. The options are:
- Simple discount: To provide shoppers a set percentage or amount off.
- Based on total spend: To assign a minimum spend requirement for shoppers to qualify for the sale price.
- Free products: To set a minimum number of items shoppers must buy to be eligible for a specific number of free items. (Note: The free items will either be the same price or lowest priced items in the customer's shopping cart).
- Buy X products for a fixed price: To offer multiple items for a fixed amount. For example, a beauty store can run a "buy 3 beauty blenders for $30" sale.
- Buy X products for Y discount: To offer buyers a fixed amount or percentage off the cart subtotal.
- Bulk pricing: To offer shoppers a fixed amount or percentage off specific items in the cart or the entire cart value.
2. Configure the discount rule
- Mention the products to be included in the sale in the "Which products?" field. Select "All products" if you wish to offer all products in your store on sale. If not, enter specific categories or products. You can specify categories and products (if any) to be excluded from this sale in a later step.

- Specify the logic to be applied to this discount rule. For instance, if you selected "Simple discount" in the previous step, you'll now get to add the fixed amount or discount percentage here.
- Tick the "Sale badge" checkbox to add the promotional banner to products that are part of this sale.
- Specify who's eligible for this sale in the "Applies to" field — everyone who shops at your store, select users, or people with select user roles.
- The "Availability" field is where you specify when the sale goes live. Select "Always available" to offer the products on sale indefinitely and "Specific dates" to schedule the sale (recommended).
Add eye-catching sale messages with enhanced display options
Once you've created the sale, it's time to add labels to your site's front end to promote them. The WooCommerce Discount Manager plugin makes it easy for you to add them throughout your website — on the single product page and above the cart (to assure customers that their order qualifies for sale prices before they proceed to checkout).
Here's a quick guide on how to set this up on your ecommerce site.
- Go to the sale you created in Marketing → Discounts.

- Locate the "Product page content" field and add the custom promotional message to be shown on the product detail page of products that are on sale. Feel free to add sale-related images or emojis to make your message eye-catching. I added "🔥 HUGE SALE - 40% OFF EVERYTHING 🔥", but you can customize it as you wish. For example, a store that sells beauty products might display something like "🎀Buy 2 beauty blenders, get 1 sunscreen free 🎀".
- The "Content location" field is where you define where on the single product page to showcase the sale badge/product label. The options are: before the product page content, before the short description, before the product title, before the add-to-cart button, before the product meta information, and before dedicated tabs.
- Add another custom sale-related message to the cart page in the "Cart notice" field. This will be shown right above the cart when the discount offer is applied. Continuing with the above example, something like, 'Congrats 🎉! We've added your free product(s) to your shopping cart 🛒!'.
- Save the settings.
Now it's time to head to the front-end view of the site to see it in action. Here's an example of the sale badge on the individual product page of a demo WooCommerce store:

How do I add a sold out badge on WooCommerce?
WooCommerce automatically marks out-of-stock products with a "Read more" button instead of "Add to cart," but it doesn’t display a clear “Sold Out” badge by default. To add a visual badge, you can use a plugin like YITH WooCommerce Badge Management to create custom “Sold Out” badges.
Make your WooCommerce sale badges work harder
Badges are a powerful way to direct shoppers' attention to products that are on sale. Plus, they can improve your store's conversion rates, user experience (UX), and overall revenue.
In this detailed tutorial, I've shown you how to change the sale badge in WooCommerce using PHP and CSS and by using a plugin.
For best results, use WooCommerce Discount Manager to create, schedule, and manage sale promotions. It lets you upgrade the default sales badges and add banners with custom, eye-catching messages to promote your offers. Plus, you can apply discounts storewide or to multiple categories or products with a few clicks.
Get started with WooCommerce Discount Manager today.
2 Comments
Hi Priyanka,
Thank you for the great and detailed article. I wanted to share another fantastic product badge plugin that could add value to your article. The Badge and Product Label for WooCommerce plugin is a free option that could be useful for your readers.
https://wordpress.org/plugins/easy-sale-badges-for-woocommerce/
Additionally, the pro version of the plugin, offers even more features.
https://www.asanaplugins.com/product/woocommerce-sale-badges-and-product-labels/
Thank you!
Hi Ivy. Thank you for your kind words and for sharing your plugin. This would be a helpful alternative to the plugins already mentioned in the article. Cheers!