How to add new WooCommerce customers to MailChimp
Are you looking for a way to add new customers to your MailChimp email list? Keep reading to learn how to add new WooCommerce customers to your MailChimp email list.
Building an email list is a great way to draw more traffic and sales to your WooCommerce store. And email marketing campaigns help you build a better relationship with your customers. Therefore an email list can help you retain customers and grow your business.
There are several ways to grow an email list. The general advice is to add popups to your site, offer exclusive offers, run contests on social media, etc. But one of the most overlooked sources for emails are new customers of your store.
Customers of a WooCommerce store don’t just provide emails, but also billing and shipping data which can be utilized to offer personalized sales and promotional offers. For instance, customers living in the US can be sent sale offers on Martin Luther King Jr. Day or the Fourth July.
The bottom line is, adding WooCommerce customers to your email list is a great way to build a long-lasting customer relationship.
In this article, we will show you how to automatically add new WooCommerce customers to an email service provider (MailChimp).
How to add new WooCommerce customers to MailChimp
To add new WooCommerce customers to your email list, you need a third-party tool.
MailOptin is one of the best email automation tools out there and we'll show you how to use it. Once you set it up, it will automatically add new customers to your MailChimp email list.
For this tutorial, we are using MailChimp as our email marketing tool. If you are using a different email marketing tool, don't worry. MailOptin works with all the popular email marketing tools.
Here’s a complete list of MailOptin integrations: MailChimp, AWeber, Drip, MailerLite, ConvertKit, Constant Contact, GetResponse, Campaign Monitor, Sendy, ActiveCampaign, Sendinblue, Gist, Klaviyo, Sendlane, Mailster, Vertical Response, Mailjet, HubSpot, Ontraport, Moosend, MailPoet, Zoho CRM, Zoho Campaigns, Keap/Infusionsoft, Jilt, GoDaddy Email Marketing, SendFox, SendGrid, CleverReach, weMail, Facebook Custom Audience, and FluentCRM.
Now, let’s look at the steps you’ll need to take to add new customers to the MailChimp email subscription list.
Add new customers to MailChimp when any product is purchased
Install and activate MailOptin on your WooCommerce site.
Next, you'll connect MailOptin to MailChimp. Go to MailOptin → Integrations → MailChimp Connection, enter your MailChimp API key, and save the setting.
Now you’ll add new customers to the MailChimp email list. Go to MailOptin → Settings → WooCommerce Integration → Select Integration. From the dropdown, select MailChimp.
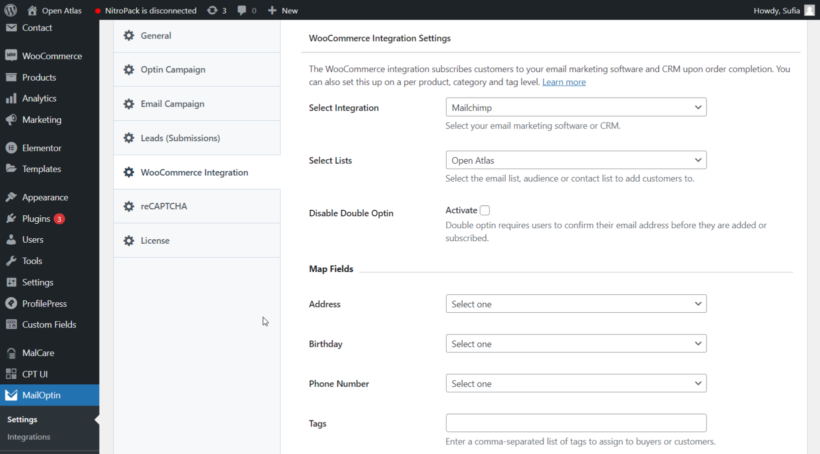
Scroll down to add billing and shipping data to the email list and then save your settings.
Some of you would probably prefer to ask customers before adding them to an email list - and this is generally a legal requirement. To do this, go to MailOptin → WooCommerce Integration Settings → Subscribe Customers and select Ask for Permission. Hit Save Changes.
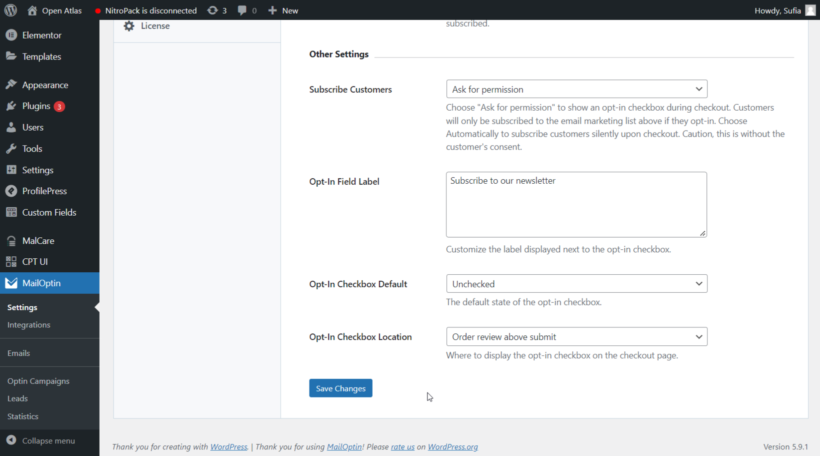
MailOptin will add a checkbox seeking permission from customers on the checkout page before adding them to your email list.
Add new customers to MailChimp when specific products are purchased
So far you have learned how to add all customers to your email list when they make any purchase. In this section, you will learn how to add a customer to a mailing list when they purchase a specific product.
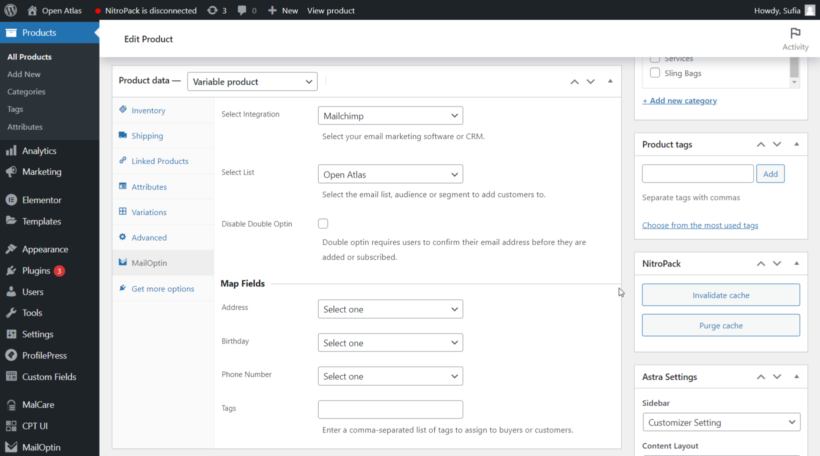
Open the specific product and scroll down to Product Data → MailOptin → Select Integration. From the drop-down menu select MailChimp.
That’s it. Customers buying that particular product will be automatically added to your email list.
Add new customers to MailChimp when products from specific categories are purchased
To add a customer to your mailing list when they purchase from a specific product category, these are the steps you need to take:
Go to WooCommerce → Products → Categories. Edit the category of your choice and you should be able to see a Connect button. Click on it and a pop-up will appear.
In the pop-up, go to Select Integration, and from the drop-down menu choose MailChimp. You can also choose which email list you want the customers to be added. And also map billing and shipping data to the corresponding custom fields in your email marketing software.
Make sure you save the changes before closing the popup.
Add new customers to MailChimp when products from specific product tags are purchased
To add a customer to your mailing list when they purchase from a specific product tag, these are the steps you need to take:
Go to WooCommerce → Products → Tags and edit the tag of your choice, and then click on the Connect button.
A pop-up will appear. Make sure you choose MailChimp for integration and then select the email list where you want the customers to be added. You may also map billing and shipping data to the corresponding custom fields in your email marketing software. Save your settings.
Related tutorial: Learn how to add multiple email recipients to your WooCommerce order emails.
Bonus: Add multiple recipients to your WooCommerce emails
Before we wrap up the article, it’s worth mentioning that MailOptin works very well with our very own WooCommerce Multiple Email Recipients plugin.
WooCommerce Multiple Email Recipients is an easy-to-use WordPress plugin that lets you add additional email recipients to your order. By combining both the plugins, you can grow your e-Commerce store exponentially.
Wrapping up
Utilizing new customers to further grow your store is a step in the right direction. We recommend using MailOptin to automatically add new customers to your email list. The plugin integrates well with almost all email marketing services including MailChimp.
That said, MailOptin is capable of doing much more. Using the plugin, you can alert customers about new products through automated emails, you can create custom lead generation and registration forms, you can A/B test your email campaigns, among other things.
Try out MailOptin and WooCommerce Multiple Email Receipts today!
2 Comments
Great article on how to add new WooCommerce customers to Mailchimp! Here are a few actionable tips that I think could help:
Use an integration plugin. There are several plugins available that can help you integrate WooCommerce with Mailchimp, making it easier to add new customers to your email list. Choose a plugin that is well-supported and highly rated by other users.
Offer an incentive. Encourage people to sign up for your email list by offering them a valuable incentive, such as a discount code or exclusive content. Make sure you have a clear and visible opt-in process to ensure that you're only sending emails to people who want to receive them.
Segment your list. Use the information you have about your customers, such as their purchase history or location, to segment your email list. This will allow you to send more targeted, relevant emails that are more likely to generate a response.
Personalize your emails. Use the information you have about your customers, such as their name and previous interactions with your brand, to personalize your emails. This will help your emails stand out in the inbox and make a stronger connection with your customers.
Make your emails mobile-friendly. The majority of people now access their emails on their mobile devices, so make sure your emails are optimized for smaller screens. Use a responsive design that adjusts to the size of the device, and keep your content concise and easy to read.
Test and optimize. Make sure you're continually testing and optimizing your emails to see what works best. Try different subject lines, calls to action, and email designs, and use the data you collect to make informed decisions about your strategy.
Thanks for sharing this useful information!
Hi, Steve. Thanks for your tips!