How to create linked products in WooCommerce

Looking to create linked products in WooCommerce? Here are 4 reliable methods, from default related products to swatch-style links between separate items.
I'm writing this following recent changes to Iconic's Linked Variations plugin. Iconic Linked Variations was the leading paid plugin for swatch-style links between separate WooCommerce products for years. The Iconic brand has now been discontinued, and Linked Variations has been merged into Kadence Store Kit. Lots of store owners are looking for a reliable alternative.
None of the plugins I cover below exactly replicate Iconic Linked Variations. Each one is an alternative way to achieve a similar result. They're worth considering based on what your customers need.
Linking products together in WooCommerce helps customers find related items quickly. It lets them compare options and buy more than one product in a single visit. The default WooCommerce setup gives you basic tools for this. With a few extra plugins, you can go much further.
In this article, I'll walk you through 4 ways to create linked products in WooCommerce. I'll start with the default options. Then I'll cover swatch-style links, table-style displays, and richer cross-sells in an on-page cart popup.
What are linked products in WooCommerce?
Linked products are separate WooCommerce products that are connected to each other on the front end. Customers see them grouped together, even though each one is its own product in the WooCommerce database.
This is useful when you want to keep products as separate items for stock, SEO and reporting. The customer can still move between them quickly. A classic example is a phone catalog where each storage and color combination is its own product:
- iPhone X - Space Grey - 64GB
- iPhone X - Space Grey - 256GB
- iPhone X - Silver - 64GB
- iPhone X - Silver - 256GB
Each one is a separate product. Linked products let the customer see the full range when they land on any one of them.
Why link products in your WooCommerce store?
There are 3 main reasons store owners link products together rather than rely on variations alone.
- Bigger catalog and better SEO. Separate products show up as separate entries in your shop. Each one has its own URL, schema and indexable page.
- Cleaner stock and reporting. Stock counts and sales reports stay per-product instead of being merged under one variable product.
- Better customer experience. Customers can see all available options at a glance and click straight through to the one they want.
Linked products are common in stores that sell electronics, fashion and beauty. They suit any catalog where attributes like color or capacity are commercially meaningful.
Method 1: Use default WooCommerce related products, upsells and cross-sells
WooCommerce comes with 3 built-in ways to link products together. They're free, but they're limited in how the linked products are displayed.
Upsells
Upsells are products you suggest as a step up from the one the customer is currently viewing. They appear below the product description on the single product page, usually under a heading like 'You may also like…'.
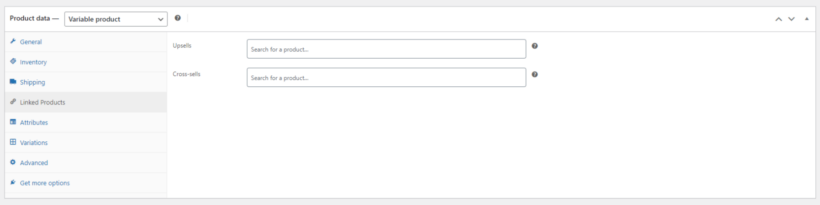
To add upsells, open a product in the WordPress dashboard. Scroll to the 'Product data' panel and click the 'Linked Products' tab. Add the products you want to upsell.
Cross-sells
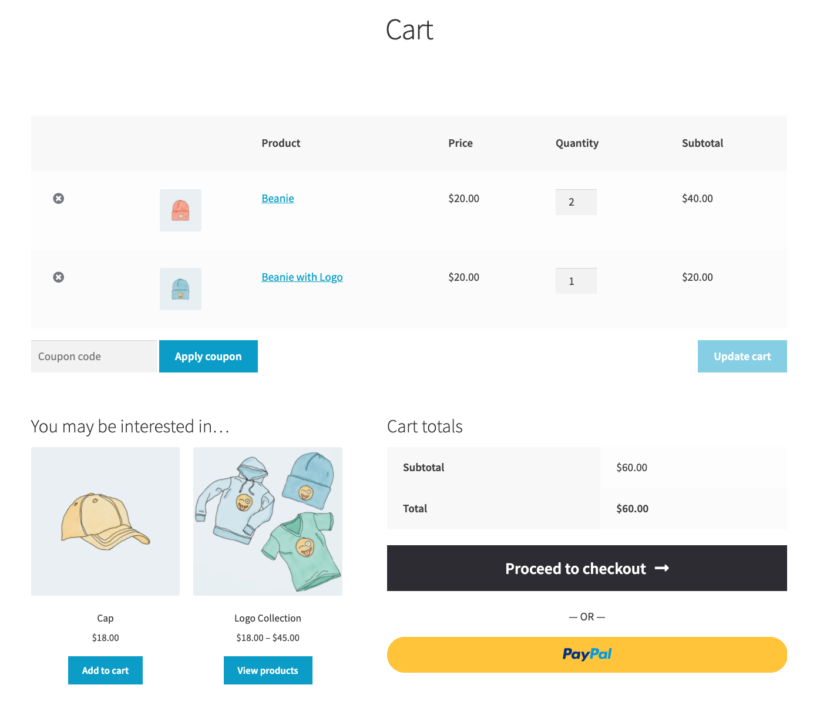
Cross-sells are complementary products. They appear on the cart page just before checkout, under a heading like 'You may be interested in…'.
You add cross-sells in the same 'Linked Products' tab as upsells:
Related products by category and tag
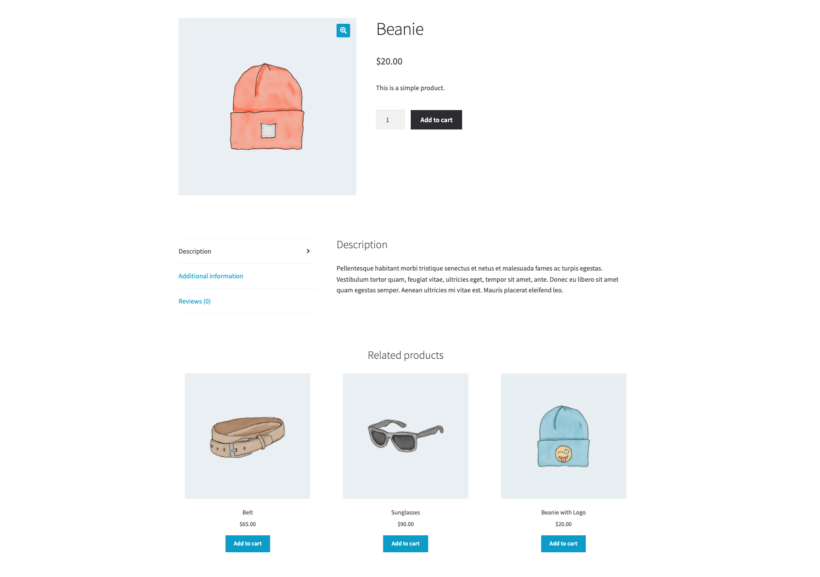
WooCommerce automatically links products that share categories or tags. These appear below the product description as related products. There's no per-product control here. The link is based purely on taxonomy.
These default tools work, but they're basic. The customer doesn't see swatch-style links. You can't display linked products in a structured table. And you can't easily run an 'add multiple to cart' flow. For richer linking, you'll want one of the plugins below.
Method 2: Create swatch-style links with WooCommerce Product Options
WooCommerce Product Options includes a 'Products' option type. It lets you display other WooCommerce products as selectable options on the current product page. This is the most direct way to recreate the swatch-style links pattern.
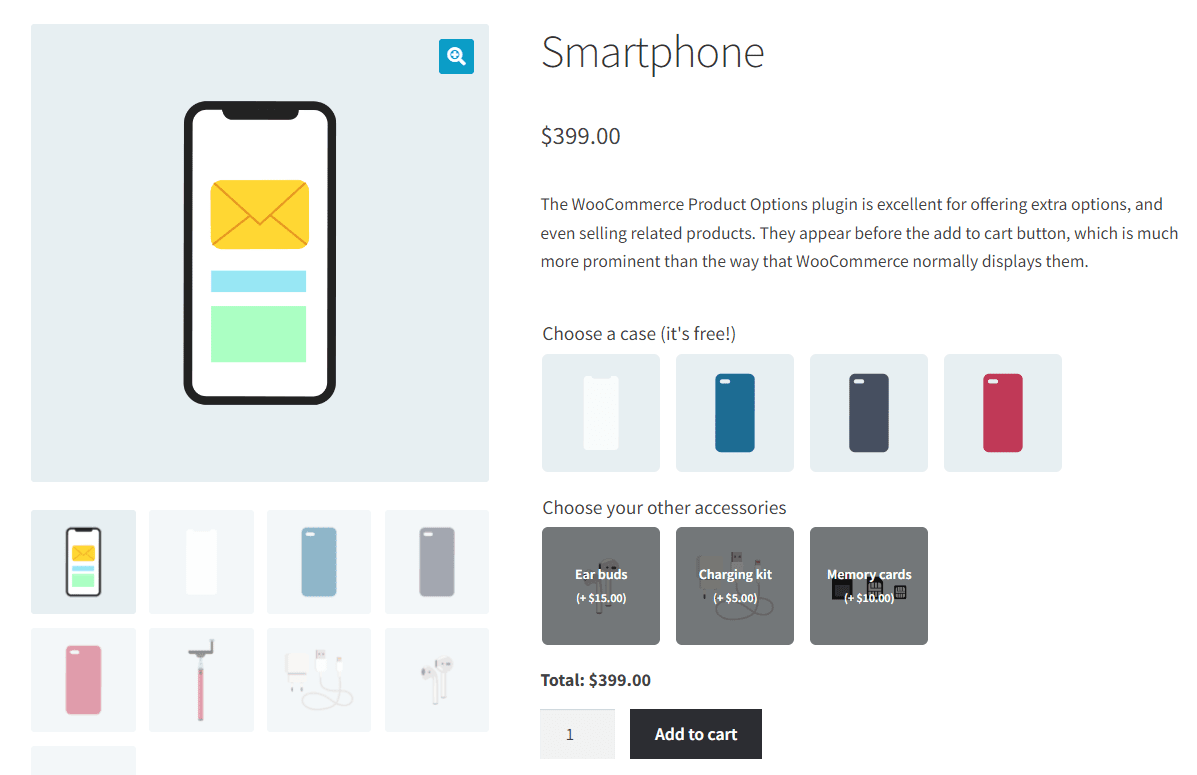
The customer sees a list of related items on the product page. They can pick the one they want and add it to the cart in a single click. Each item is its own separate product, so you keep all the catalog and stock benefits I covered above. You can pair this with variation swatches for an even richer look.
How to set it up
- Install WooCommerce Product Options on your store.
- Open the product where you want the linked products to appear.
- In the Product Options panel, add a new option of type 'Products'.
- Pick the products you want to link to. You can also pick a category or tag, and the plugin pulls in the matching items automatically.
- Choose how the options display. Color swatches, image swatches and label buttons all work.
- Save the product.
The linked products now appear on the product page. Customers can move between them without needing the default WooCommerce related products section.
Method 3: Display linked products in a table with WooCommerce Product Table
WooCommerce Product Table takes a different angle. Instead of showing linked products as swatches, it displays them in a structured table. You can place this on the shop or product page.
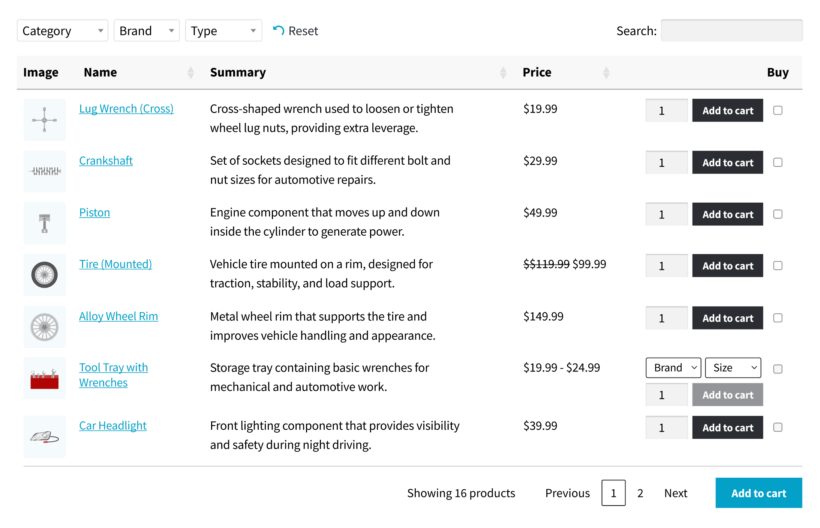
This works well for catalogs where customers compare across many options before deciding. They can sort, filter, and add multiple items to the cart in one go. It also pairs well with showing single variations on the shop page. That fits when each linked item is a variation.
How to set it up
- Install WooCommerce Product Table on your store.
- Go to Products → Product Tables and click 'Add New'.
- Use the table builder to choose which products or categories to include.
- Pick the columns you want, such as image, name, price, stock and add to cart.
- Save the table. WooCommerce Product Table gives you a shortcode like
[product_table id="1"]that you can paste onto any page.
Customers see every linked product side by side. They can buy more than one variation in a single click. That's harder to do with the default WooCommerce setup.
Method 4: Add cross-sells with WooCommerce Fast Cart
WooCommerce Fast Cart replaces the standard cart page with an on-page popup. The popup can display cross-sell suggestions alongside the cart contents. This feels similar to frequently bought together blocks. The difference is that it happens at the cart stage.

This is useful when you want linked products to appear at the moment of purchase. The customer is already in buying mode, so the cross-sell is well timed.
How to set it up
- Install WooCommerce Fast Cart on your store.
- In the plugin's Cart Contents settings, enable the 'Show cross-sells' option.
- Make sure each product has cross-sells assigned in the WooCommerce 'Linked Products' tab (covered in Method 1 above).
- Add a product with cross-sells to the cart on the front end to test the popup.
The popup automatically selects an appropriate layout based on the number of cross-sells available. You can combine this with any of the methods above. Fast Cart sits on top of your existing product page setup and adds cross-sells at the cart stage.
Which method should you use?
The right method depends on what you're trying to achieve.
- Free and basic: use the default WooCommerce related products, upsells and cross-sells.
- Swatch-style links between separate products: use WooCommerce Product Options with the Products option type.
- Table-style display of linked products: use WooCommerce Product Table.
- Cross-sells at the cart stage: use WooCommerce Fast Cart.
You can mix and match. For example, use WooCommerce Product Options for swatch-style links on the product page. Then add WooCommerce Fast Cart for cross-sells in the cart popup. The customer sees linked options at every key step, all the way through to the checkout.
Final thoughts
Linking products in WooCommerce is one of the simplest ways to improve catalog usability and lift average order value. You can also pair these methods with product add-ons for even more flexibility on the product page. The default WooCommerce setup gives you the basics. The 3 Barn2 plugins above let you go further, each in a slightly different way.
My top recommendation for swatch-style links is WooCommerce Product Options. It's the closest match to the swatch-style linked-products pattern, and it comes with a 30-day money-back guarantee.