How to bulk edit Shopify images for faster loading
Most Shopify stores have product images uploaded in inconsistent sizes, named something like IMG_4829.jpg, with no alt text attached. The result is slow pages, unpolished product grids, and zero SEO value from any of those images.
Bulk editing product images in Shopify involves two separate tasks:
- The first is preparing your image files before they go into Shopify, which means compressing, resizing, and naming them correctly.
- The second is assigning those images to the right products and variants at scale, without clicking through each product one at a time.
Shopify's default approach to image management is designed around individual products. That works fine for small stores, but it falls apart quickly when you have hundreds of products and variants to update. This article covers both parts of the workflow, including how to bulk edit Shopify images using the native CSV importer, and how Setary removes the CSV loop entirely.
Why slow images hurt your store more than you think
Shopify image optimization matters because image file size is the most common cause of slow page load times. Large files make pages load slowly, and slow pages lose customers, especially on mobile.
Shopify's recommended image specifications give you a clear target to aim for. The ideal dimensions are up to 2048 x 2048px for zoom quality. WebP and JPEG are the preferred formats. For most product images, under 70KB per file is a reasonable target for Shopify store speed. Lifestyle or hero images can run a little higher, but they should still be kept as small as possible without visible quality loss.
Inconsistent image dimensions create a second problem. When some product images are square and others are portrait or landscape, the product grid looks unpolished. That inconsistency affects trust before the customer has even clicked through to a product page.
[Suggested image: Screenshot of a Shopify product grid showing inconsistent image dimensions alongside a version with uniform square images, demonstrating the difference in visual consistency]
The SEO angle is worth taking seriously too. Shopify product image size affects the image URL, and image file names and alt text are real ranking signals in Google's image search. If every image in your store is named IMG_4829.jpg with no alt text, that's a missed opportunity across potentially hundreds of products.
Fixing all of this at scale is where most store owners get stuck. Shopify's admin is built for one product at a time.
Step 1: Prepare your images before uploading them
Resize and compress your image files
File format is the first decision. Use WebP where possible, because it produces smaller file sizes than JPEG at equivalent quality. Shopify can serve WebP automatically, but uploading in WebP keeps the source file smaller too. JPEG works well for photographs. Use PNG only where you need transparency.
Keep your dimensions at or below 2048 x 2048px. Going larger than that increases file size with no visible benefit to the customer.
For compression, these tools cover most situations:
- Squoosh - free, browser-based, no software to install, good for individual files.
- TinyPNG - handles batch compression for JPEG and PNG files.
- ImageOptim (Mac) - compresses image files offline, useful for bulk folders.
- XnConvert (cross-platform, free) - can compress and resize an entire folder at once, which makes it one of the most practical options for bulk Shopify image optimization.
Aim for a size of under 70KB per image where possible. For large full-width, lifestyle or hero images, under 200KB is a reasonable target.
Name your image files properly
Shopify uses the file name as part of the image URL. Shopify image file naming has a small but real SEO benefit, so it's worth doing before you upload rather than after.
Use lowercase letters, hyphens to separate words (not underscores), and include the key product descriptors. For example, blue-leather-wallet-front.jpg is useful. IMG_4829.jpg is not. Avoid generic names like product-image-1.jpg.
If you have a large folder of images to rename, these tools can help:
- XnConvert - can batch rename files based on a pattern alongside its compression features.
- Bulk Rename Utility (Windows, free) - lets you rename entire folders of files at once using rules and patterns, which is much faster than renaming individually.
Once your images are compressed, sized correctly, and named, the next step is getting them into Shopify and assigned to the right products and variants.
Step 2: Assign images to products and variants at scale
The next step is to upload your optimized product and variant images to Shopify. There are two ways to do this: using the native Shopify CSV importer (which is a bit fiddly and has some limitations, particularly for variable products) and the Setary bulk editing app.
Method 1: Shopify's CSV importer
Shopify's built-in product importer uses a CSV file with specific column headers. The 'Image Src' column accepts a publicly accessible URL for each product image. The 'Image Alt Text' column sets the alt text. For variant-specific images, the 'Variant Image' column maps a specific image URL to a specific variant.
The basic process works like this:
- Export your existing products as a CSV from Products → Export in the Shopify admin.
- Open the file in a spreadsheet application and edit the image columns.
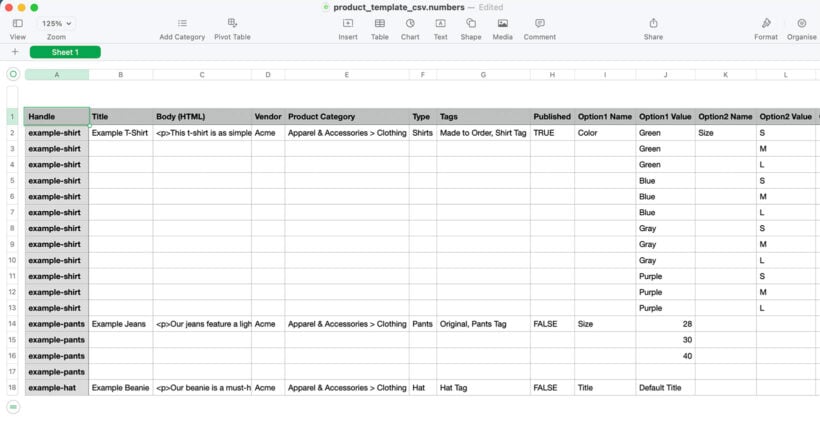
- Re-import the updated file via Products → Import.
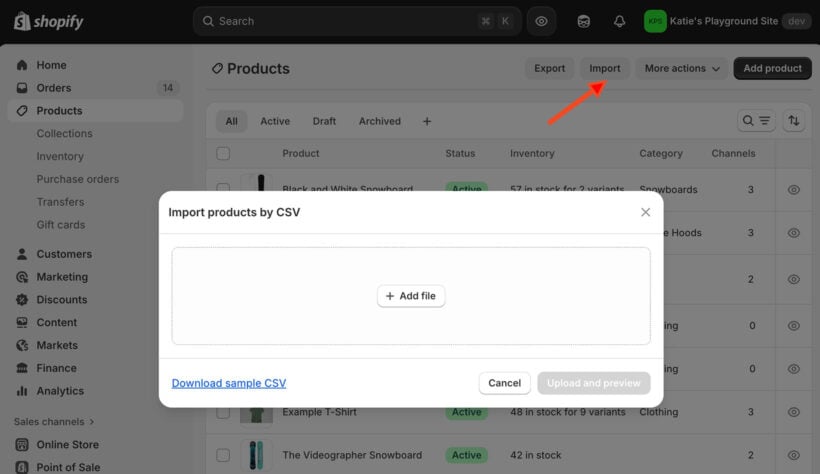
Your images need to be hosted somewhere publicly accessible so Shopify can pull them in via URL. This might mean uploading to an external host or using a public cloud storage folder.
The native importer handles one-time bulk updates to image URLs and alt text across simple products reasonably well. If you have a clean catalogue and you're doing this once, it works.
Importing variable product images to Shopify
Where it falls apart is with variable products. Multiple variants across multiple attributes produce a complex CSV structure where one misplaced row can break the entire import. Shopify's error messages on failed imports are often vague. And every subsequent change means repeating the full export-import cycle.
Shopify CSV image import is a practical option for occasional bulk updates on smaller catalogues. For ongoing image management across a large product range, the time cost adds up quickly.
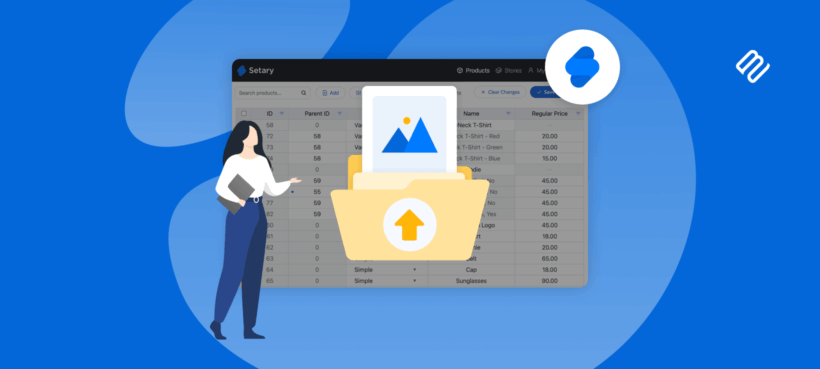
Method 2: Setary
Setary is a spreadsheet-style editor for Shopify that lets you manage product data, including images and alt text, directly in a familiar spreadsheet interface. There's no CSV importing or exporting involved.
Setary connects directly to your Shopify store and syncs automatically. Changes you make in Setary update your store in real time, so there's no import step, no waiting, and no risk of a formatting error breaking an entire file.
Here's how to bulk edit and import product variants in Shopify using Setary:
- Open your product catalogue in the spreadsheet view, where every product and variant appears as its own row.
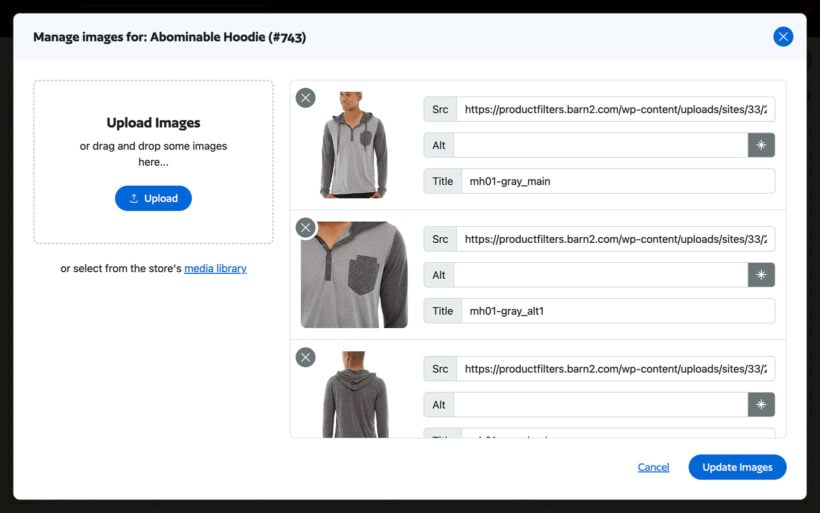
- Paste image URLs into the image column against the relevant product or variant rows.
- Changes sync immediately to your live store.
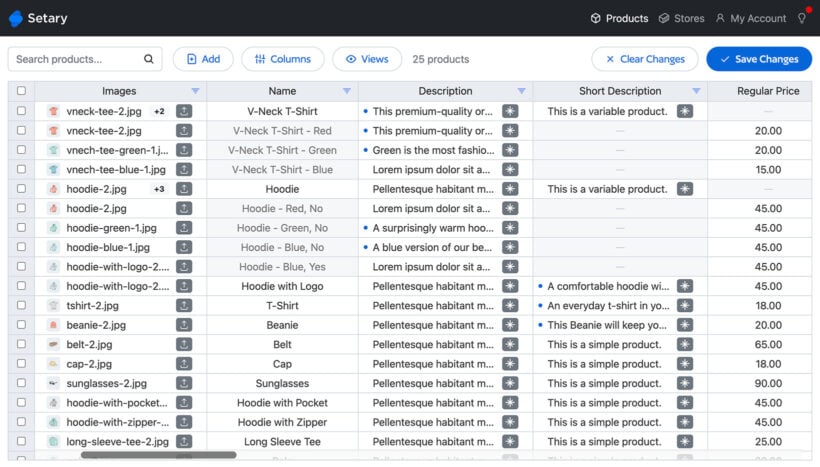
Variant image management is significantly more manageable in Setary than in CSV. Because each variant has its own row, you can see exactly which image is assigned to which variant and update it directly. There's no need to worry about row order or CSV formatting rules.
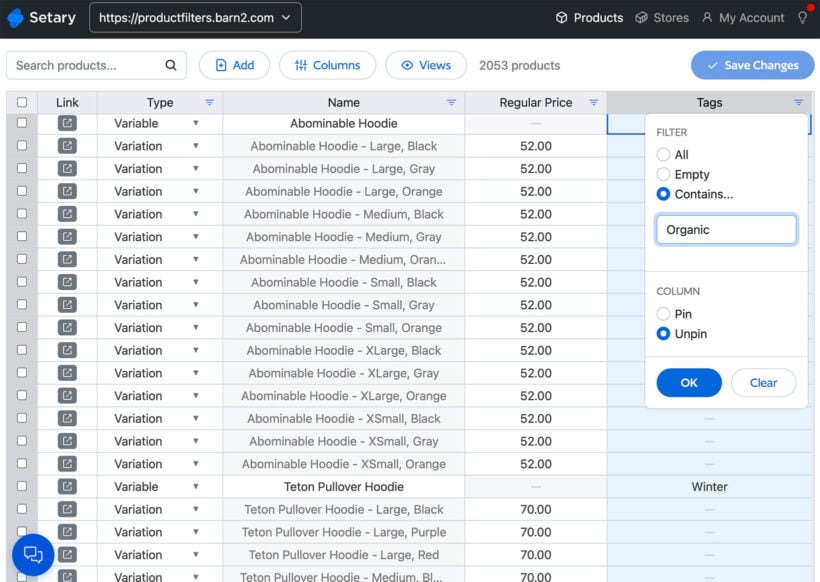
Setary's filter tools let you narrow down to a specific collection, product type, or attribute. From there, you can update images or alt text for just that filtered set, which is something that's very difficult to do cleanly in a CSV file without careful manual work.
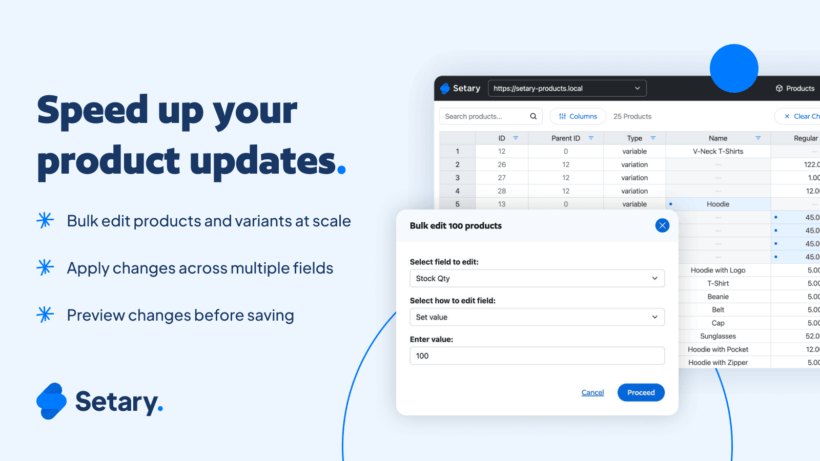
The bulk actions feature lets you select a group of rows and apply the same image URL or alt text to all of them at once. This is useful for cases where multiple variants share the same image, or where a whole product category needs the same alt text pattern.
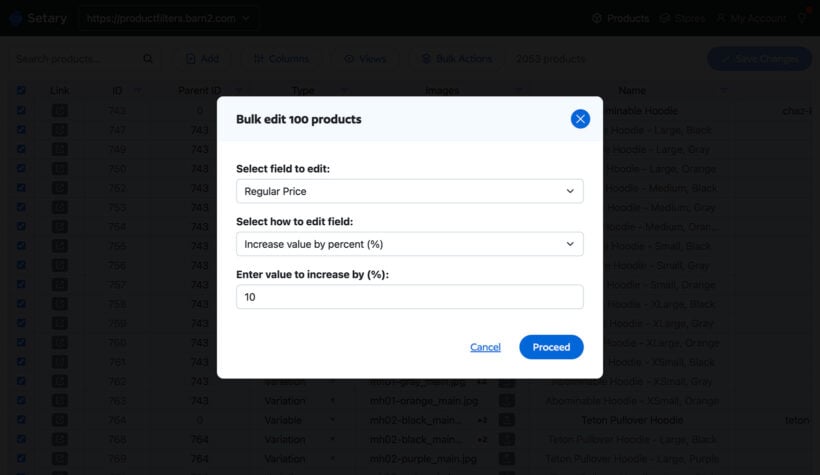
A bulk image update that would take an hour of CSV wrangling, including export, editing, fixing errors, and re-importing, can be done in a few minutes in Setary because the loop is removed entirely.
Step 3: Bulk update your image alt text for SEO
Alt text serves two purposes. The first is accessibility: screen readers use alt text to describe images to visually impaired users. The second is SEO: Google uses alt text to understand what an image shows, which affects image search ranking and can influence broader page relevance.
Most Shopify stores have blank alt text on the majority of their product images. Google gets no signal from those images about what they show.
Good alt text is descriptive and specific. "Navy blue men's slim-fit chino trousers - front view" is useful. "Trousers" is not. Blank is worse.
- Via Shopify CSV: The 'Image Alt Text' column lets you set alt text per image row. This works for a one-time bulk update on Shopify image alt text, but you have to repeat the full export-import cycle every time you want to make changes.
- Via Setary: Alt text sits alongside the image URL in the same spreadsheet row. You can update it for all products at once, or filter down to a specific category and update just those rows. No import step means changes are live immediately.
If you have hundreds of products with no alt text at all, bulk updating via Setary is the fastest way to fix this without going product by product in the Shopify admin.
Comparison: Shopify CSV vs. Setary for bulk image management
The table below covers the key differences to help you decide which approach suits your situation.
| Feature | Shopify CSV import | Setary |
|---|---|---|
| Cost | Free (native to Shopify) | Paid (see the Setary app for pricing) |
| Image URL assignment | Yes, via 'Image Src' column | Yes, directly in spreadsheet rows |
| Variant image management | Possible but complex | Easy - each variant is its own row |
| Alt text bulk update | Yes, via 'Image Alt Text' column | Yes, inline in the same view |
| Real-time sync | No - requires import step | Yes - changes apply immediately |
| Filter and bulk action | No | Yes - filter by collection, type, and more |
| Image compression/resizing | No | No (handled before upload) |
| Best for | Small catalogues, one-time updates | Large catalogues, ongoing image management |
Remember: Neither tool handles image compression or resizing. That step happens before upload, using the tools covered in Step 1: Squoosh, TinyPNG, ImageOptim, or XnConvert depending on your setup and volume.
Getting your Shopify images under control
The fastest way to fix slow, inconsistently managed Shopify images is to treat it as two separate tasks. Compress and name your files properly before upload, then assign them to the right products and variants at scale.
The first part is free. Squoosh or XnConvert handles compression and resizing without any cost. The second part is where the right tool makes a real difference. If you're managing more than a handful of products and want to skip the CSV loop entirely, Setary is worth a look.