Learn how to set up WooCommerce product customization using options and fields instead of creating hundreds of variations that slow your store down.
Most store owners think they need a visual designer when they actually need product options with pricing rules, live previews and conditional logic. I see this confusion constantly. Someone wants to sell customized mugs or personalized t-shirts, and their first instinct is searching for elaborate design software.
The real challenge isn't adding fancy design tools. It's setting up customization without creating thousands of slow variants or getting incorrect pricing. Your customers want to add names, select options, upload files, and see accurate pricing. They're not graphic designers building complex artwork from scratch.
Here's what actually works for WooCommerce product customization setup: use product options for fields and pricing logic, add a visual designer only when customers need full canvas editing, and test your setup thoroughly before going live.
This guide shows you how to choose the right approach for your store. You'll learn when options beat variations, how to avoid performance problems, and how to set up customization that creates orders your fulfillment team can actually process.
Why product options beat variations for customization
To customize WooCommerce products, you have three approaches:
Let me explain the core difference: Product variations are predefined SKUs that create separate database entries for every combination. Options are form fields that capture customer input without creating new products. This distinction matters more than most people realize.
Variations slow your admin above 50-100 items. In contrast, product options scale without performance impact. They let you set up product customizers with "infinite mix" scenarios impossible without needing thousands of SKUs.
An example
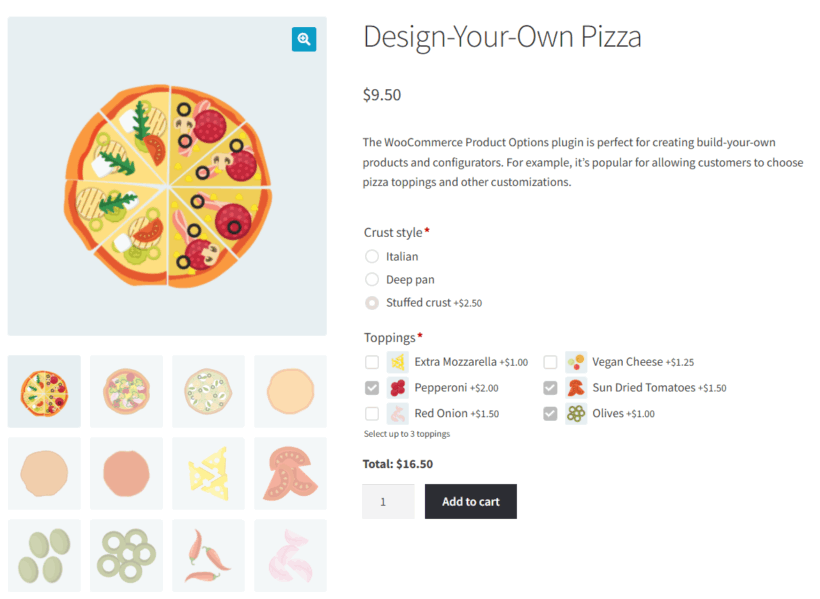
Consider a pizza shop with different sizes and toppings. You could create variations for every possible combination: small pepperoni, large pepperoni, small mushroom, large mushroom. The math gets ugly fast. Or you could use option fields that let customers configure thousands of combinations without creating thousands of variants.
Options solve the "infinite mixes" problem. Customers can select exactly what they want. Your database stays manageable, and your fulfillment team sees clear order data.
Variations still make sense for predefined product versions with separate SKUs where you need to manage stock, such as clothing sizes. Set up variations alongside product options for more flexible customization needs: fields, pricing logic, conditional rules, and basic visual preview.
Why WooCommerce's built-in fields aren't enough
You may also have heard that WooCommerce itself comes with native custom fields. However, these have no pricing logic, conditional display, or customer-facing UI. They're developer tools, not customer-facing features.
Custom code requires ongoing PHP maintenance, can break during updates, and needs developer time for every configuration change.
This is why plugins exist. They add the logic layer WooCommerce lacks for true woocommerce product customization setup. Keep reading to discover the best plugin and how to use it.
Visual designers vs product options: Choosing the right customization tool
When you research WooCommerce product customization setup options, you might come across visual product designers. These are specialized plugins that provide full canvas editing. They offer layered images, advanced text placement, clipart libraries, and design uploads. They excel when customers need to create or edit complex graphics within the product customizer.
What most stores don't realize is that they don't need a full visual designer. Instead, they can keep customers' lives simple by providing multiple product options plus a live preview plugin.
If customers are selecting options, entering text, or uploading images (not designing complex graphics), then you can use product options to create user-friendly product configurators. Visual designers add significant complexity for both the merchant and customer, as well as additional per-product setup overhead. Choose them only when truly necessary.
WooCommerce plugin options for product customization
Next, I'll tell you about the best product customization plugin to set up in your store. This provides the best balance between flexibility and usability. After that, I'll share the best visual designer plugin for more complex needs. And then finally, I'll provide step-by-step instructions (plus video) on how to set up a product customizer in WooCommerce.
Product options plugin (recommended)
The WooCommerce Product Options plugin handles the majority of customization needs. It covers everything most stores actually need for woocommerce product customization setup, without unnecessary bloat or complexity.
Its core capabilities include:
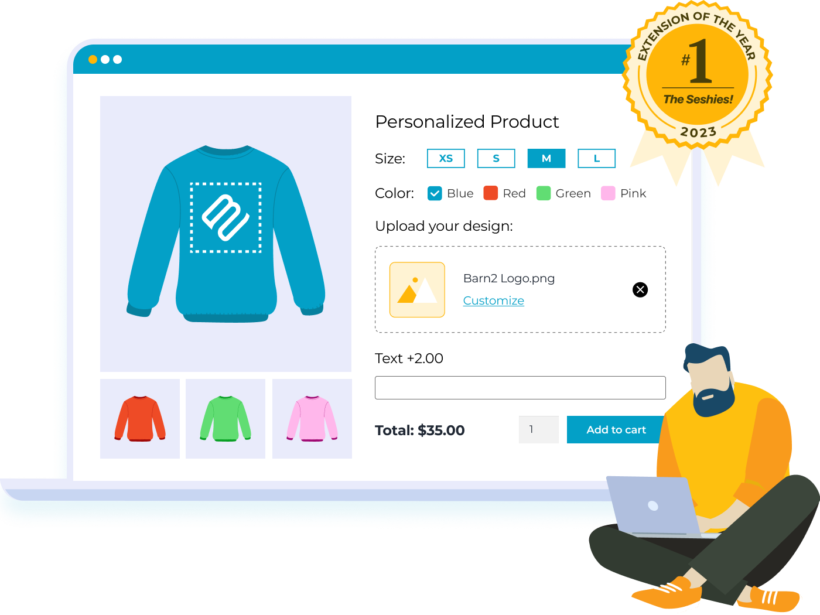
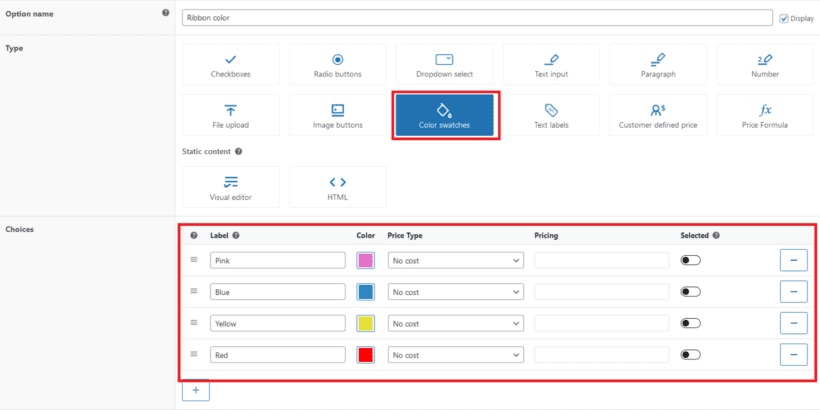
16+ field types - Text inputs, dropdowns, checkboxes, color pickers, file uploads, date pickers, image swatches, and more.
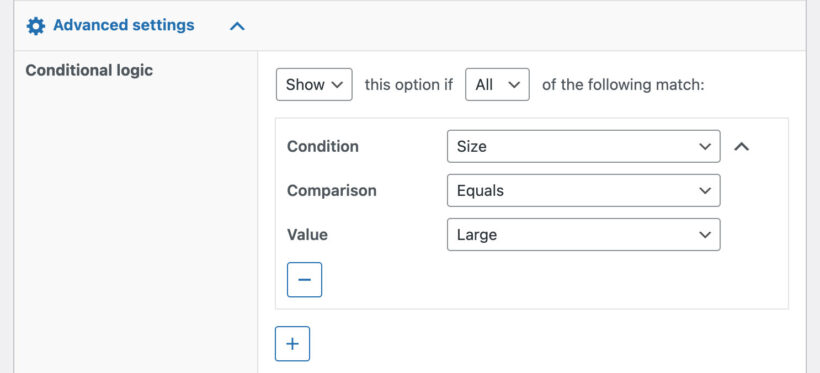
Conditional logic - Show or hide fields based on selections, create dynamic forms that adapt to customer choices.
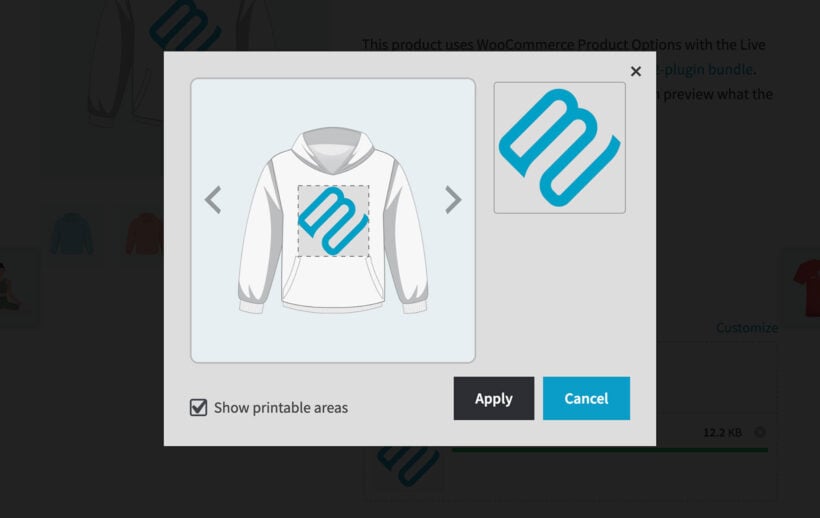
Live image and text preview - Display uploaded images and custom text on product images in real-time.
Order data capture - Customization data flows reliably from cart to checkout to order admin.
You don't hunt through WordPress to find customer specifications. Everything appears exactly where your fulfillment team needs it.
Visual designer plugins (for specialized needs)
If you're running a print-on-demand business or need customers to design complex graphics from scratch, consider specialized visual designers. These tools serve a specific niche.
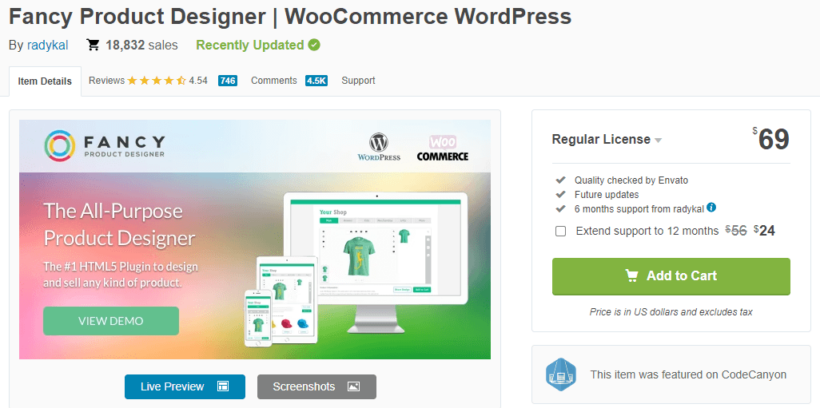
Fancy Product Designer offers full canvas editing with extensive clipart libraries, advanced text controls, and layer management for complete apparel customization. It works well when customers need to position multiple design elements, add effects, and create complex compositions.
Lumise focuses on print-on-demand with sophisticated layer controls, print-ready file export, and production-optimized workflows. The plugin generates files in formats your printer actually needs, which matters if you're sending orders to fulfillment partners.
These tools excel at visual design. Customers can rotate elements, adjust opacity, add shadows, and work with multiple layers. But they typically handle pricing and conditional logic less robustly than dedicated options plugins. They're also incredibly difficult to use, both for the merchant and the customer.
Do I need a visual designer plugin?
Think about your actual use case. You only need a visual designer plugin if customers need to be able to make complex visual edits after uploading images to your website. If you simply need to collect other types of information, or allow them to move and size an image they have already cropped offline, then WooCommerce Product Options is everything you need.
For example, a custom cake shop doesn't need a full designer. Customers select cake size, flavor, filling, type a message, and maybe upload a simple photo. That's product options territory.
For most customization scenarios (adding names, selecting options, calculating prices, showing preview), Barn2 provides everything you need. The rest of this product customization setup guide focuses on that majority use case.
How to set up WooCommerce product customization
1. Set up product customization fields
Before you start, write a list of what information you actually need to fulfill customization orders accurately. Choose field types that match how customers customize. This might include text inputs for names and custom messages, dropdowns for sizes when you have many options, checkboxes for add-ons customers might want multiples of. You might also need file uploads for artwork or photos, or image swatches for visual selections like colors or patterns.
Go to Products → Product Options and create a new option group.
Use the 'Add' button to add all the fields you need:
Select which products, variations and/or categories the product customization options will appear on. (Tip: You can create different option groups for different products, or share the same ones across multiple products.)
Use clear labels that tell customers exactly what to enter. Add help text that explains any requirements or restrictions. For example, you might advise customers to upload images in a certain size or format.
Group related options together with section headings. Put the most important customization options first.
Hide optional extras behind conditional logic so they don't overwhelm the initial view. You can also use conditional logic to setup a step-by-step product customizer which reveals each step when the customer completes the previous step.
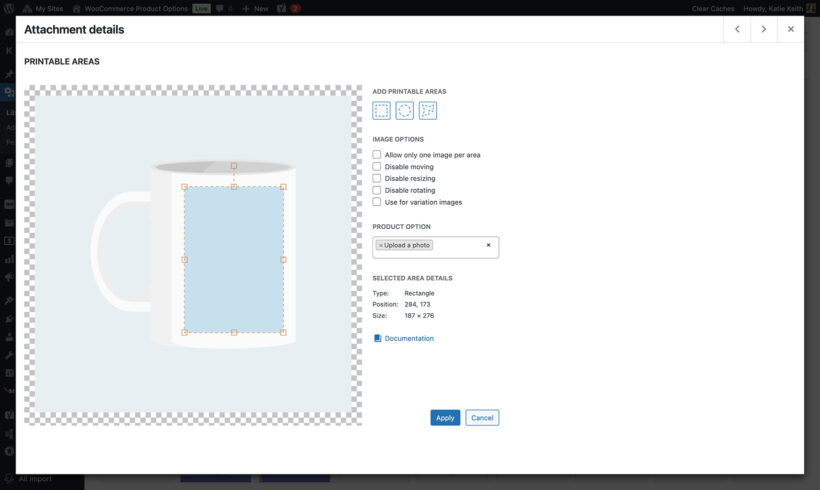
Install the live preview add-on (available as a bundle when you purchase WooCommerce Product Option) so customers see uploaded images or custom text on product images in real-time. Edit the product image in the Media Library and set up printable areas that define the customizable sections.
This way, you can set up an intuitive product customization experience that captures accurate order data without requiring code. The plugin's admin interface handles all configuration through a visual builder - no PHP required.
2. Set price options
Configure pricing for each field based on what makes sense for your business. The plugin supports multiple pricing models so you can match your real costs.
One-time fees - Add fixed amounts like gift wrapping at $5 or expedited shipping at $15. These work best for services or add-ons with consistent costs.
Quantity-based fees - Charge per quantity selected, like custom labels at $2 per label. Perfect when customers can choose how many of something they want.
Percentage increase or decrease - Calculate based on base price, like custom engraving at +15% or bulk discount at -10%. This scales automatically with your product prices.
File upload field fees - Charge per uploaded file, like design files at $3 per file. Useful when processing each file costs you time or money.
Price formulas - Build measurement-based pricing like fabric calculated as length × width × price per square foot. This handles complex calculations automatically.
Price formulas deserve special attention because they solve tough pricing challenges. Say you sell custom window blinds. Customers enter width and height. Your formula multiplies dimensions, adds installation if selected, and applies bulk discounts for multiple windows. All calculated in real-time.
Conditional pricing works too. For example, you can charge extra for rush orders only when customers select expedited shipping. Offer discounts when they buy multiple related items.
3. Verify, test, and track your product customization setup
Once you've set up product customization in WooCommerce, it's important to test everything thoroughly:
Never test WooCommerce product customization setup directly on your live site. Set it up on staging and test there first.
Verify pricing displays correctly in cart subtotals and checkout summary. Test a few customization combinations yourself to catch any price formula errors early.
Create a test product with various option types. View it in your actual theme (not the WordPress admin). Confirm fields appear in the correct location and conditional logic triggers properly.
Check responsive layouts on desktop, tablet, and mobile. Many customization issues only appear on specific screen sizes. A field that looks perfect on desktop might be unusable on mobile. I always test on at least three devices before going live.
Run checkout tests with various option combinations. Verify the price totals include all your fees correctly. Make sure the math works exactly as you expect, and tweak until it's perfect.
Test edge cases that customers will definitely try:
Required fields validation - Can customers bypass required fields?
Conditional logic triggers - Do fields appear and disappear correctly?
Formula calculations with different inputs - What if someone enters zero? Negative numbers?
Maximum quantity limits - Does the form prevent ordering too many?
Minimum order amounts - Can customers proceed with less than required?
File upload restrictions - Do size limits and file type validation work?
Special characters in text fields - What happens with quotes, apostrophes, emoji?
Track where customizations appear throughout the order process. This verification step catches data loss problems before customers report them. You should check the cart line items, checkout summary, order confirmation screen, order admin screen, and order emails.
Place a few test orders yourself. Go through the complete process as if you're a real customer. Use different payment methods. Try different option combinations. This catches issues you'd never spot just clicking around the admin.
Test abandoned cart recovery too. Add options to cart, leave the site, and come back. Do your options persist correctly? Some cache plugins interfere with option storage.
Setup product customization that works today
The core distinction matters: product options handle logic, pricing, and data. Visual designers only add preview layers for complex graphics.
Most WooCommerce stores don't need full design tools. The Product Options plugin covers the majority of customization needs with fields, conditional logic, pricing flexibility, and live preview. Your woocommerce product customization setup can be running in under an hour.