3. Creating filters and filter groups
Once you have installed WooCommerce Product Filters and configured the plugin settings, it's time to start adding filters to your site.
The process for creating filters is as follows:
Available filters
WooCommerce Product Filters comes with a wide range of filters. You can create as many filters as you like. Each filter allows the customer to narrow down the list of products by a particular type of information:
- Categories - Filter products by category. Display as dropdowns, checkboxes, radio buttons, labels, or images (with or without the category name).
- Attributes - Filter products by global attribute (e.g. size or color). Display as dropdowns, checkboxes, radio buttons, range sliders, labels, or images (with or without the attribute name).
- Colors - Use color swatches to provide a visual way for customers to filter by color. Display as color swatches only, or with the attribute name.
- Tags - Filter products by tag. Display as dropdowns, checkboxes, radio buttons, or labels. The labels option effectively creates a filterable tag cloud.
- Custom taxonomy - Filter products by a custom taxonomy which you have added to your WooCommerce products. Display as dropdowns, checkboxes, radio buttons, labels, or images (with or without the taxonomy term name).
- Custom field - Filter products by a custom field which you have added to your WooCommerce products.
- Price - Display a price slider so that customers can select a low and high price to filter by.
- Ratings - Display star ratings so that customer can filter by average rating.
- In stock - Display a checkbox which allows customers to view products which are in stock and exclude other stock statuses.
- On sale - Display a checkbox which allows customers to view products which are on sale and exclude full priced products.
- Sort by - Display a 'Sort products' dropdown which allows customers to change the order of the products in the list.
- Search - Add a search box so that customers can search for products by typing a keyword.
Creating and managing filters
Create and manage your filters in the WordPress admin under Products → Filters. This page lists all your filter groups, each of which can contain one or more filters.

Filter groups
When you first install the plugin, a 'Recommended Filters' group has been pre-installed for you. Edit this as you wish, or delete it and create your own groups from scratch:
- Use the 'Add New' button to create a new filter group.
- Hover over an existing group to edit, duplicate or delete it.
- Use the 'Sort' icons to re-order the list of filter groups. This is only used internally and will not change anything on the front end of your website.
Adding/editing filters

Use the 'Edit filter group' page to add and manage the filters within a group. Use the '+ Add filter' button to add new filters, and hover over an existing filter to edit, duplicate or delete it:
- Filter name - Add a name which will appear at the top of the filter, for example "Filter by color".
- Type - Select the data that the filter will use, for example 'Tag' or 'Price'. Depending on the type of filter you select, an additional field may appear below:
- Category - Filter by product category.
- Attribute (note: only global attributes can be used for filtering. These are created in Products → Attributes.)
- Show filters for all available attributes - This option will automatically create filters for all attributes which apply to the list of products. For example, if one category is using filters for 'Color' and 'Size' then these filters will be shown on that page; whereas if another category has a 'Brand' filter then this will appear instead. This saves having to add different filters to different pages of your store.
- Select attribute - Select an attribute to use for the filter.
- Color
- Select color attribute - Select the attribute which you are using for colors. You must also add the actual color values in Products → Attributes → Configure Terms.
- Display the name of each color next to the color swatch - Tick this to show the attribute name next to the color swatch. If unticked, the color sample will appear with no text.
- Tag - Filter by product tag.
- Custom taxonomy - This option only appears if you have added some custom taxonomies to your WooCommerce products. An option appears for you to select a taxonomy.
- Price - Filter by the product page.
- Custom field - This option only appears if you have added some custom fields to your WooCommerce products. An option appears for you to select a custom field.
- Rating - Filter by average product rating.
- In stock - Filter to view in stock products only.
- On sale - Filter to view products which are on sale only.
- Sort by - Adds a dropdown allowing customers to change how customers are sorted.
- Search - Adds a keyword search box.
- Filter style - This field only appears for certain types of filter. The options are:
- Dropdown - Available for categories, attributes, taxonomies and tags. When you select the dropdown type for a category filter, the following options appear below:
- List categories and subcategories within a single dropdown - This displays one dropdown listing all the categories. If you have sub-categories then they will be indented/nested under their parent category, within the dropdown.
- Display categories and sub-categories as separate dropdowns - If you have categories and sub-categories (or sub-sub categories, and so on) then each level will be displayed within a separate dropdown. Initially, only a single dropdown containing all the parent categories will appear. When the customer selects a category, a second dropdown containing all the sub-categories will appear alongside; and so on. To avoid inaccuracies, we recommend disabling the product count when you are using this option.
- Checkbox - Available for categories, attributes, taxonomies and tags.
- Radio button - Available for categories, attributes, taxonomies and tags.
- Label - Available for categories, attributes, taxonomies and tags.
- Image - Available for categories, attributes and taxonomies. You should add the images on the relevant Add/Edit Category/Attribute/Taxonomy page. You can choose whether to display images on their own, or with the category/attribute/taxonomy name overlaid on the image.
- Range slider - Available for attributes, categories, tags and custom fields. When you select the range slider field type, a 'Range unit' field appears. Use this to set the label that will appear under the range filter. For example, if you have set product weights as 5kg, 10kg and 15kg then you should enter the 'Range unit' as 'kg'. The range slider will then extract the numbers and display a range between 5 and 15, with the 'kg' label underneath.
- Text input - Only available for custom field filters.
- Selection - Available for attributes, categories, tags and custom taxonomies. If you want to allow customers to filter by specific terms only, then enable the second radio button and select the terms that you want to display within the filter. For example, you might have lots of categories but only want to include 'Men' and 'Fitness Equipment' in the filter:

- Dropdown - Available for categories, attributes, taxonomies and tags. When you select the dropdown type for a category filter, the following options appear below:
- Re-ordering filters within a group - Use the 'Sort' icons on the left to drag and drop each filter to its new position. This will change the order of the filters displayed on your website.
- Click the 'Save changes' button when you have finished adding filters to the group.
Adding filters to a page
Display above the list of products in your store
Select a filter group on the plugin settings page or in the setup wizard to automatically display filters in a horizontal layout above the list of products in your shop. This appears on the shop page, product category pages, and so on.
Widget
WooCommerce Product Filters comes with a widget which you can use to add filter groups to any sidebar area:
- Go to Appearance → Widgets.
- Add the 'Product Filters' widget to the appropriate sidebar.

Note: Filter widgets are automatically hidden on mobiles and replaced with a customizable 'View filters' button. Learn more.
Tip: To show the widget on some pages but others, you can use a free plugin like Widget Options.
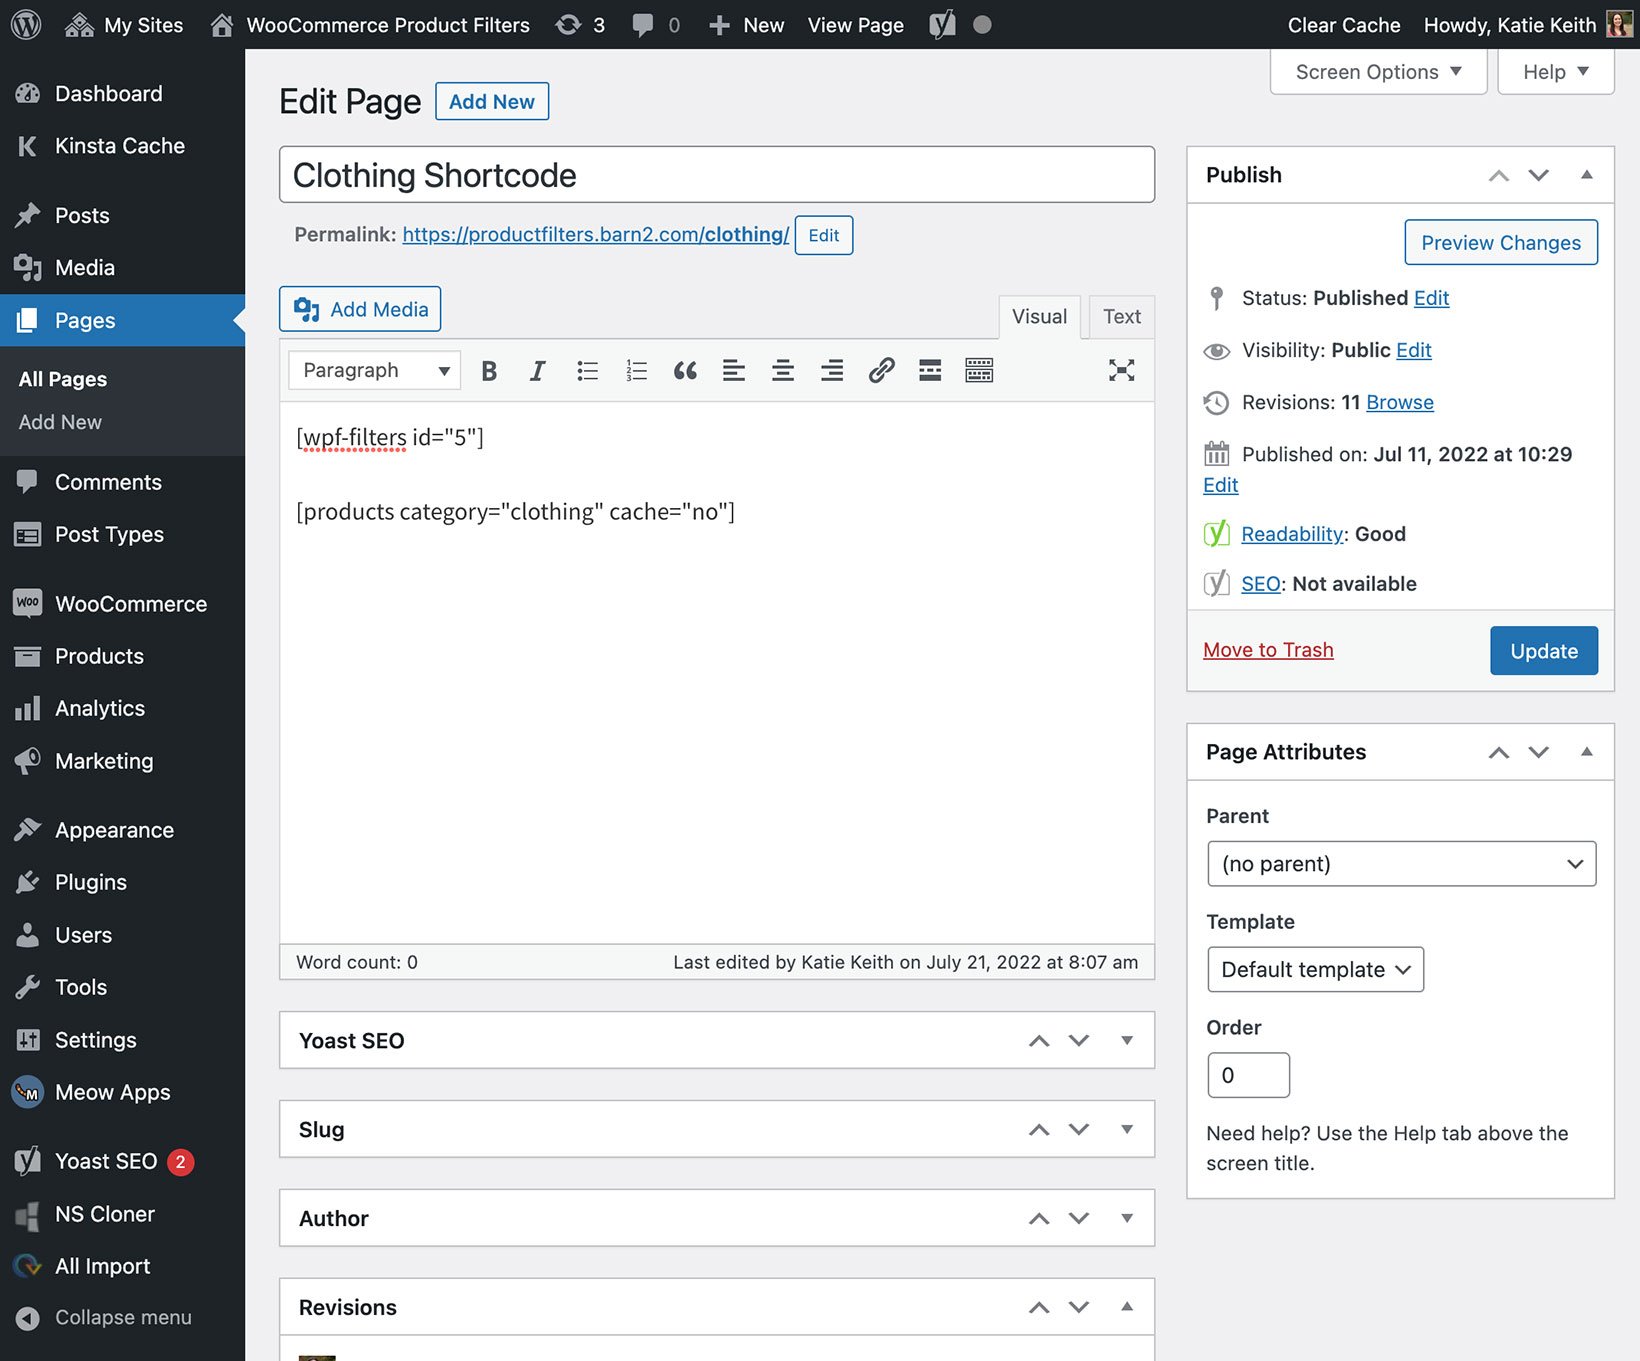
Shortcode
You can add filter groups anywhere on your site using the following shortcode:
[product_filters id="1"]
This will display your default filter group.
You can easily get the correct shortcode for each filter group by going to Products → Filters and clicking the 'Copy' option next to the shortcode.
-

- 1. Copy the shortcode from the list of filter groups

-

- 2. Paste the shortcode where you want the filters to appear
Shortcode options
The shortcode has some options which you can use to configure each filter group individually:
id- the ID of the filter group.layout- select a horizontal or vertical layout. The default is 'vertical'.
Example: [product_filters id="1" layout="horizontal"]
Using filters with page builders and WooCommerce shortcodes
You can also use the filters with Gutenberg, Elementor, Divi Builder, or the built-in product shortcodes that come with WooCommerce. Learn more.
Showing different filters on different pages
There are several ways to display different filter groups on different pages on your store. We have a separate article about this.